
Building a mini R2D2 from junk
Heyhey. So yeah. This isn't a "how to" guide, or a tutorial, or any of those things. This is just a bunch of photos of what I did to make a model of R2D2 using a few things from Bunnings and some junk I had lying around.
If you want more info, feel free to drop a comment, and I'll try to remember what I did.
Some quick background: This project was part of a challenge with a colleague, wherein we both foolishly decided to construct R2D2s, pretty much to the same scale, and with pretty much the same materials and intention. I'll talk a bit about where our techniques and materials varied, and why, and I hope to provide a photo of both finished products toward the end.
Let's start with the best and worst part of making R2D2:
The Dome.
Oh, god. The dome. My first piece of advice, if you ever attempt to build an R2D2 of any scale, is to find a dome first. Find a good dome. Find a nice, structural dome. If you want to build a full-size droid, IKEA has a pendant lamp for around the $100 mark that's perfect. If you're going for something smaller, try a ball, or a Christmas bauble. My colleague chose the Christmas bauble path. I didn't.
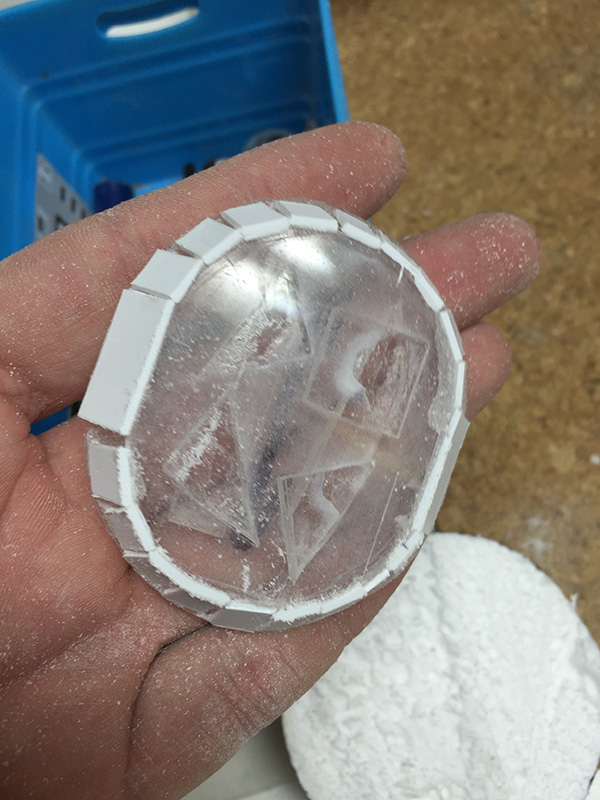
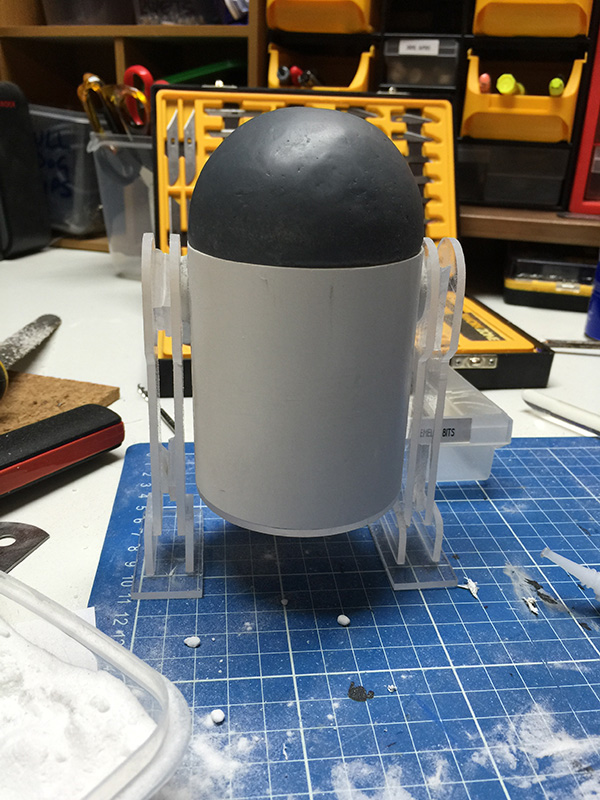
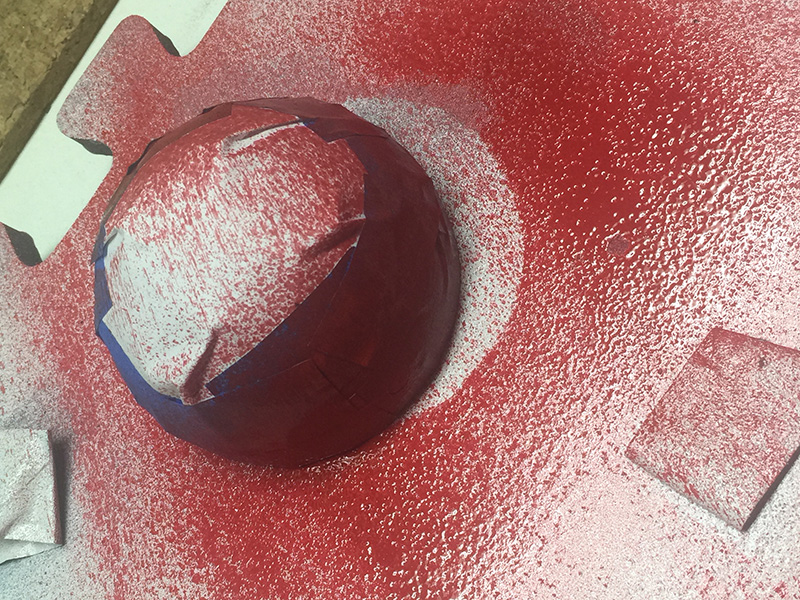
I, foolishly, decided to tailor my dome size to the size of PVC tube I had intended to use for the body of R2. This meant I was on the hunt for a 75mm dome. And I struggled to find one. I found Christmas baubles in the 78mm range, but I was stubborn, and ultimately chose a very labour intensive and unsatisfying way to make my droid head.

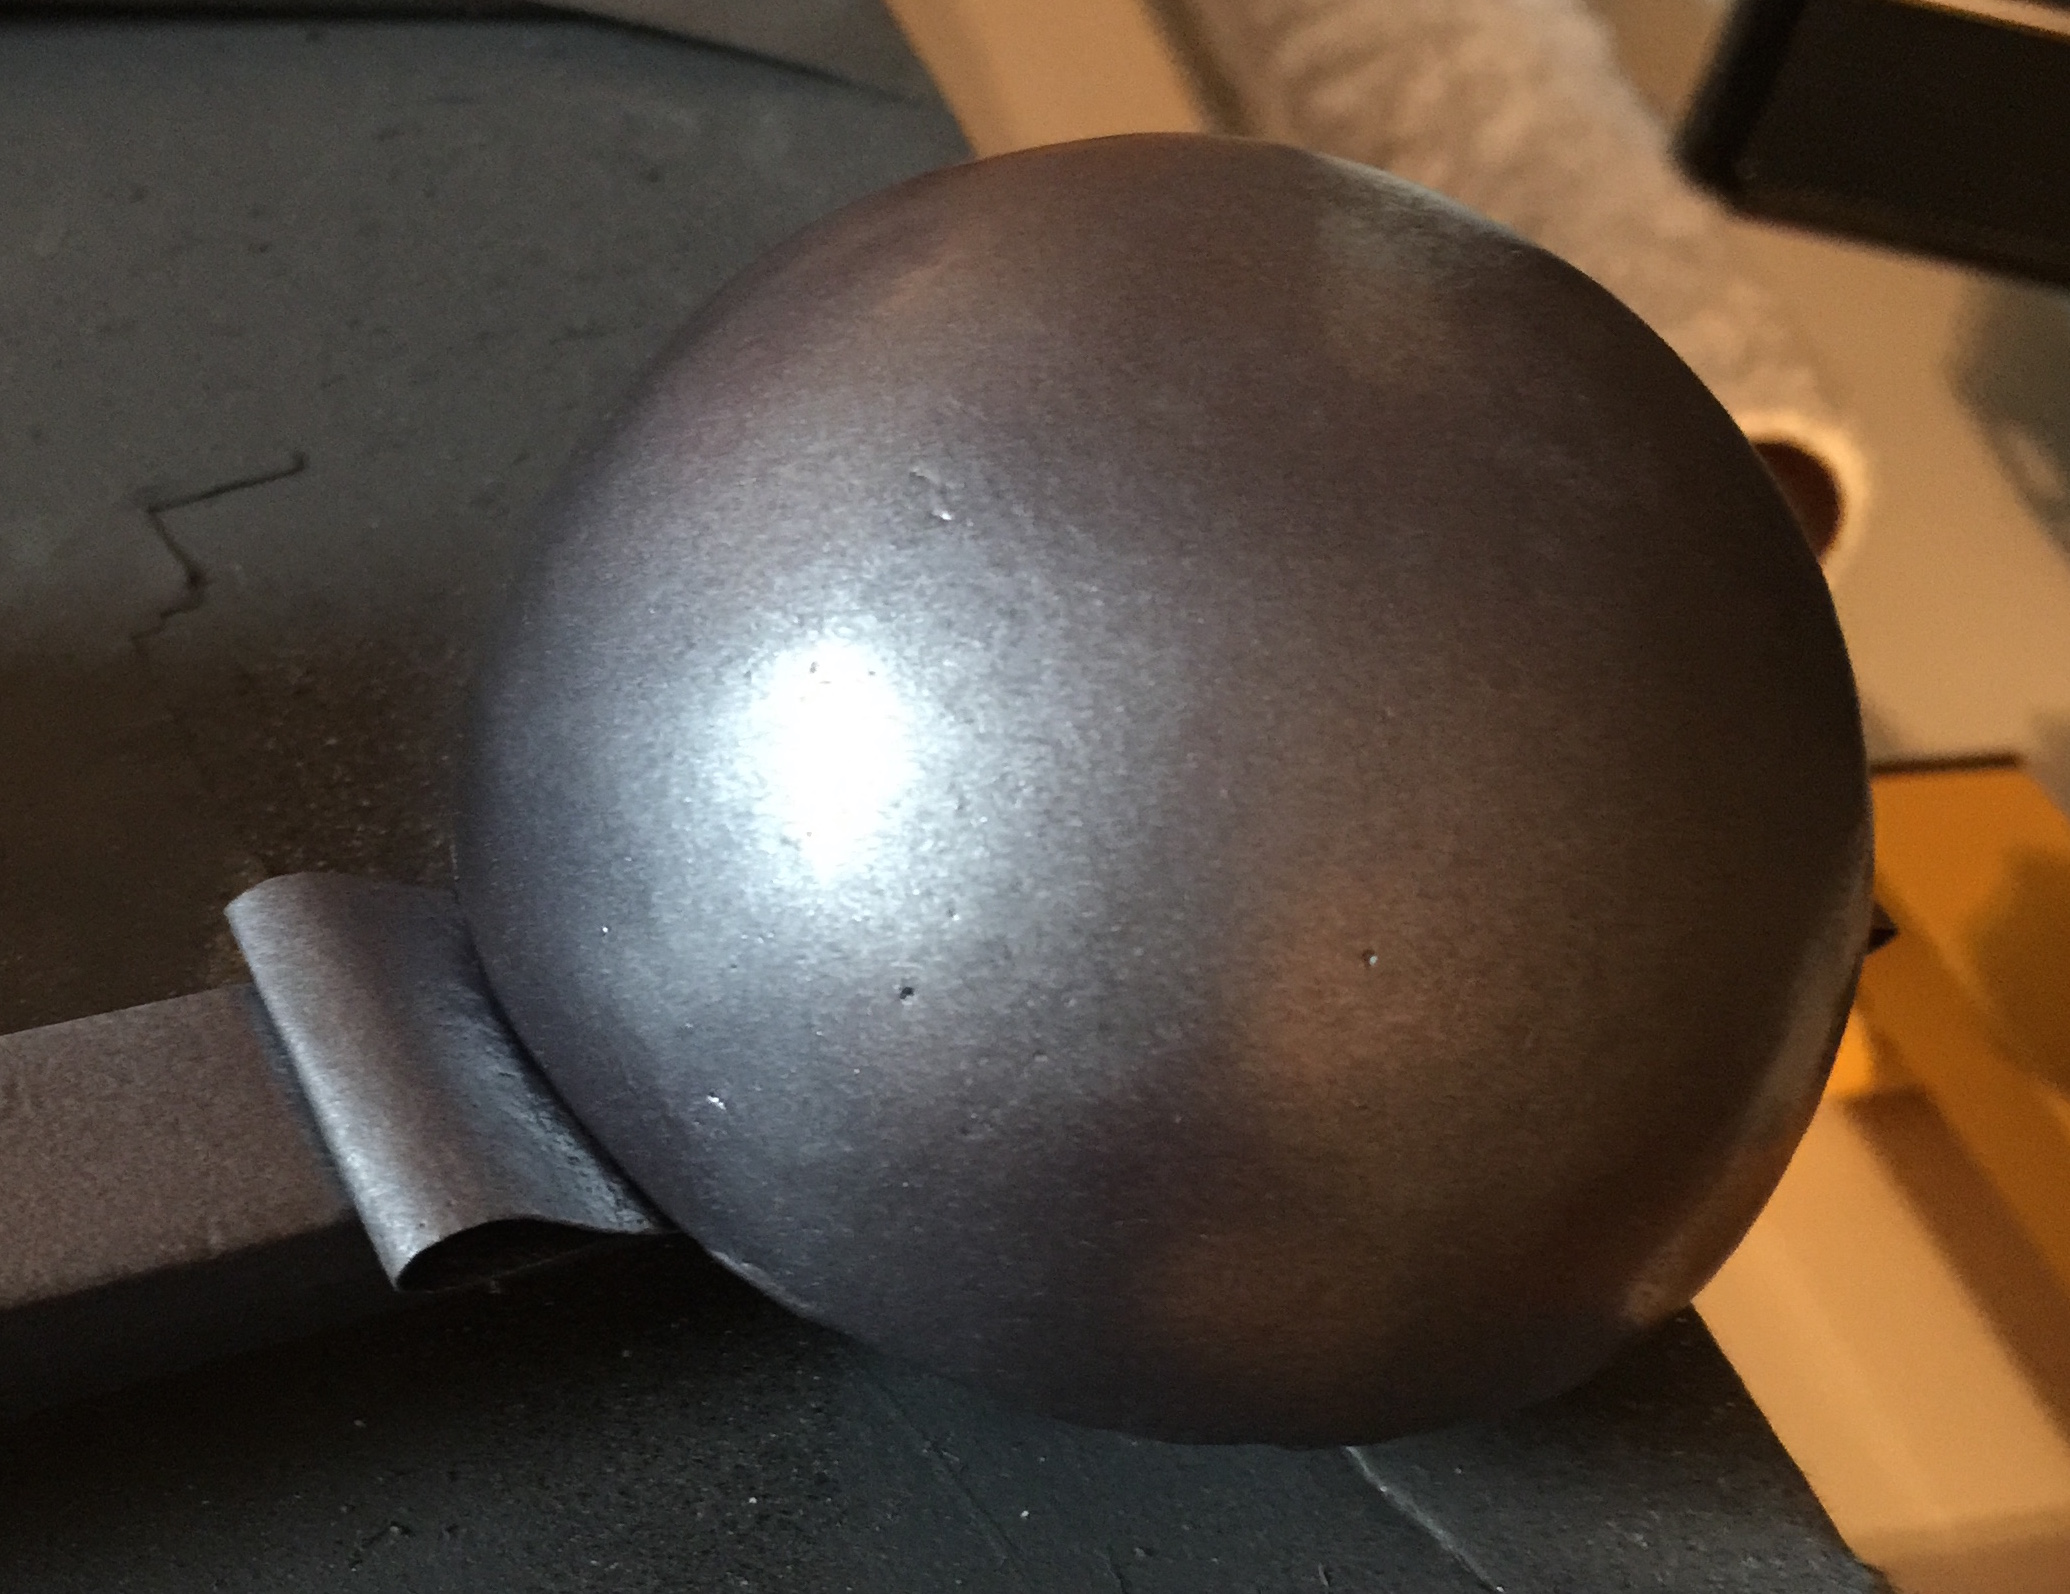
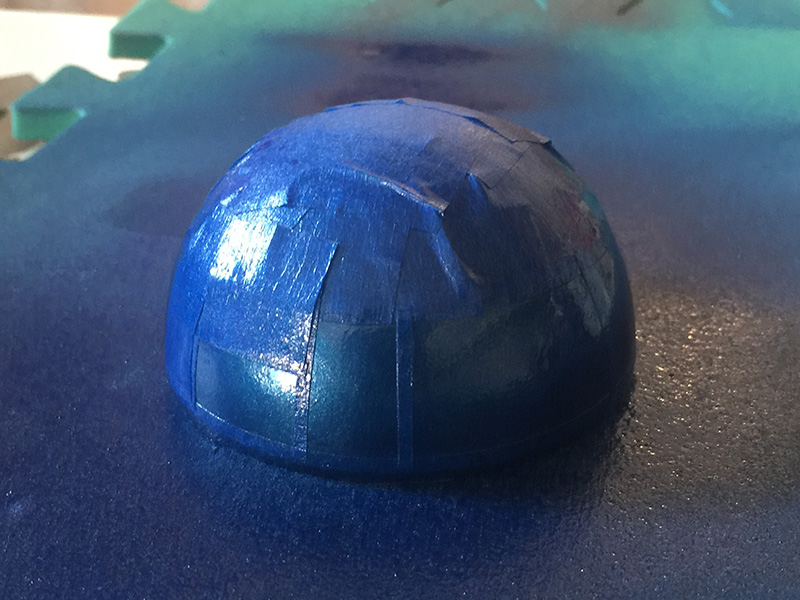
That...thing...that you see above is a styrofoam ball from Spotlight with the initial layers of a shell being built over it. The shell is made from liberal dousings of cyanoacrylate (super glue, and in a well-ventilated area, I might add) and sprinklings of baking soda. After about a bazillion layers of glue and soda, I ended up with an eggshell-thin dome supported by soft foam, and ultimately filled with every kind of plastic bog and putty I could find. Was I satisfied? No. Will it do the job? It'll have to, for now.
My advice? Christmas bauble, next time.
So, we're going to continue to talk about how to make a dome the hard way. This was a long and tedious process, and I feel it's only fair that you should have to suffer through a proportionally painful part of this process, much like I did.

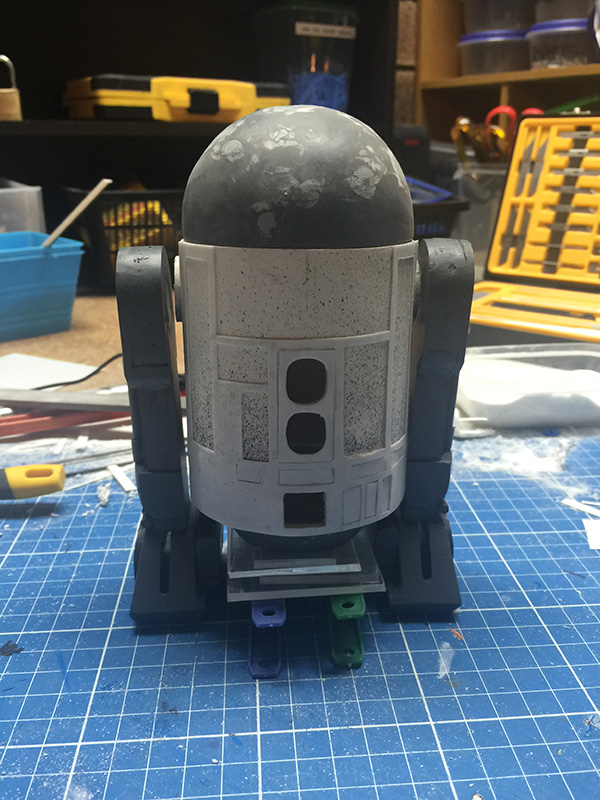
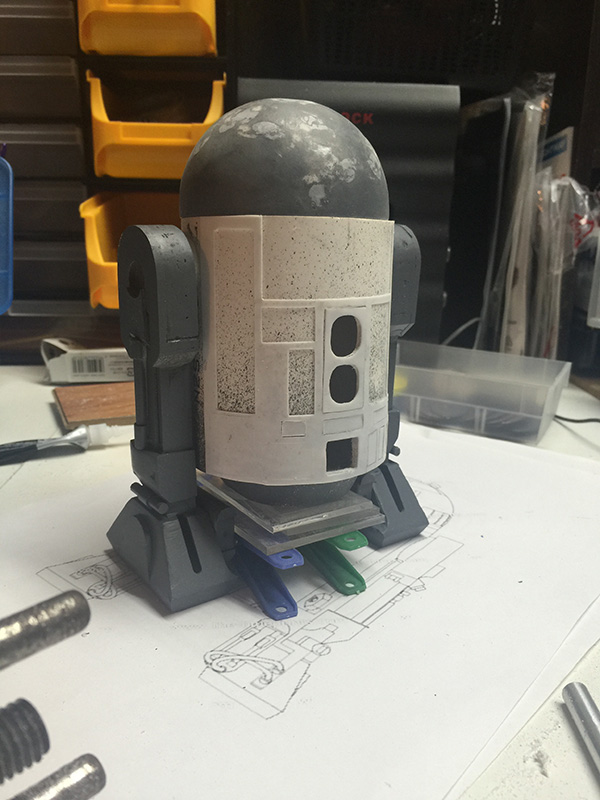
That's after about three days (not full time, of course), of sanding and patching and filling and sanding and patching and filling.
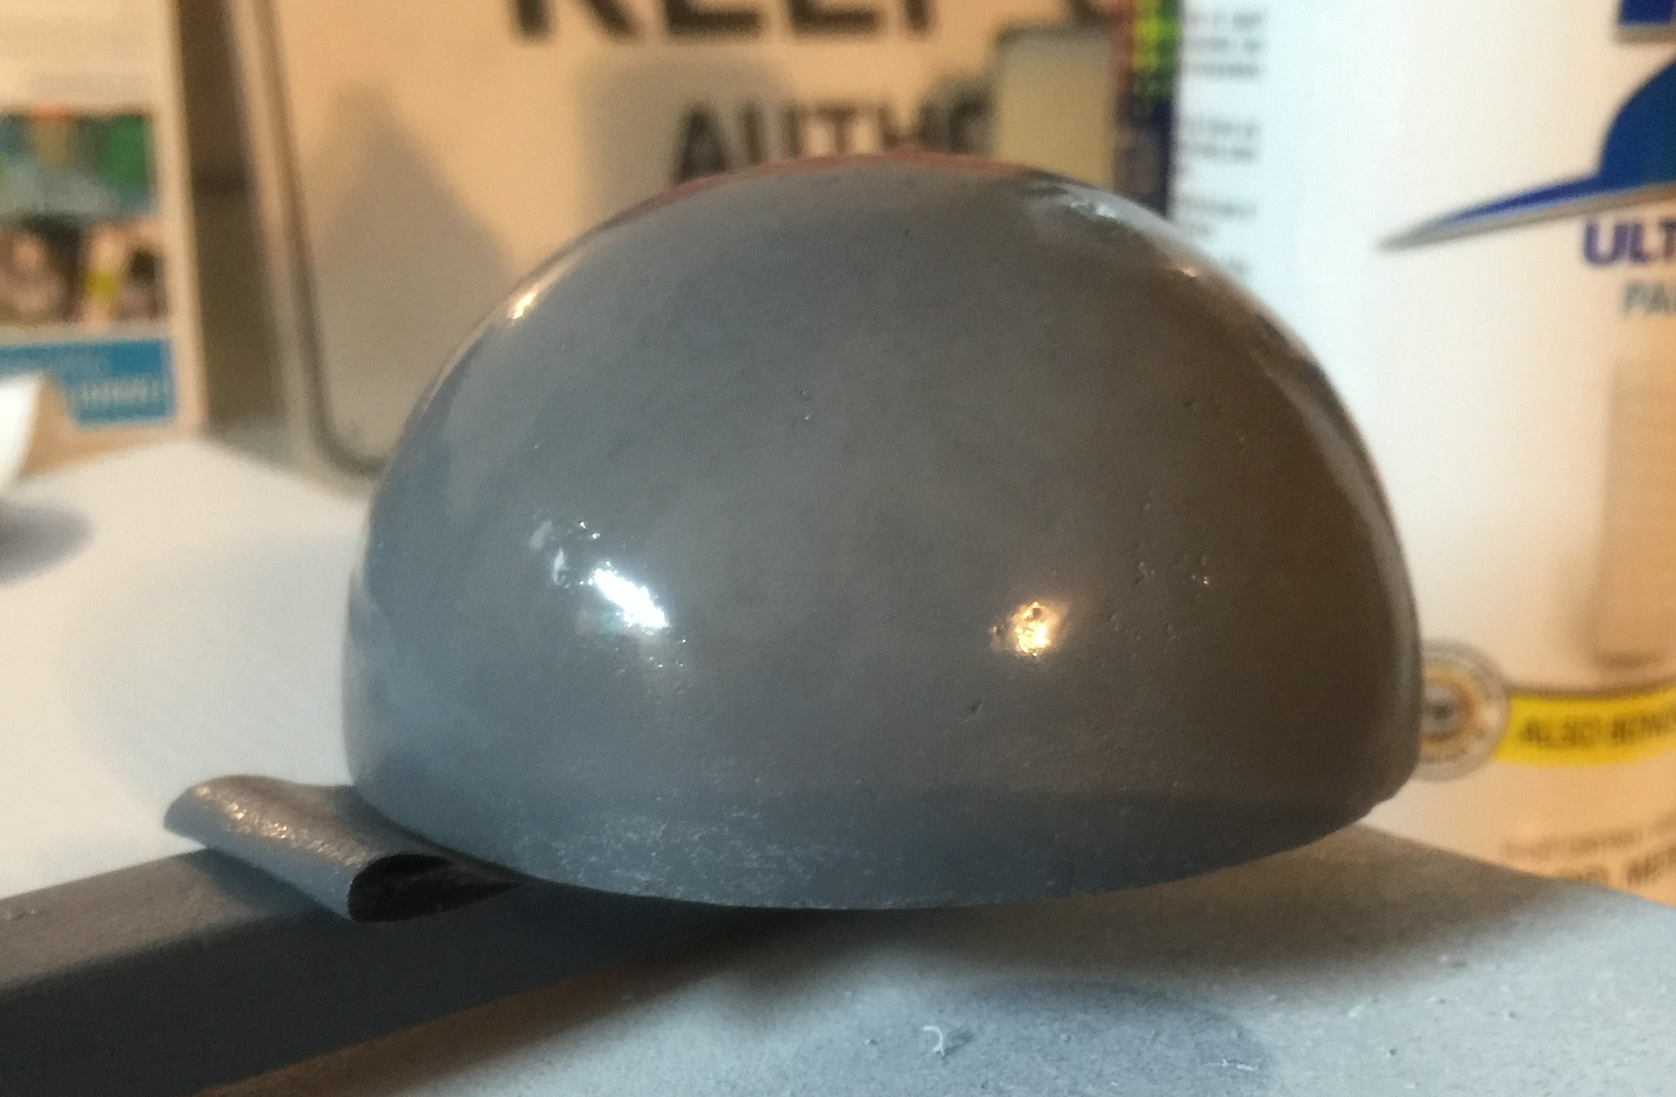
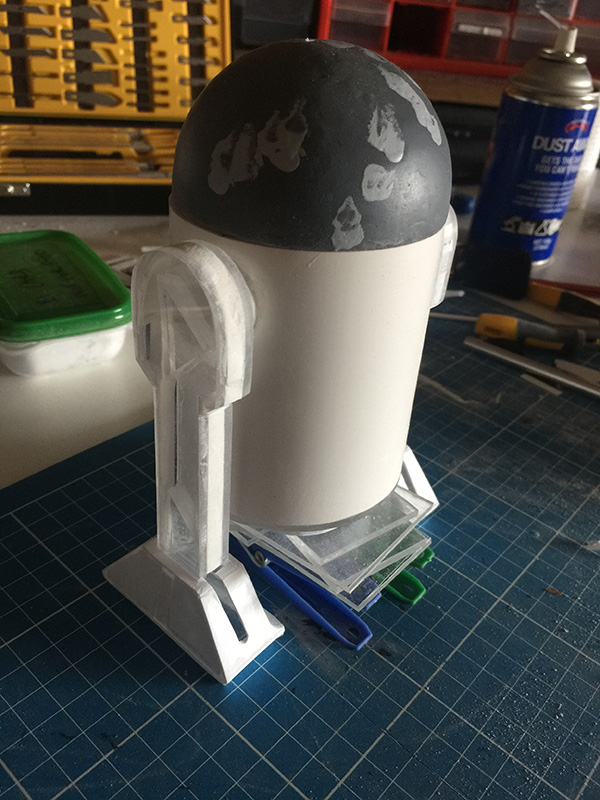
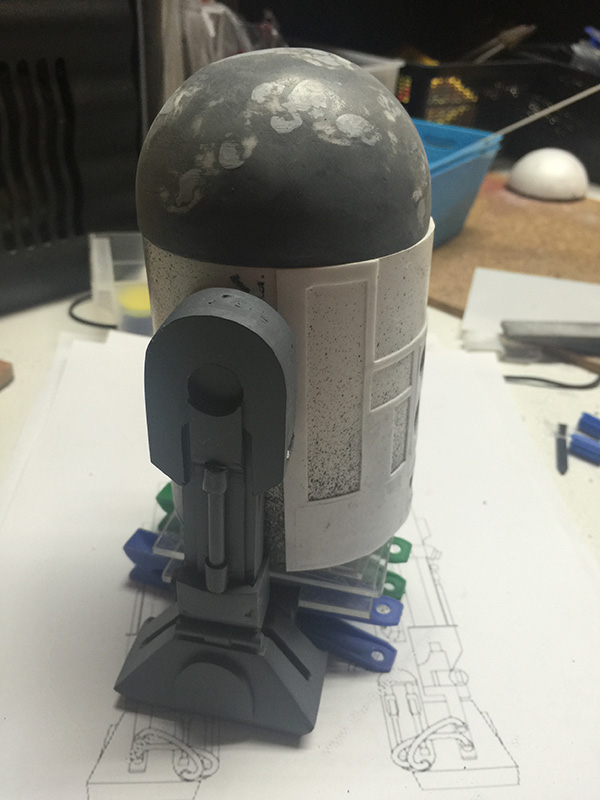
Above is the net result after a bazillion years of sanding and filling and puttying and sanding and priming and swearing. It's almost there. There are still a few holes and scratches to work out.
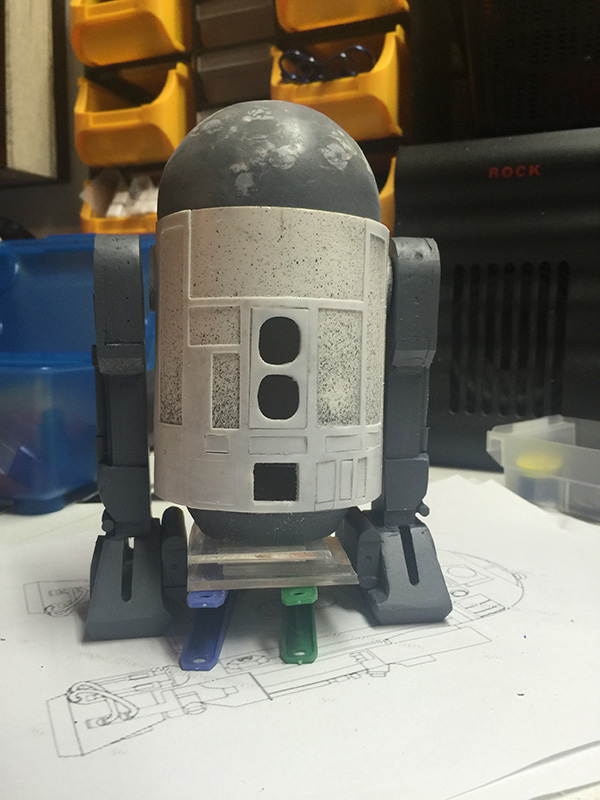
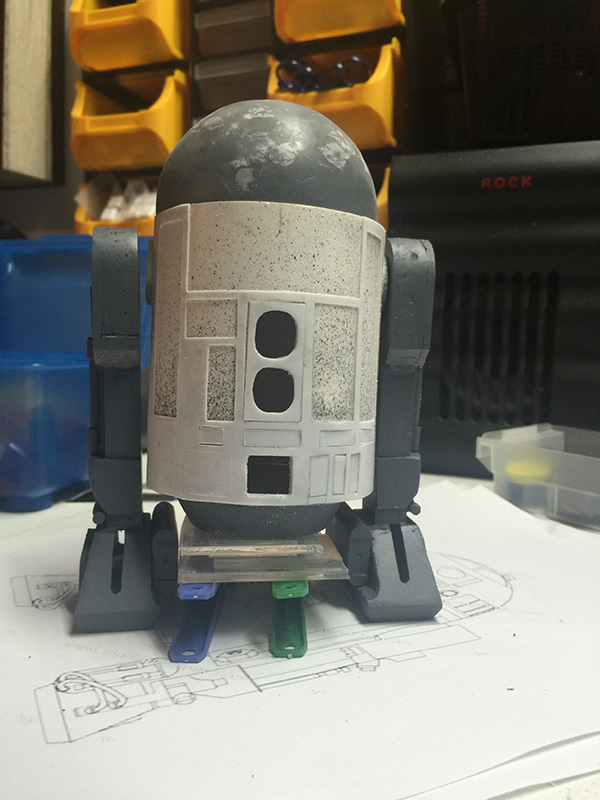
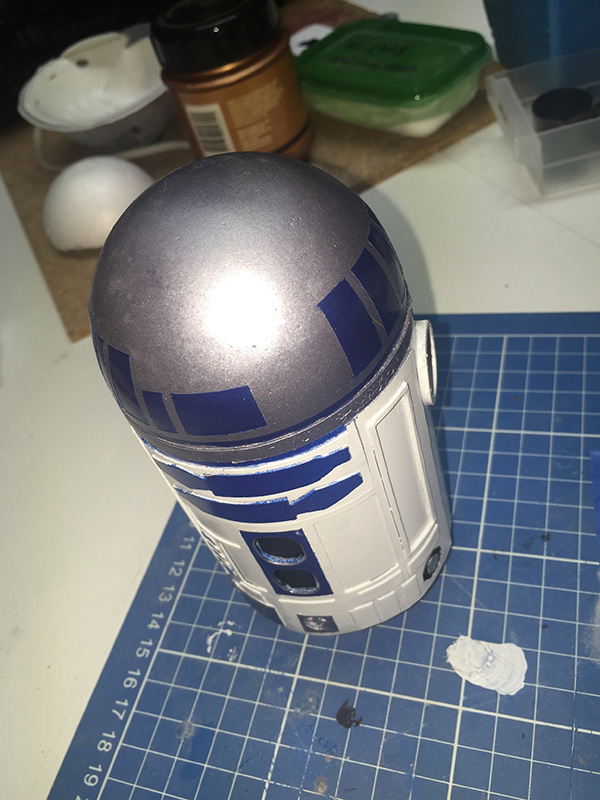
And now with a coat of silver (not chrome) paint. Still a couple of holes I hadn't noticed. They'll get filled, don't worry.
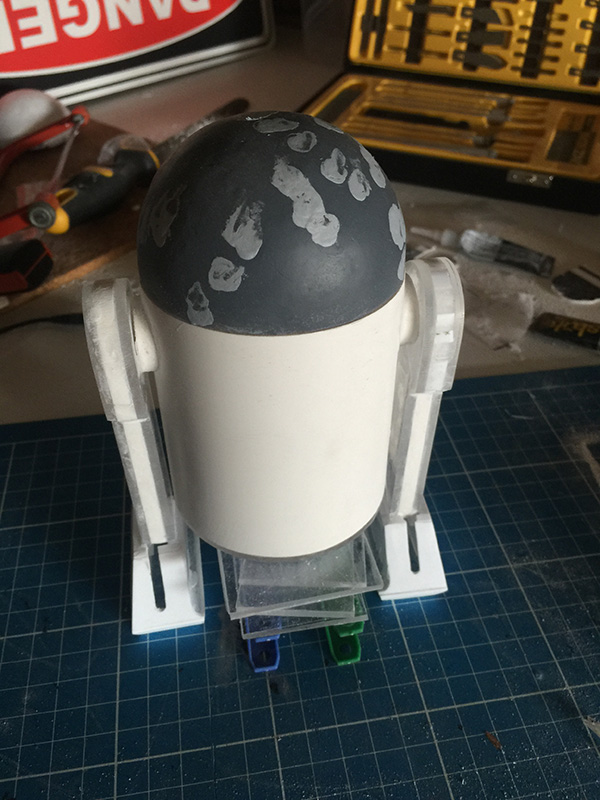
Having now made a somewhat satisfactory dome (albeit without any detail, yet), it's time to do something with the body and leg assemblies.
I don't have a lot to say about these parts, other than they just worked. Not a lot of planning, and fairly minimal measurement went into making the barrel. The legs just kind of fell into place.
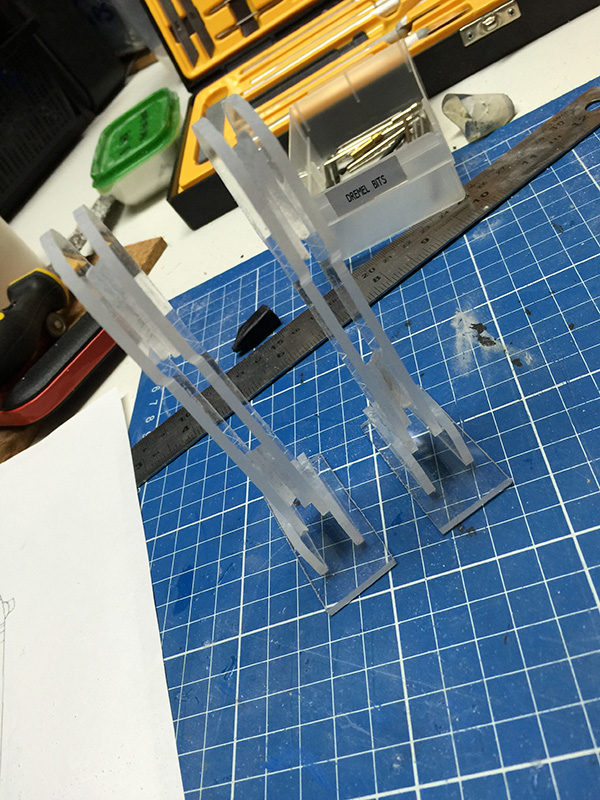
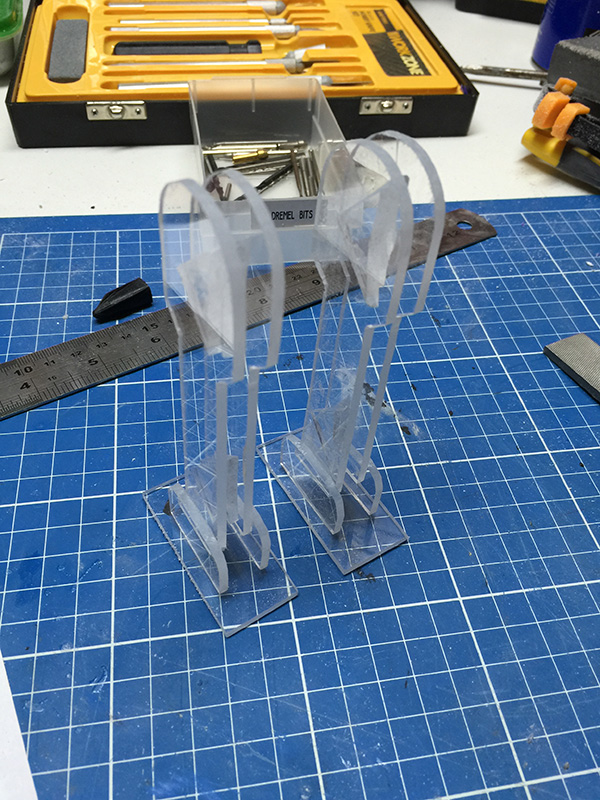
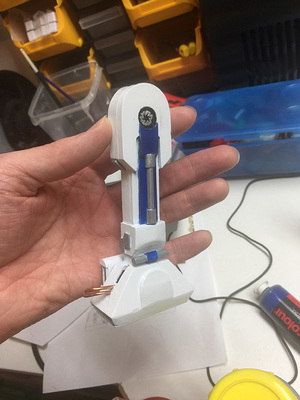
The legs:
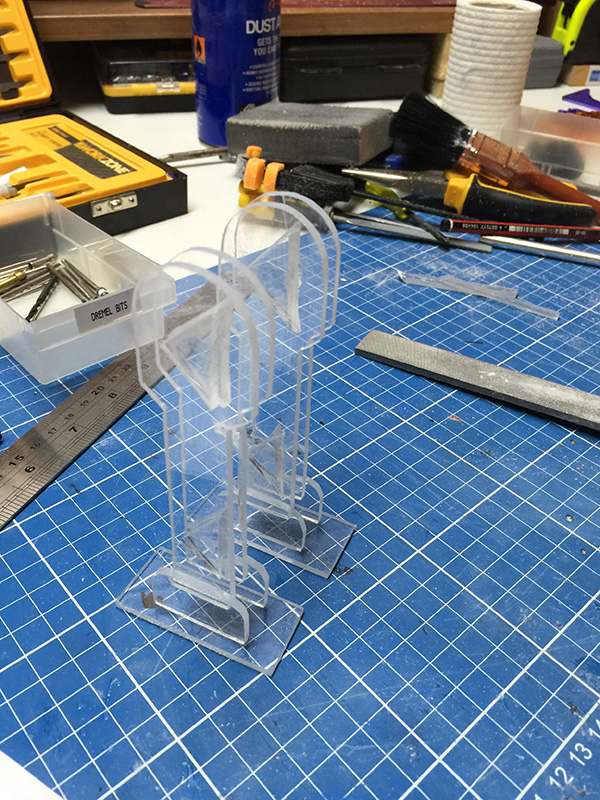
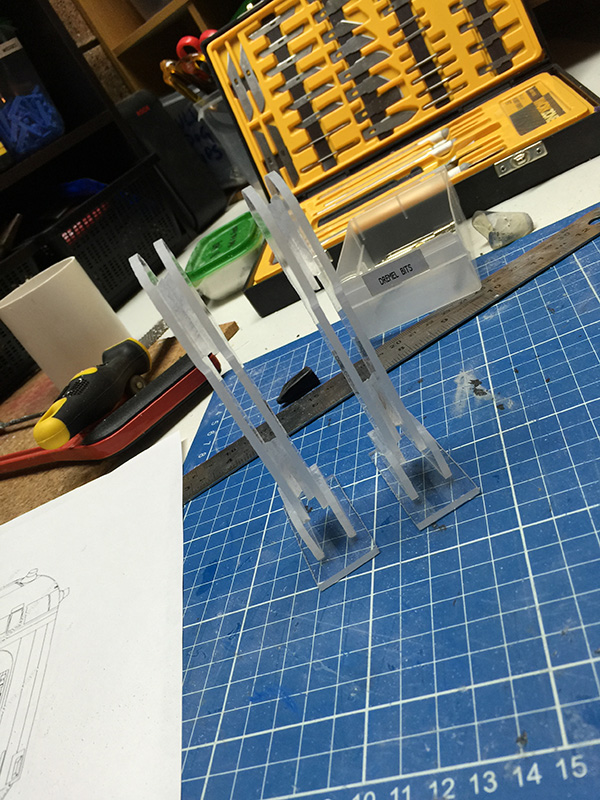
R2D2's legs are made, mostly, from acrylic sheet. I love acrylic sheet. It's easy to work with, it doesn't mind being sanded and filed, it takes paint and glue with ease, and if you need something to be transparent, it's natural state is...transparent. For R2, though, acrylic's defining quality was structure. I built R2D2's legs using a rough template that I printed off the internet (I believe I searched for something along the lines of "r2d2 plans" or "r2d2 blueprints" and found many satisfactory examples).
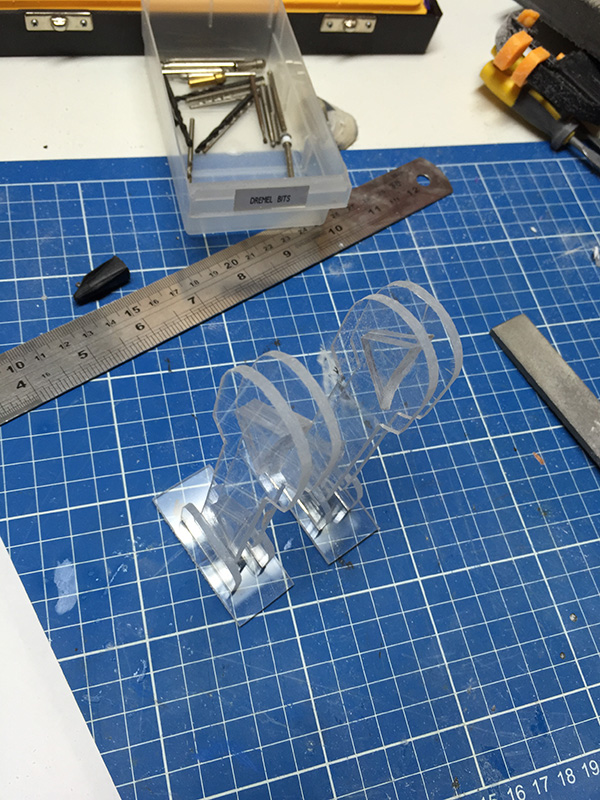
One of the most terrifying parts of this project, at least for my humble self, was the fact that R2D2 is essentially symmetrical. I hate symmetry. I hate making two of something. I hate building things where the left hand side has to match or mirror the right hand side. R2D2, unfortunately, has two legs. And they're both largely the same. As I said earlier, the legs just worked. I have no explanation or solution for making two droid legs. They just happened perfectly the first time. It's both exciting and disappointing simultaneously.
The body:
R2D2's body is also not a particularly complicated thing, being that it's essentially a cylinder. There are a few details that will need to be added, but the bulk of the work is done once you've cut out an appropriately-sized chunk of PVC pipe and built some kind of shoulder apparatus for the legs to attach to.
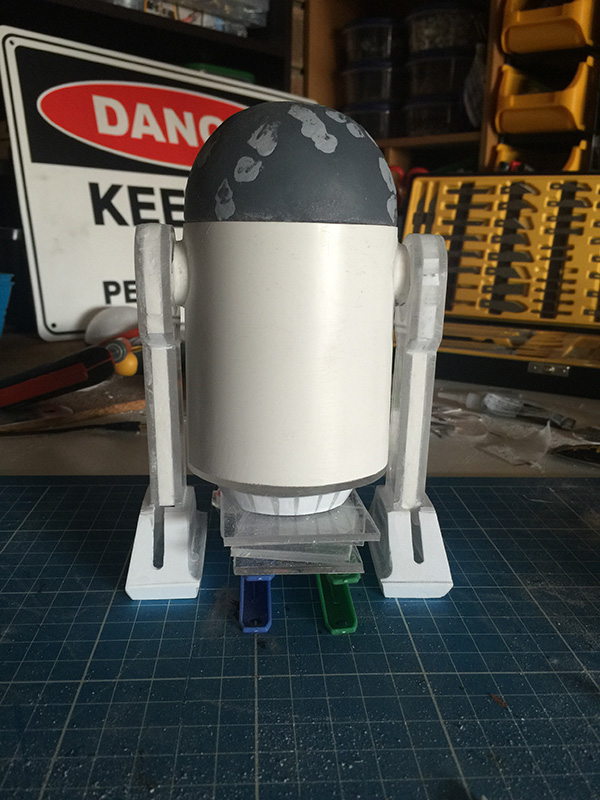
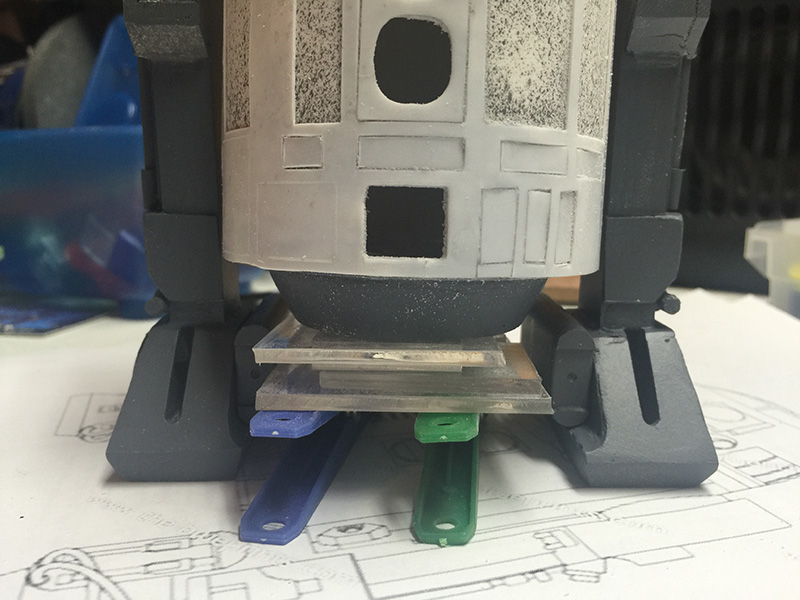
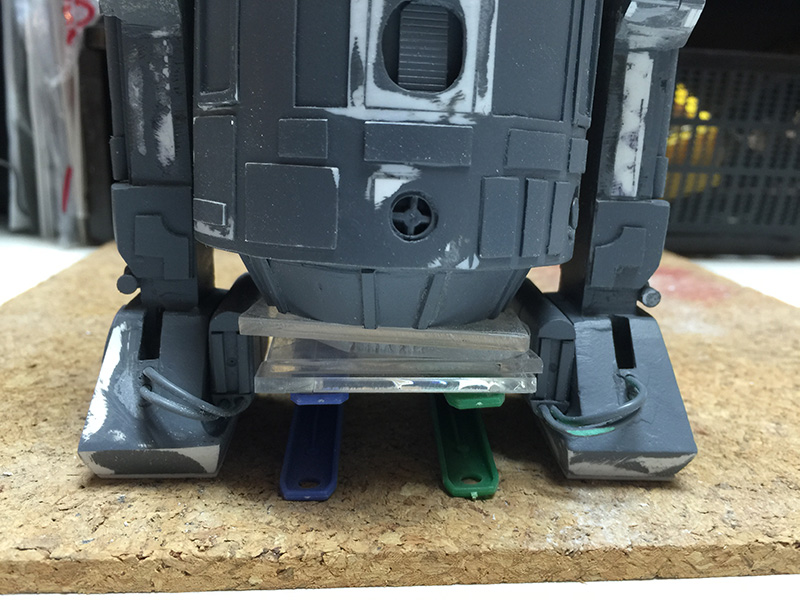
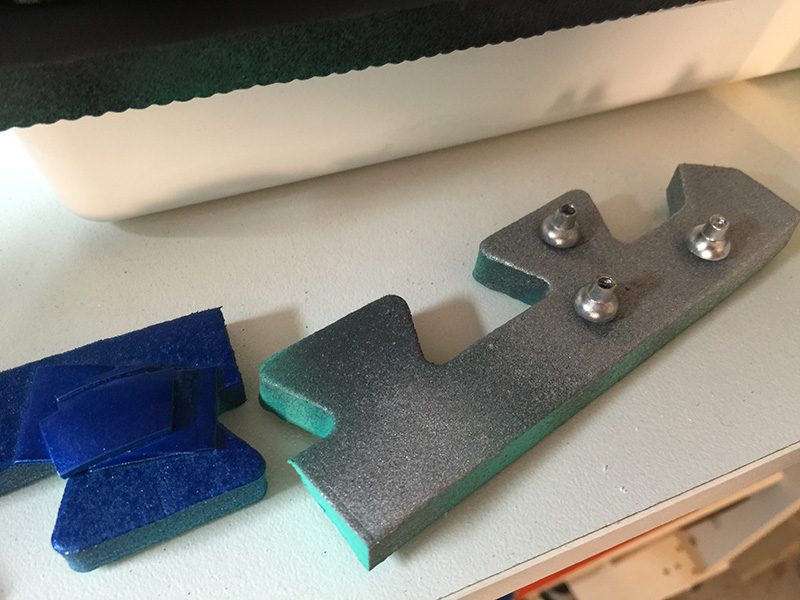
The first photograph above shows the tapered protuberance that goes underneath R2D2's body. This is the part that would have a rectangular hole to receive R2's third foot in its retracted position, but I had already decided that my R2D2 would be bipedal and I had no intention of constructing the third leg. We'll pretend the third leg is inside there, somewhere.
I chose to make the tapered part by stacking acrylic pieces (and scrap pieces), then smoothing the tapered sides with styrene sheet offcuts and filling with cyanoacrylate and soda or plastic putty. Ultimately, this was -- as usual -- the most difficult way I could possibly make the part, and my colleague chose a much simpler solution: utilise the already curved edges of the PVC tubing, and with about four cuts, make the shape and stick it together.
The last four photographs above also show R2D2's feet with their initial covering of styrene, giving the appropriate shapes for the battery and cable mountings and a reasonable representation of the angular sole of his feet.
Next up: Detailing the body.
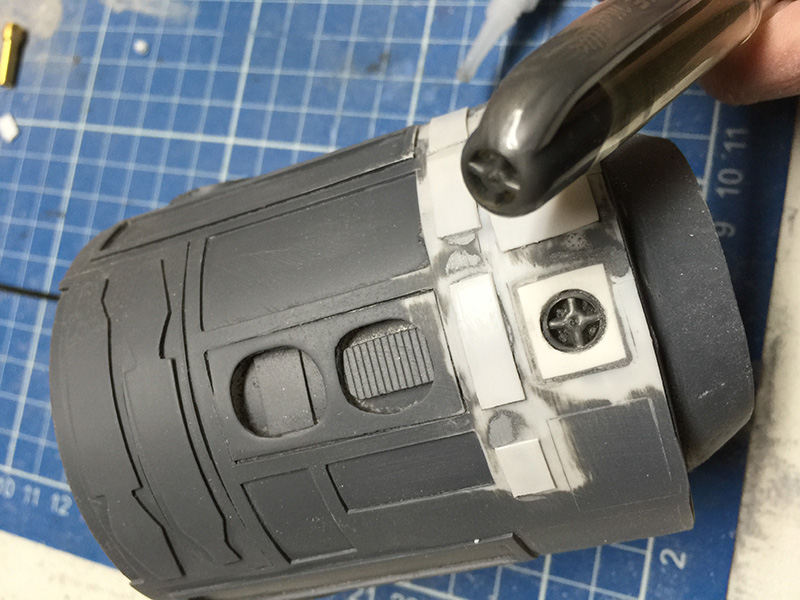
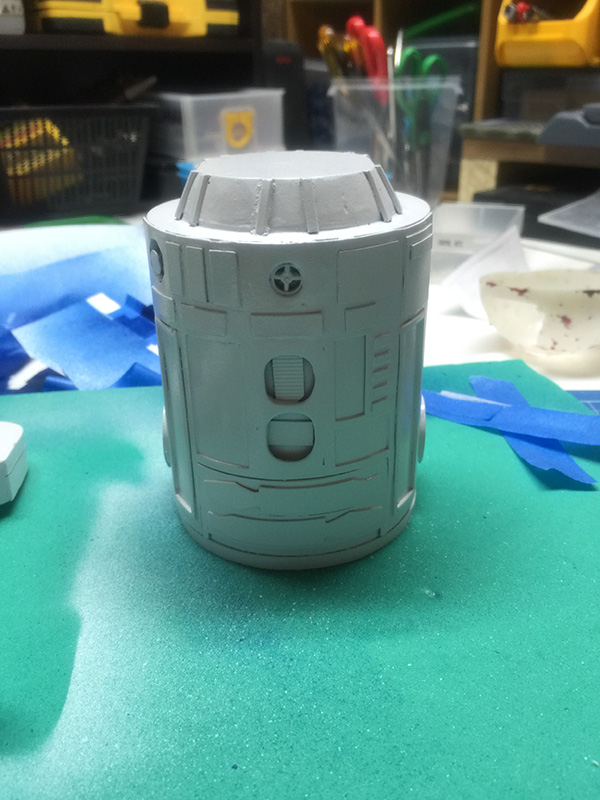
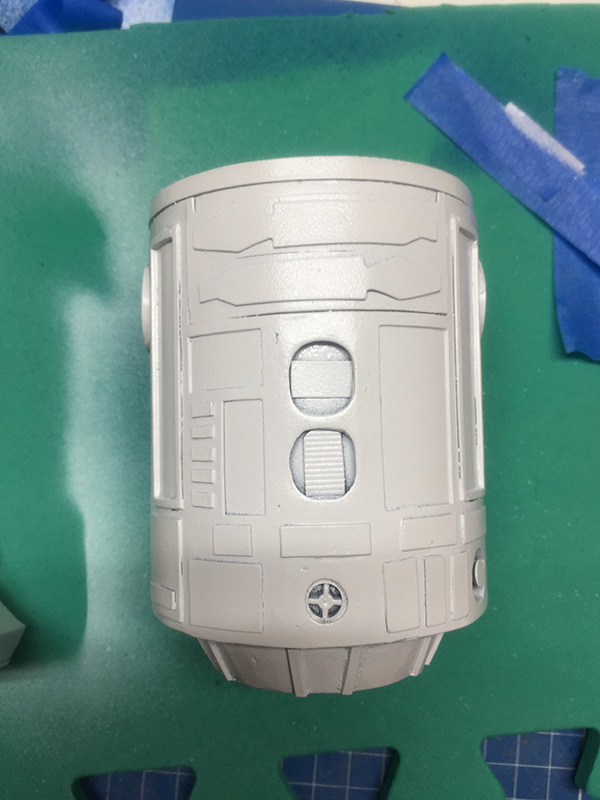
The next step in the arduous process of creating an Astromech droid is to get some detail onto its chassis. Again, to the internet, and with the digging up of blueprints. I managed to find a nice wraparound graphic of the panel locations on R2D2's torso and back, and scaled them appropriately to be able to stick them around my piece of PVC pipe.
To create the raised texture of panels, I used a sheet of 0.5mm styrene, cut to size, to which I adhered the wraparound print with spray adhesive. After cutting out all of the little panels, I had a lacy mesh of plastic to glue to the front of the droid. For the most part, this was pretty successful.
You can see by this point I've also added additional detail to the leg pieces, including some styrene strips to add panels and shape to the top of the shoulder and hub, and some pieces of Chupa-Chup stick for the pistons.
The vent at the bottom was made from the top of the lid of a gel pen, which happened to have a nice four-pointed configuration. I wish I'd created the rear vent first, as my second attempt at plastic welding the cap in place ended up straighter and with a far superior finish.
The battery boxes and cables are in place, now, also. The batteries are made from a couple of lids from USB sticks, and the cables are just audio cable from a car stereo.
Next up: Dome details, and lets start painting!
Alrighty, it's time for some:
Dome details.
There's not a great deal of add-on details on R2D2's dome. There's an eye in a little square-ish mount, three holographic projectors, and a bunch of painted-on details.
The eye.

The eye surround was cut from the Christmas bauble that I had determined in the early stages was far too large to use for the dome proper. As the eye frame is essentially a chunk cut from a dome of a larger diameter, the Christmas ball turned out to be perfect. The little lip at the bottom, and the structure underneath to give it some height were all cut out of styrene offcuts and attached with cyanoacrylate. I don't have a photograph, but the hole for the eye lens was made with a drill.
The holographic projectors.
"Help me, Obi-wan Kenobi. You're my only hope."
R2D2 has three holographic projectors that protrude from his dome. They're all pretty much identical, and consist of a tubular lens extending from a sphere that allows the projectors to point in various directions. I had no intention of replicating the directional ability, but the basic shapes were essential.
After a few experiments with various beads and baubles, I stumbled upon.....push pins.
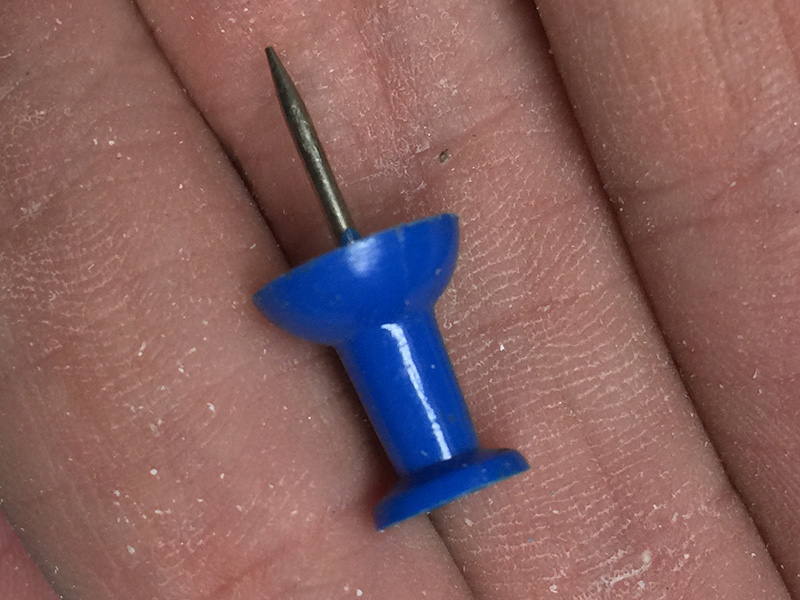
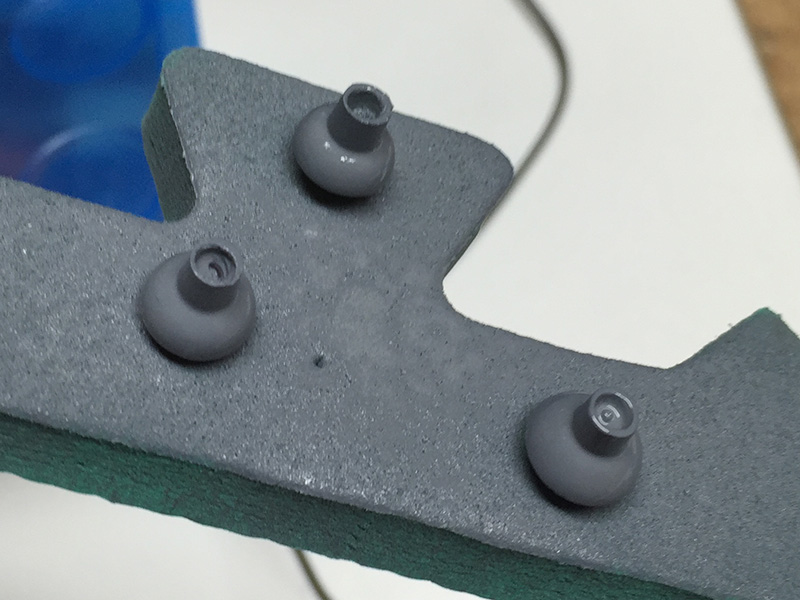
By cutting the flat end off, and drilling out the stem, the push pins resemble the holographic projectors pretty well! After drowning them with primer, they got chromed and put aside to be attached to the dome after the panels get painted.
Up next: Painting the barrel and legs!
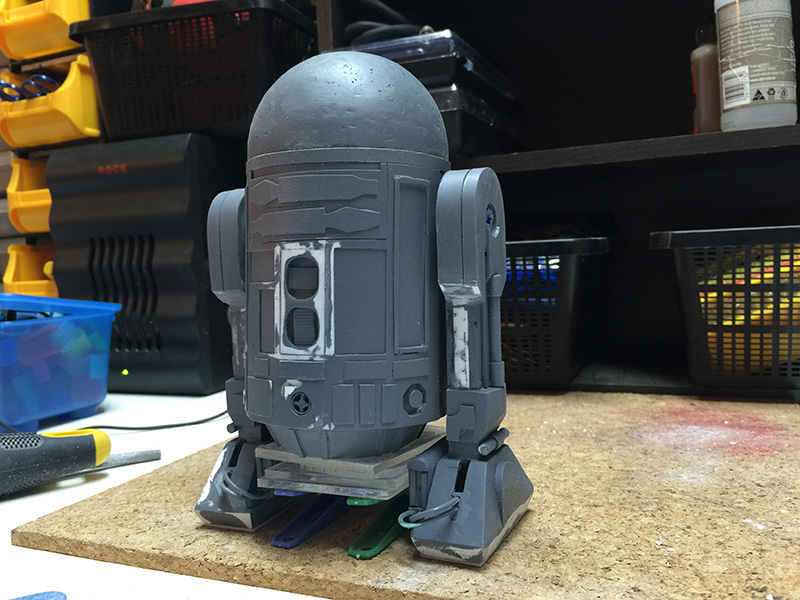
Okay, time to slap some paint on this thing.
Paint.
Getting the painting process started wasn't difficult, and involved slapping a couple of coats of primer onto R2D2's body, then a few coats of appliance white high-gloss paint.
My strategy -- as is often the case -- is to try to achieve something kind of "showroom new", but if it fails, I have the backup plan of slathering it with weathering. So, Plan A for R2D2 is a brand spanking new droid, and Plan B is something along the lines of R2D2 after being rescued from the swamps of Dagobah.
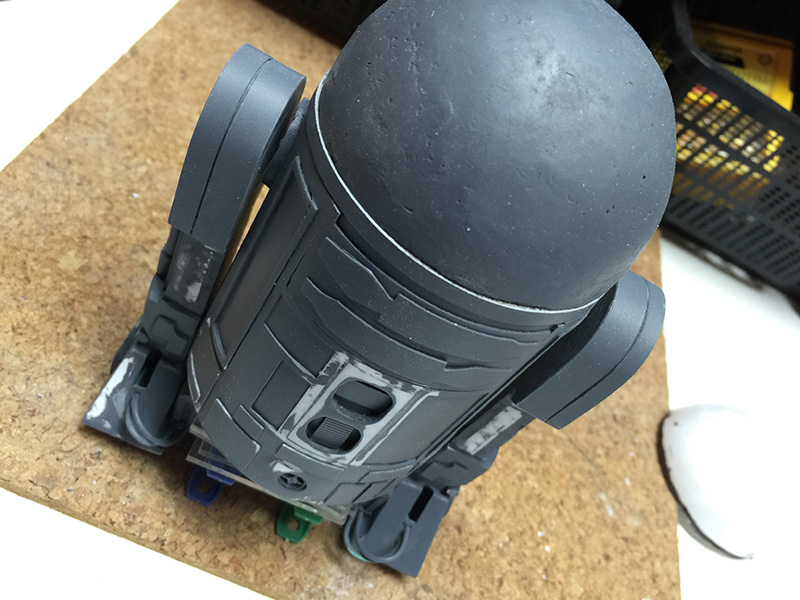
It was easiest to paint the body upside-down, as the top (where the dome will attach) obviously does not need to be painted.
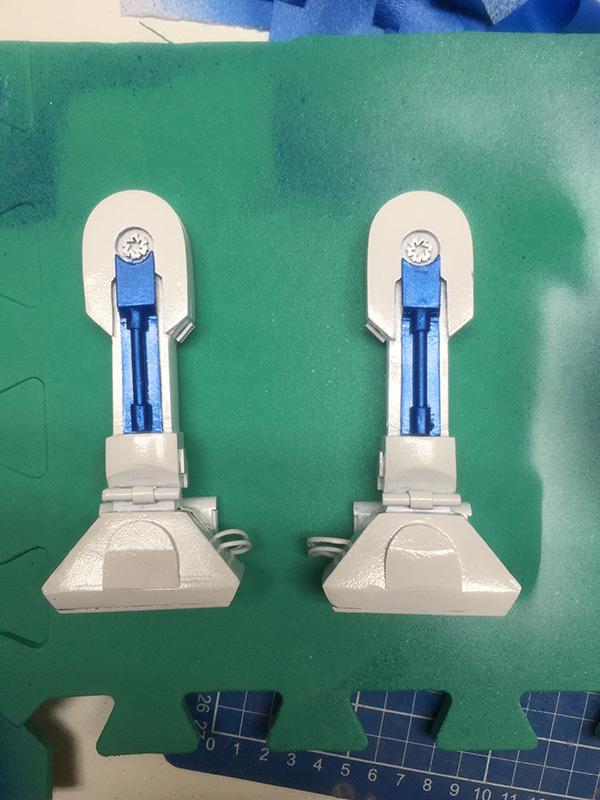
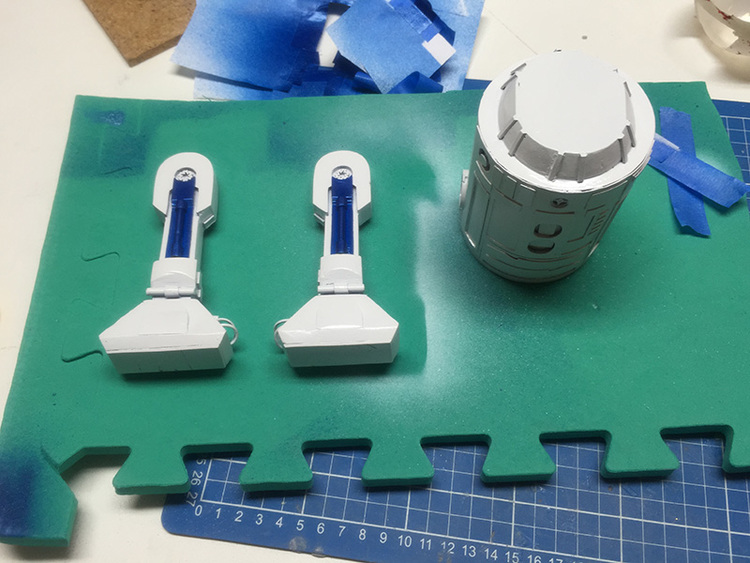
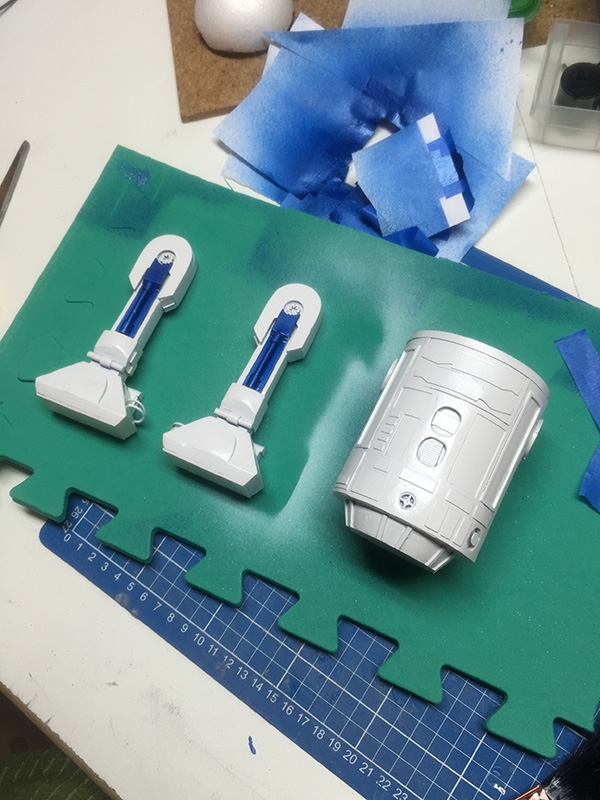
Next up, some masking, and some blue paint on the legs. The pistons on the outside of the legs will eventually be brush-painted silver, and some other details will be tidied up.

You can see some of the details on R2's legs, with some silver paint on the shoulder hub and some copper paint for the battery cables.
Still some more details to go.
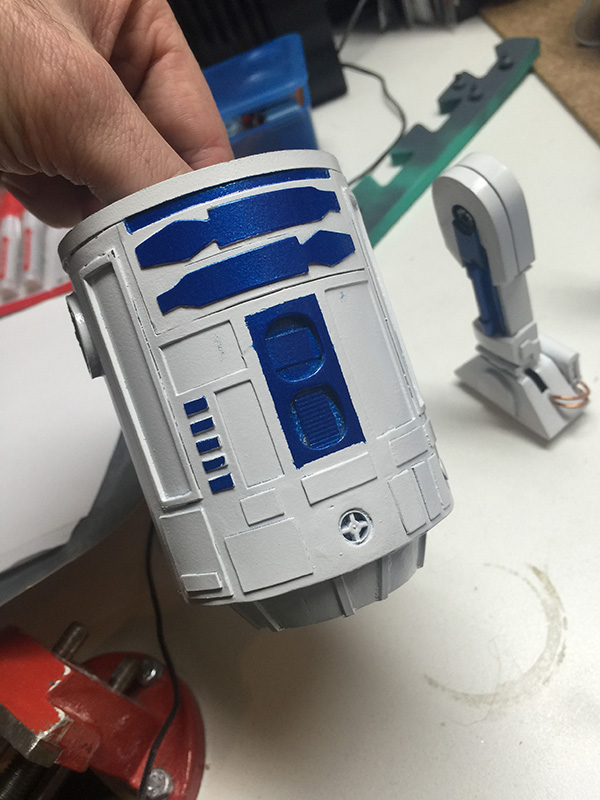
So, continuing on with details on the body.
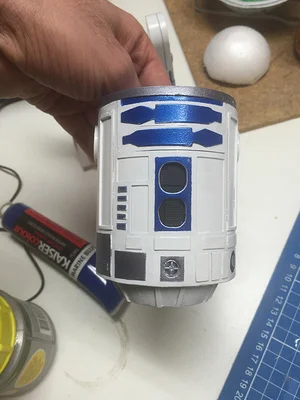
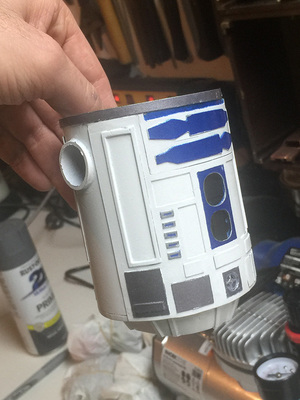
After much masking and swearing and touching-up and regret over choice of parts, I managed to get the majority of the details on the front of the droid completed. I made some executive decisions about which areas would get detail and which would not. In particular, I kind of regret deciding not to further detail the lower-left silver panel, which on the prototype droid has a bunch of air gaps. Oh, well. Maybe next time.
The leg now has some chrome (silver, really) detail on the piston and the hub (which is made from a slice of a wall plug) and some silver and blue details on the foot...rod...thing. I ended up using blue acrylic for the band around the rod, as the metallic blue I've used on the rest of the droid doesn't decant from the aerosol can particularly well.
Next time: Lets put a dome on! This thing's almost complete.
And now, some dome details.
Dome details.
Did I mention dome details?

So, from left to right, we have:
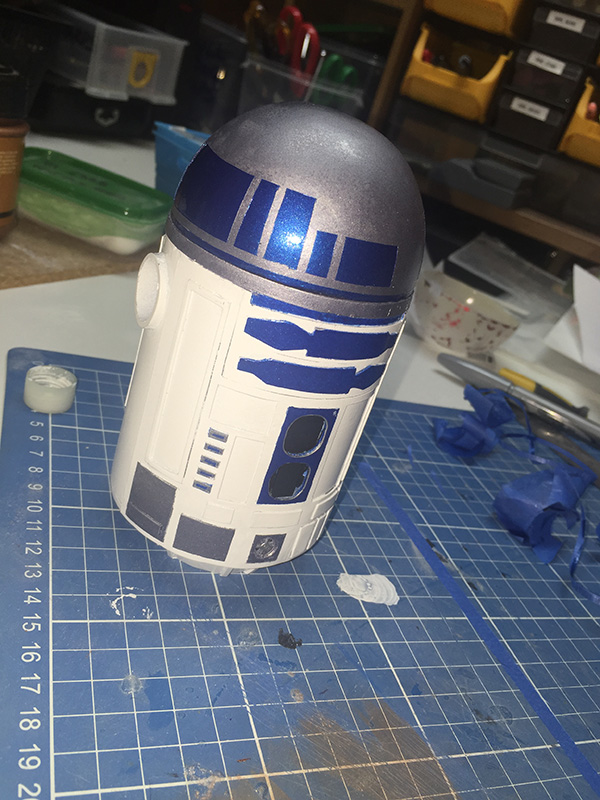
- R2D2's dome masked up, with an application of metallic blue paint for his blue panels. I used metallic blue vehicle touch up paint (I believe it's a Subaru shade of blue), because I find the touch-up cans are the best way of getting some unique colours in spray cans. If you're feeling incredibly eager, you can even have the cans made up to your colour specifications. I find for these builds, though, it's just as easy to choose a colour from the existing range. A lesson I learned from this: It works out better if you base coat with metallic blue, then mask and top coat with the silver/chrome for the rest of the dome. My colleague took the alternative approach, and ended up with a far superior finish.
- Three shots of the finished blue panelling.
- Using a hideous old can of red spraypaint for the tiny red circle below the main eye. I discovered that using a regular hole punch on some masking tape provided exactly the right size of hole to spraypaint the red light. I undercoated it with white first, as the red area would otherwise have been on top of the dark blue paint and may not have been as bright as I would have hoped.
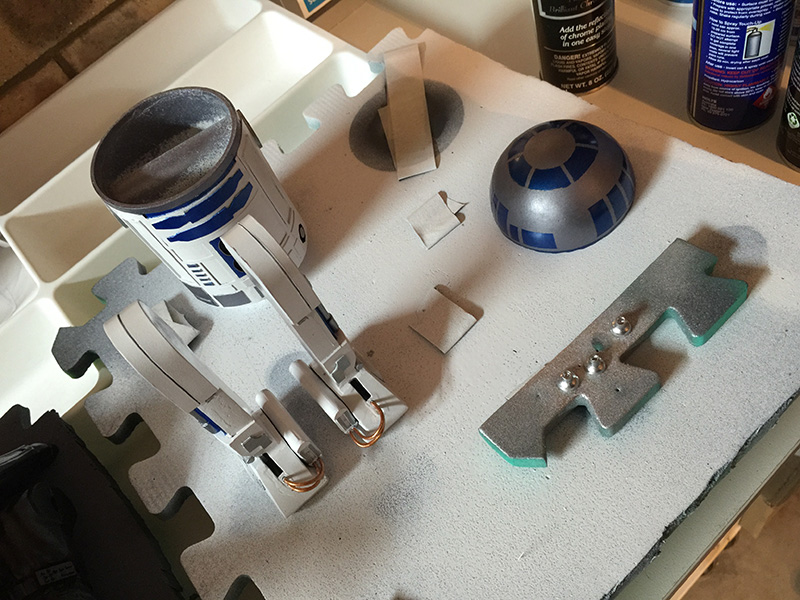
- Dome details: The main eye on the left, still to have the lens drilled out, and the three projectors now hit with chrome paint.
- Finally: All the parts of the droid.
Next up: Assembly and completion!
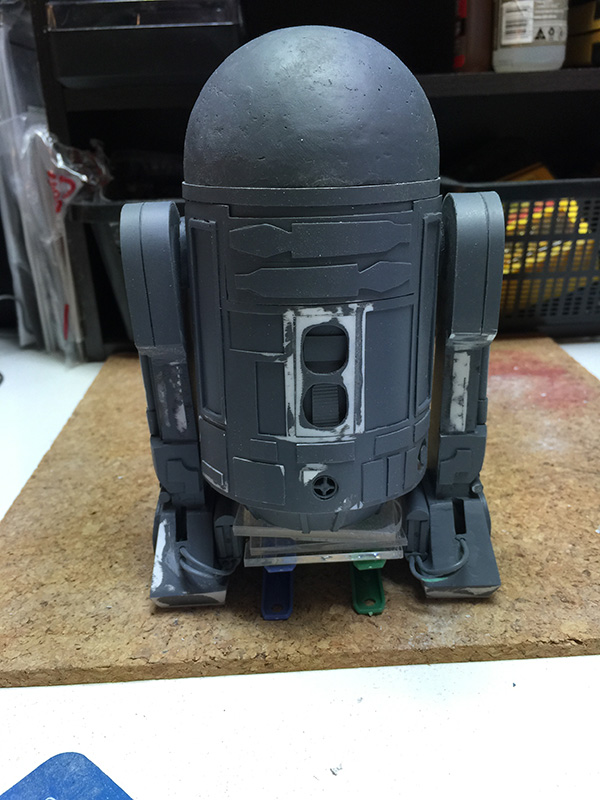
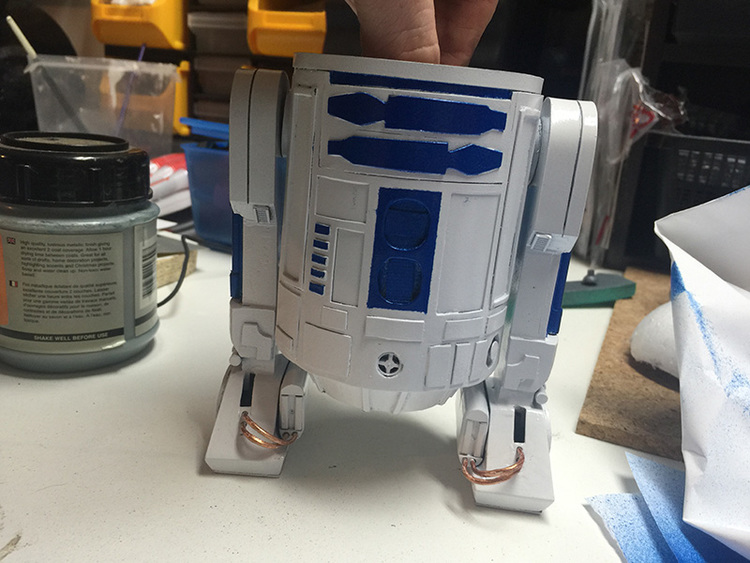
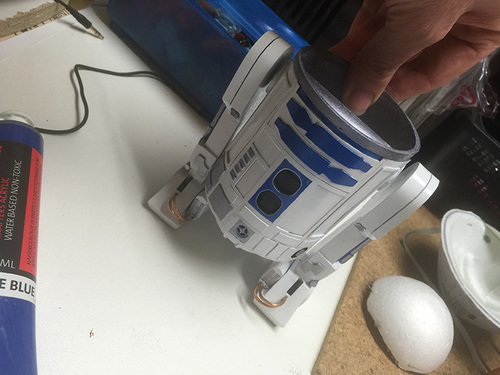
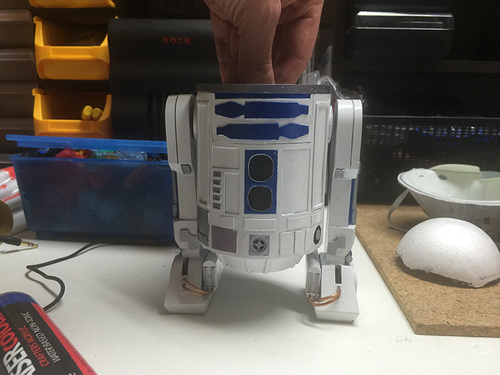
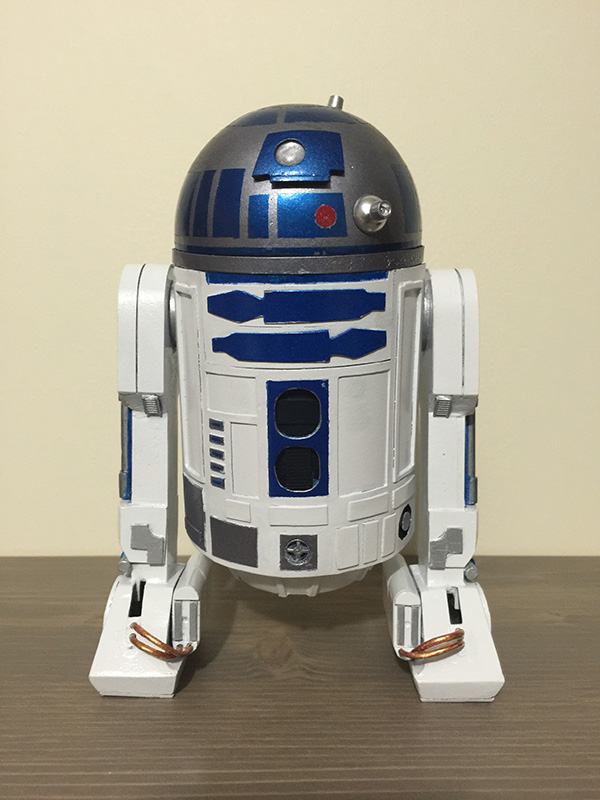
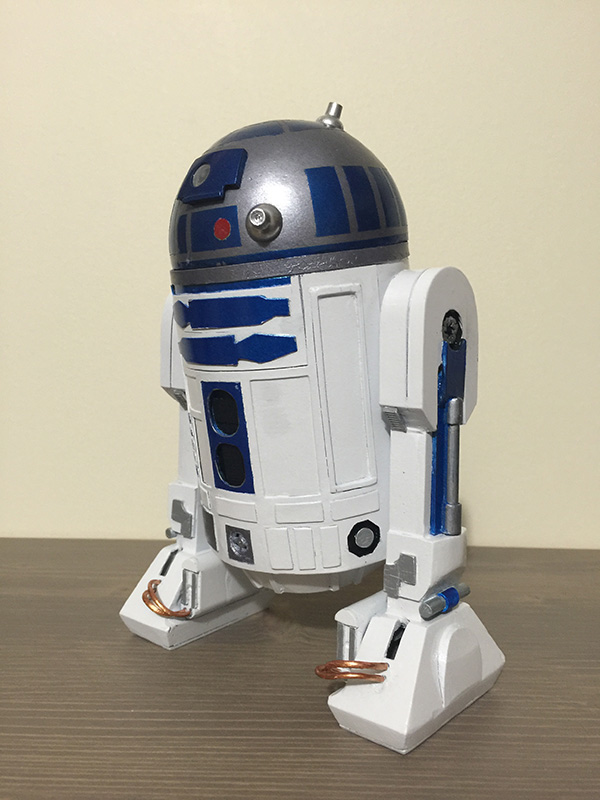
So, all that's left to complete R2D2 is to basically stick all the bits together.
A bit of glue and swearing later:
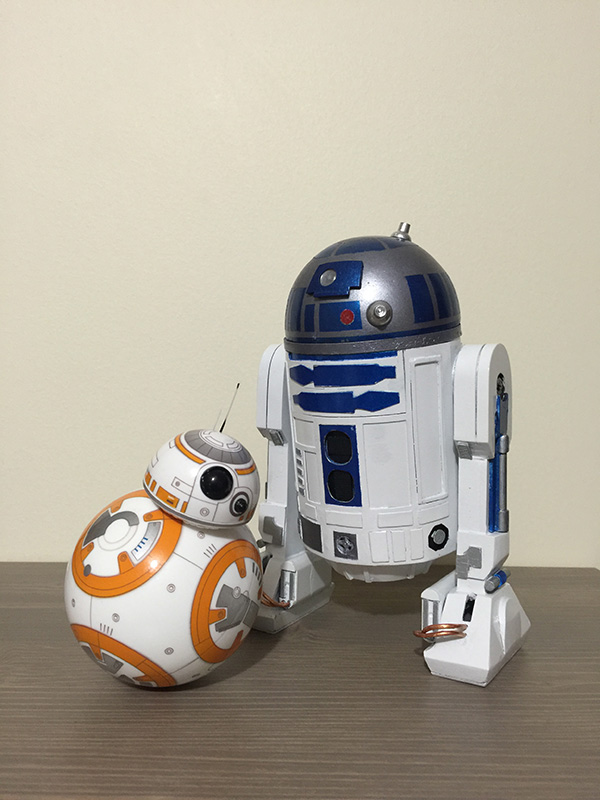

Above we have R2D2 with the Sphero BB-8 autonomous robot toy. I didn't plan it (largely because the Sphero toy wasn't available when I started the R2D2 project), but they ended up pretty much exactly the same scale. That's kinda nice.
I'm happy with the level of detail I managed to incorporate into R2D2.