
How I made the Enterprise from hardware store parts
Space. The final frontier. These are the voyages of...some junk from the hardware store.
After making R2D2 from hardware store materials, I thought 'hey, why not build the Enterprise the same way'. So, uh, I did.
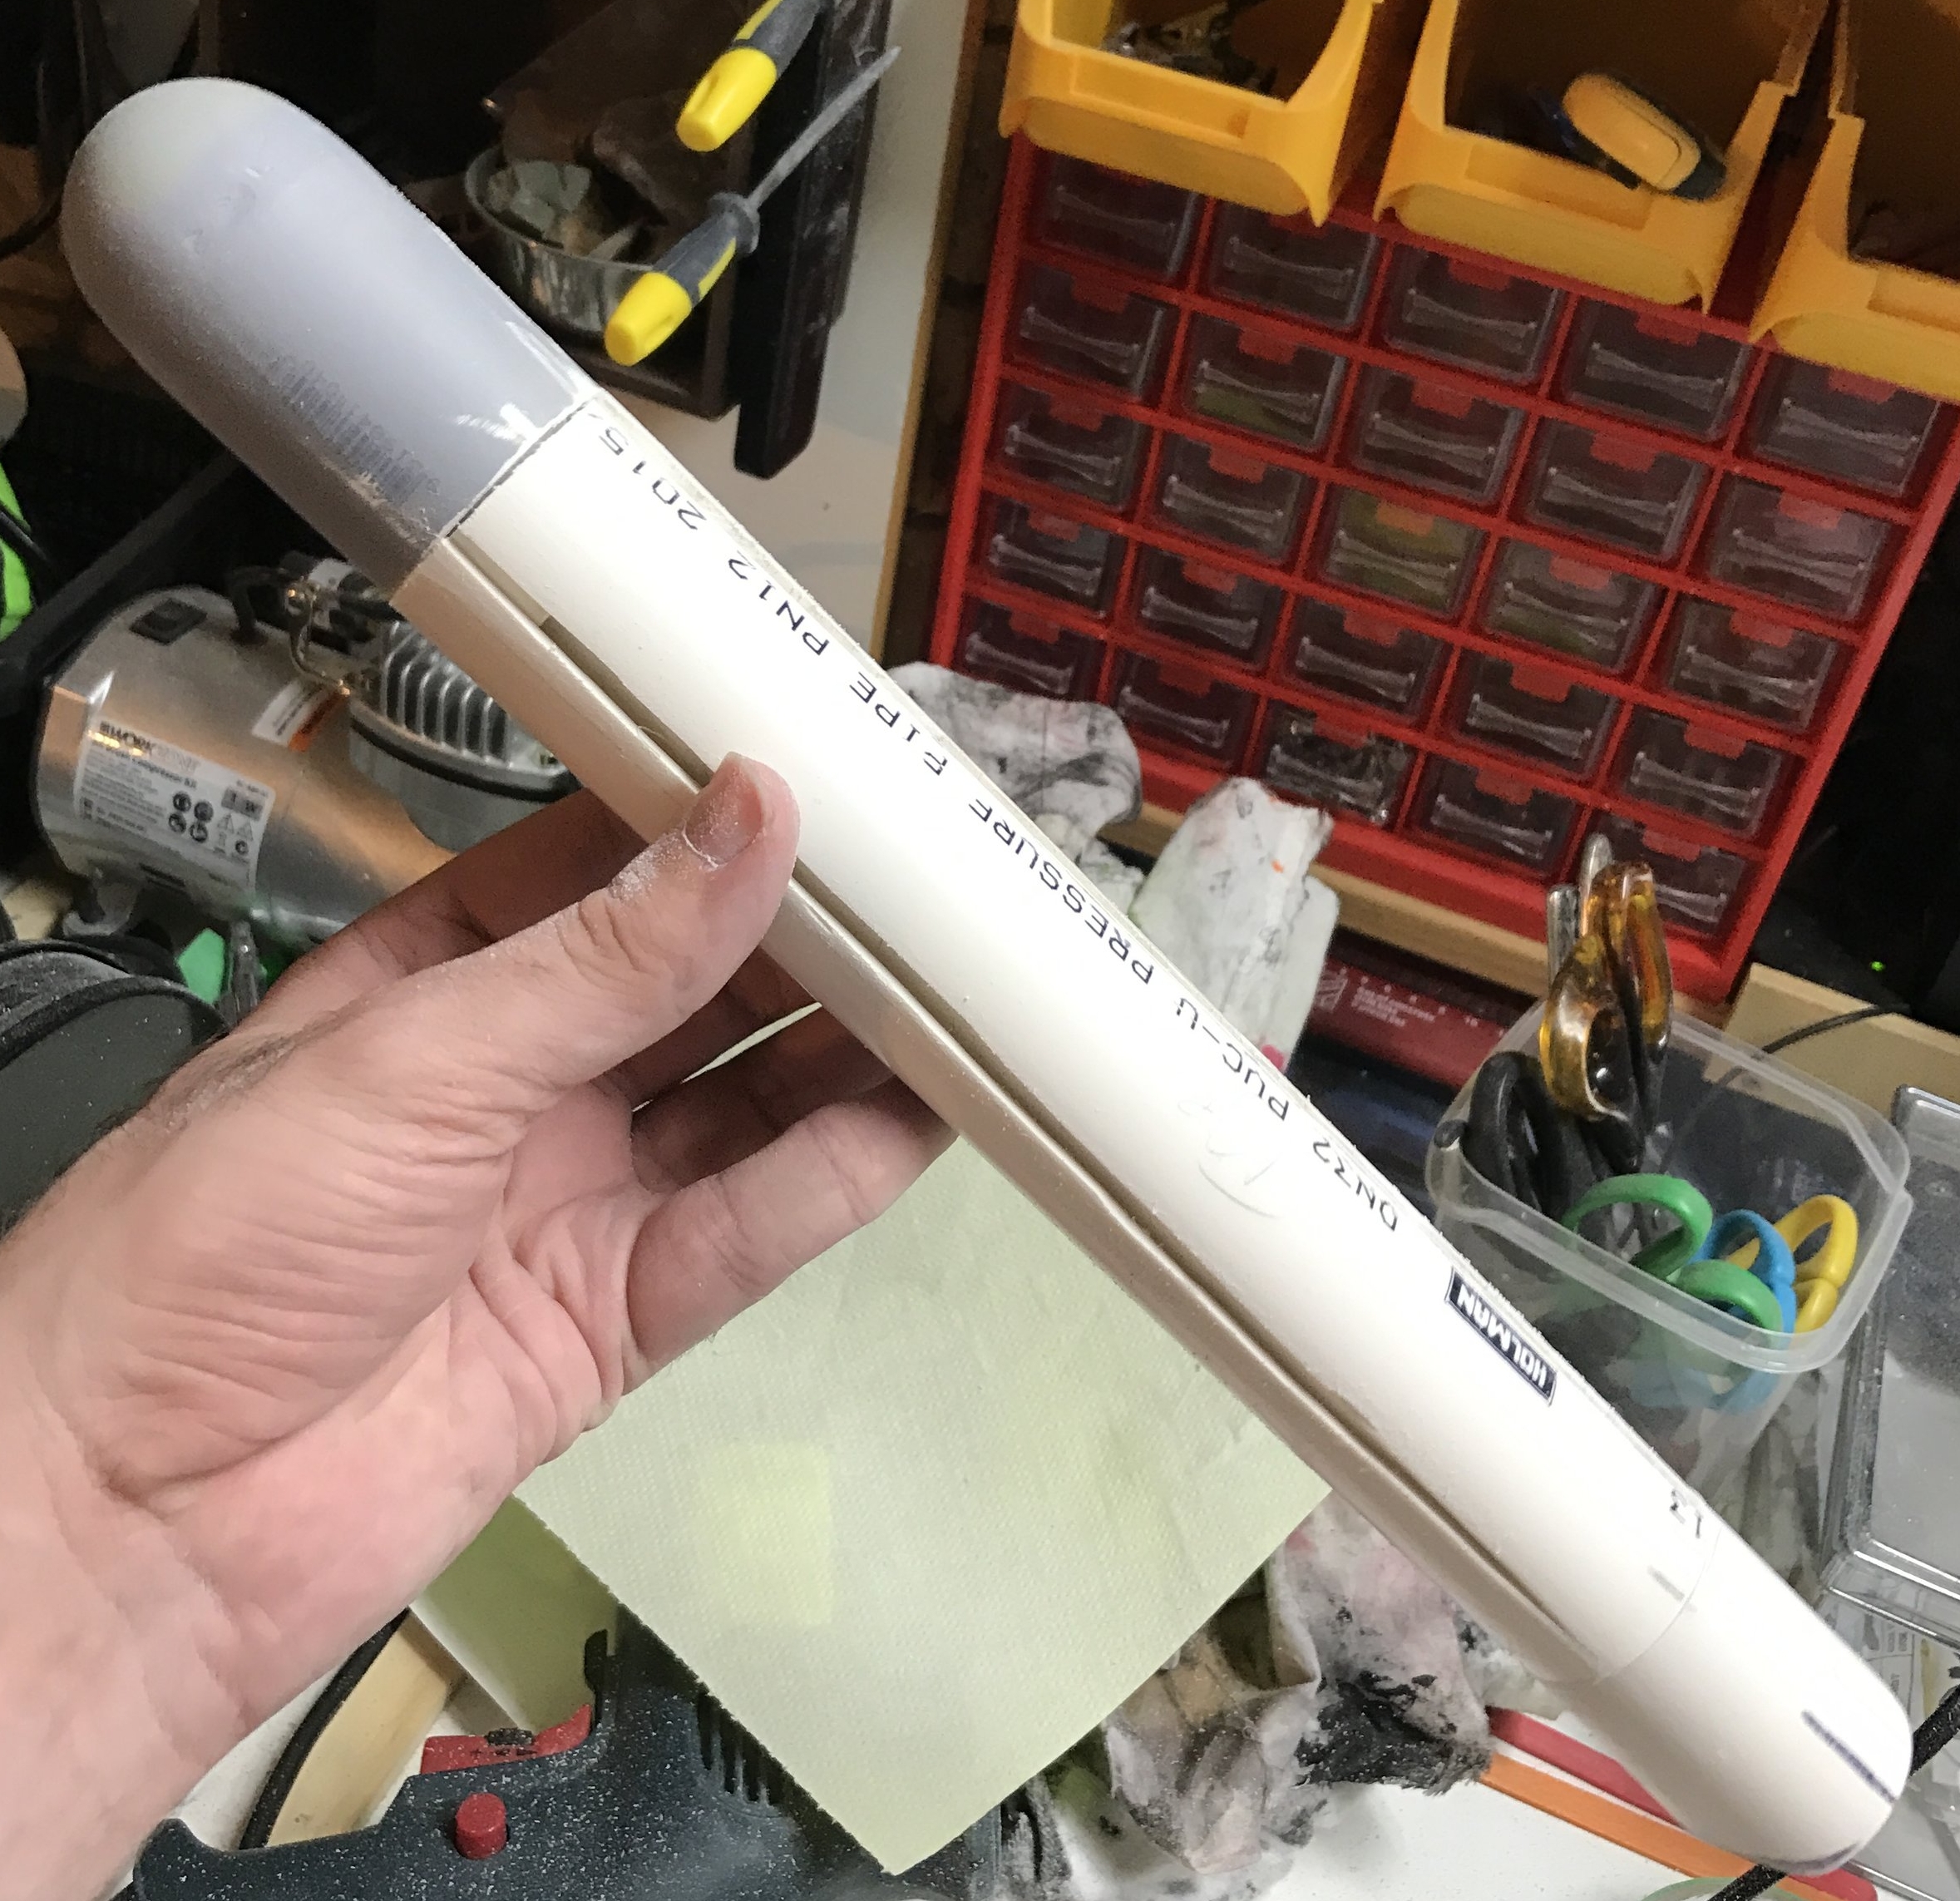
Or, more to the point, I stuck three pieces of PVC pipe together on a crude framework of wood joined together at 45-degree angles, and left it on the workbench for six months.
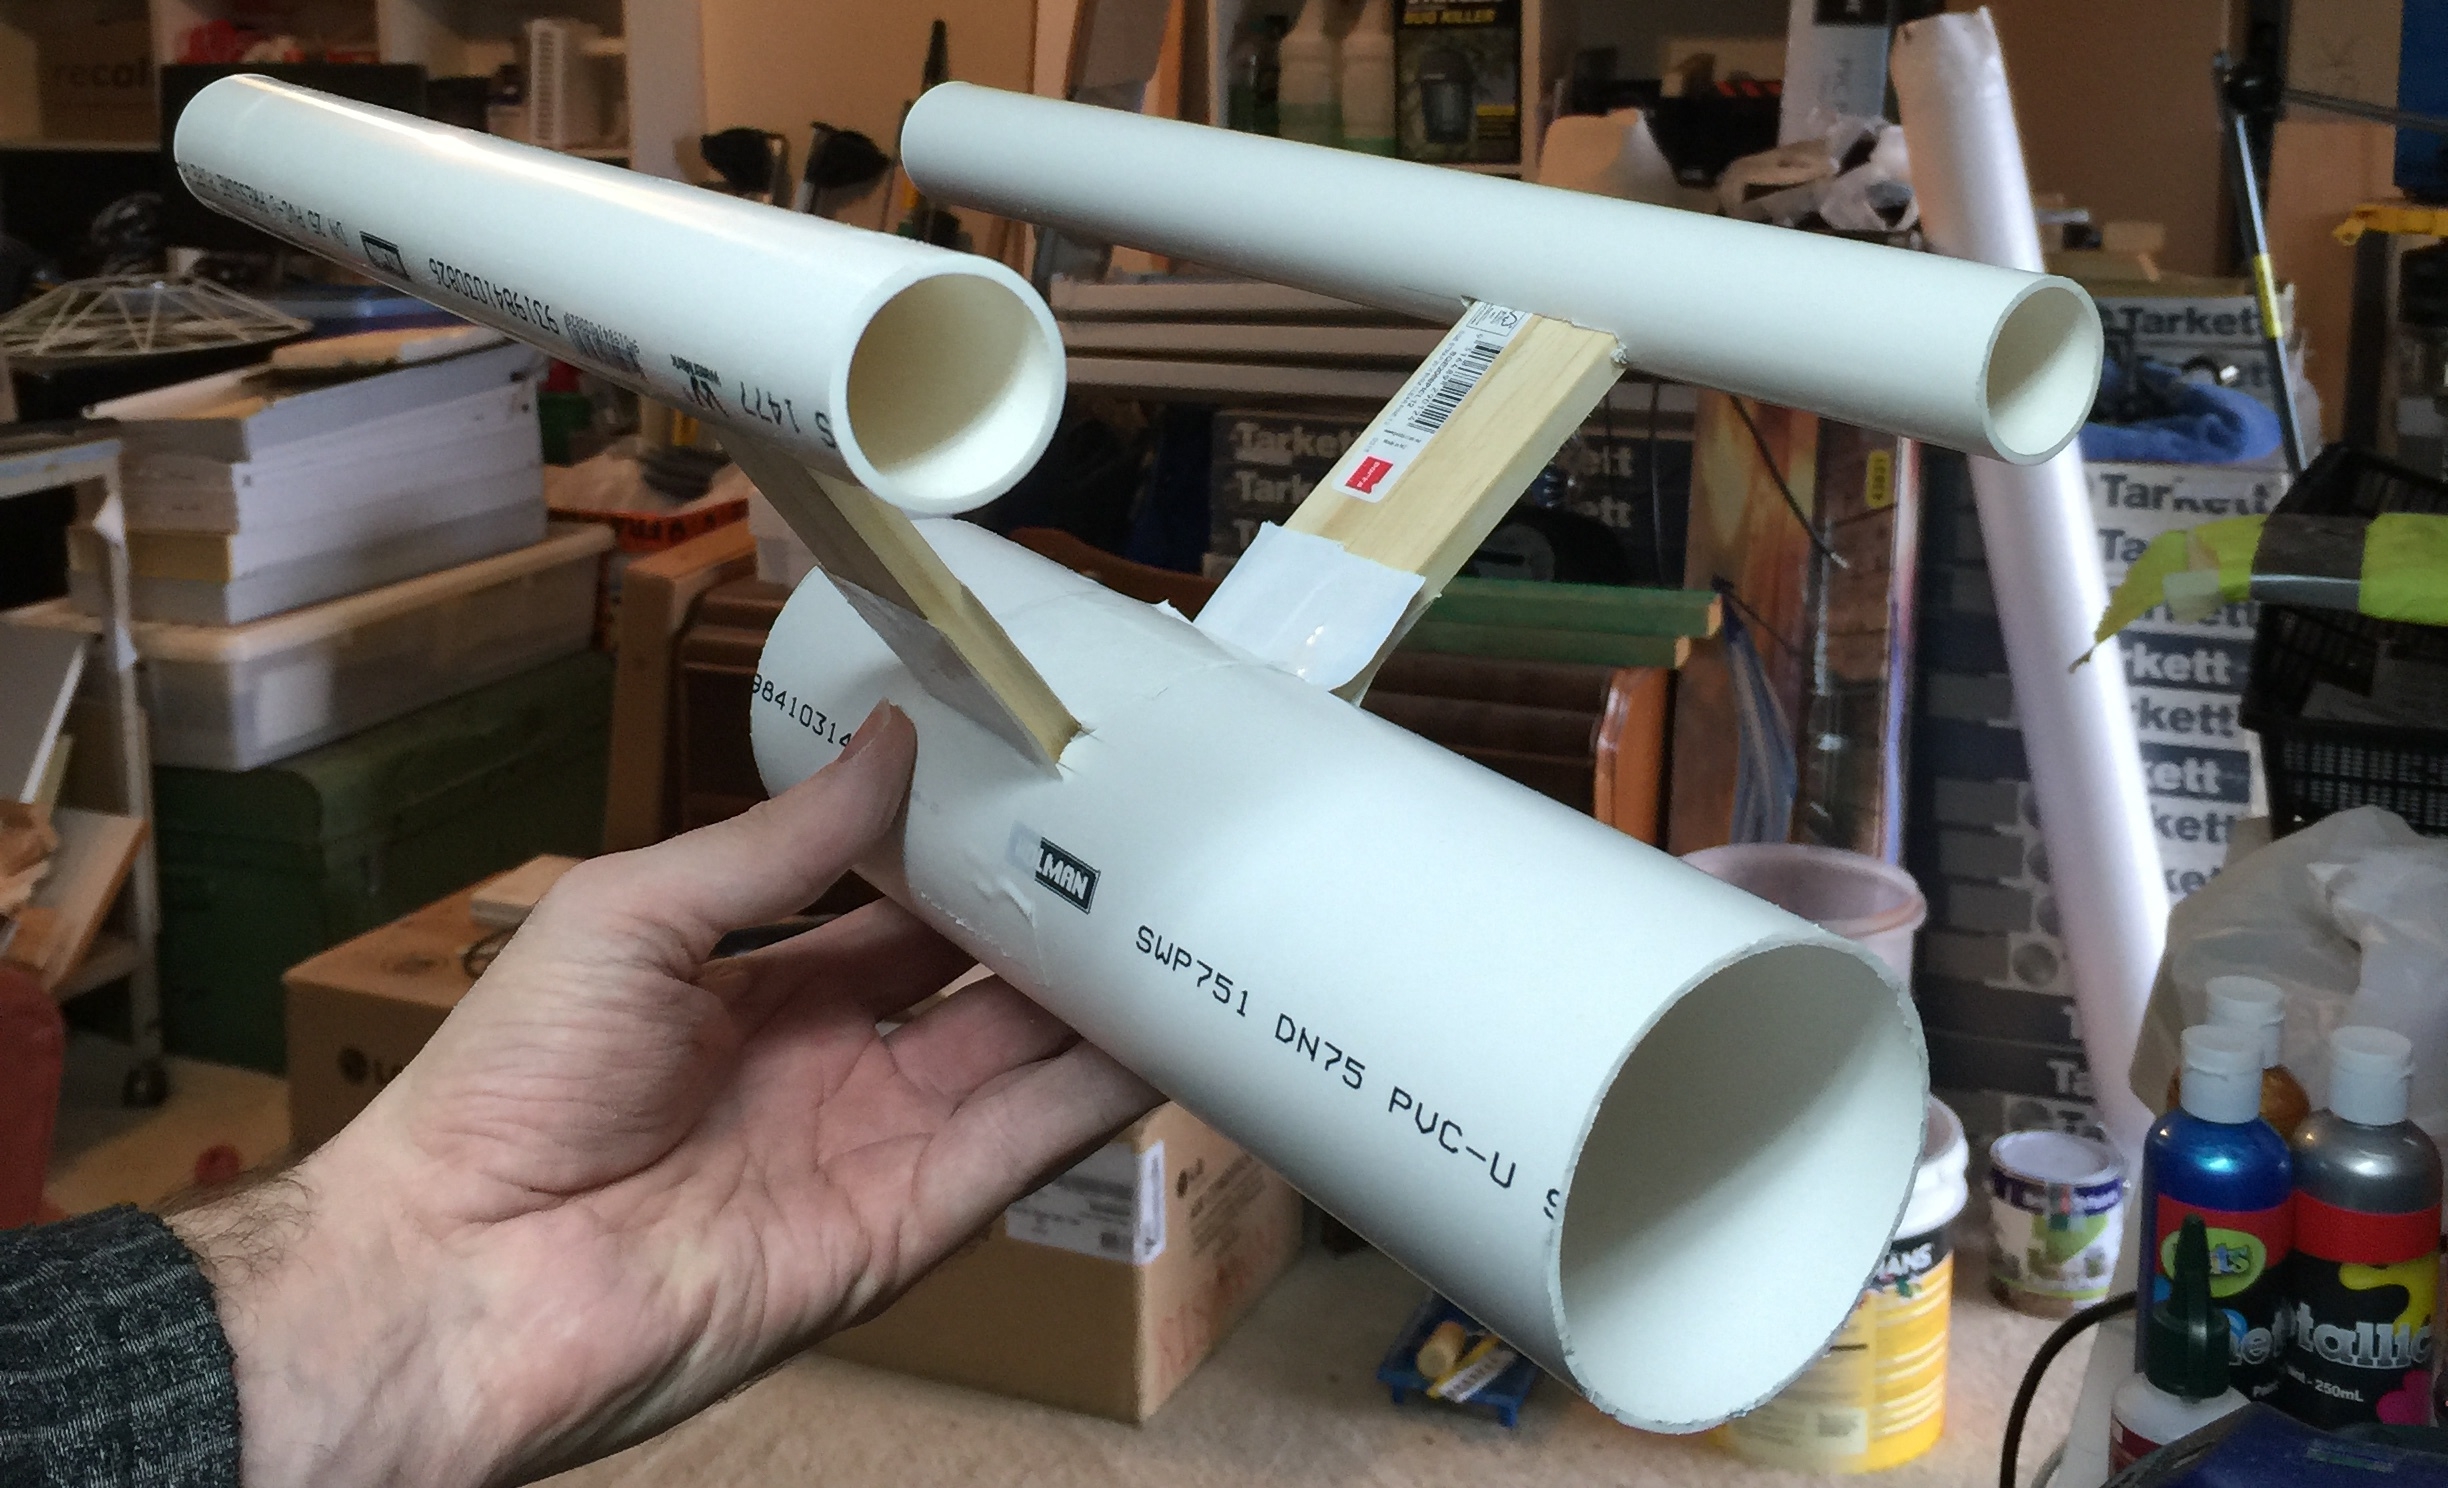
As you can see from the above photograph, it's clearly perfect and requires little more than some paint and decals.
Maybe not.
It sat like that, with duct tape and screws, for a long time. It was thrown about, shoved aside and piled beneath other things. Eventually, I decided to do something with it.
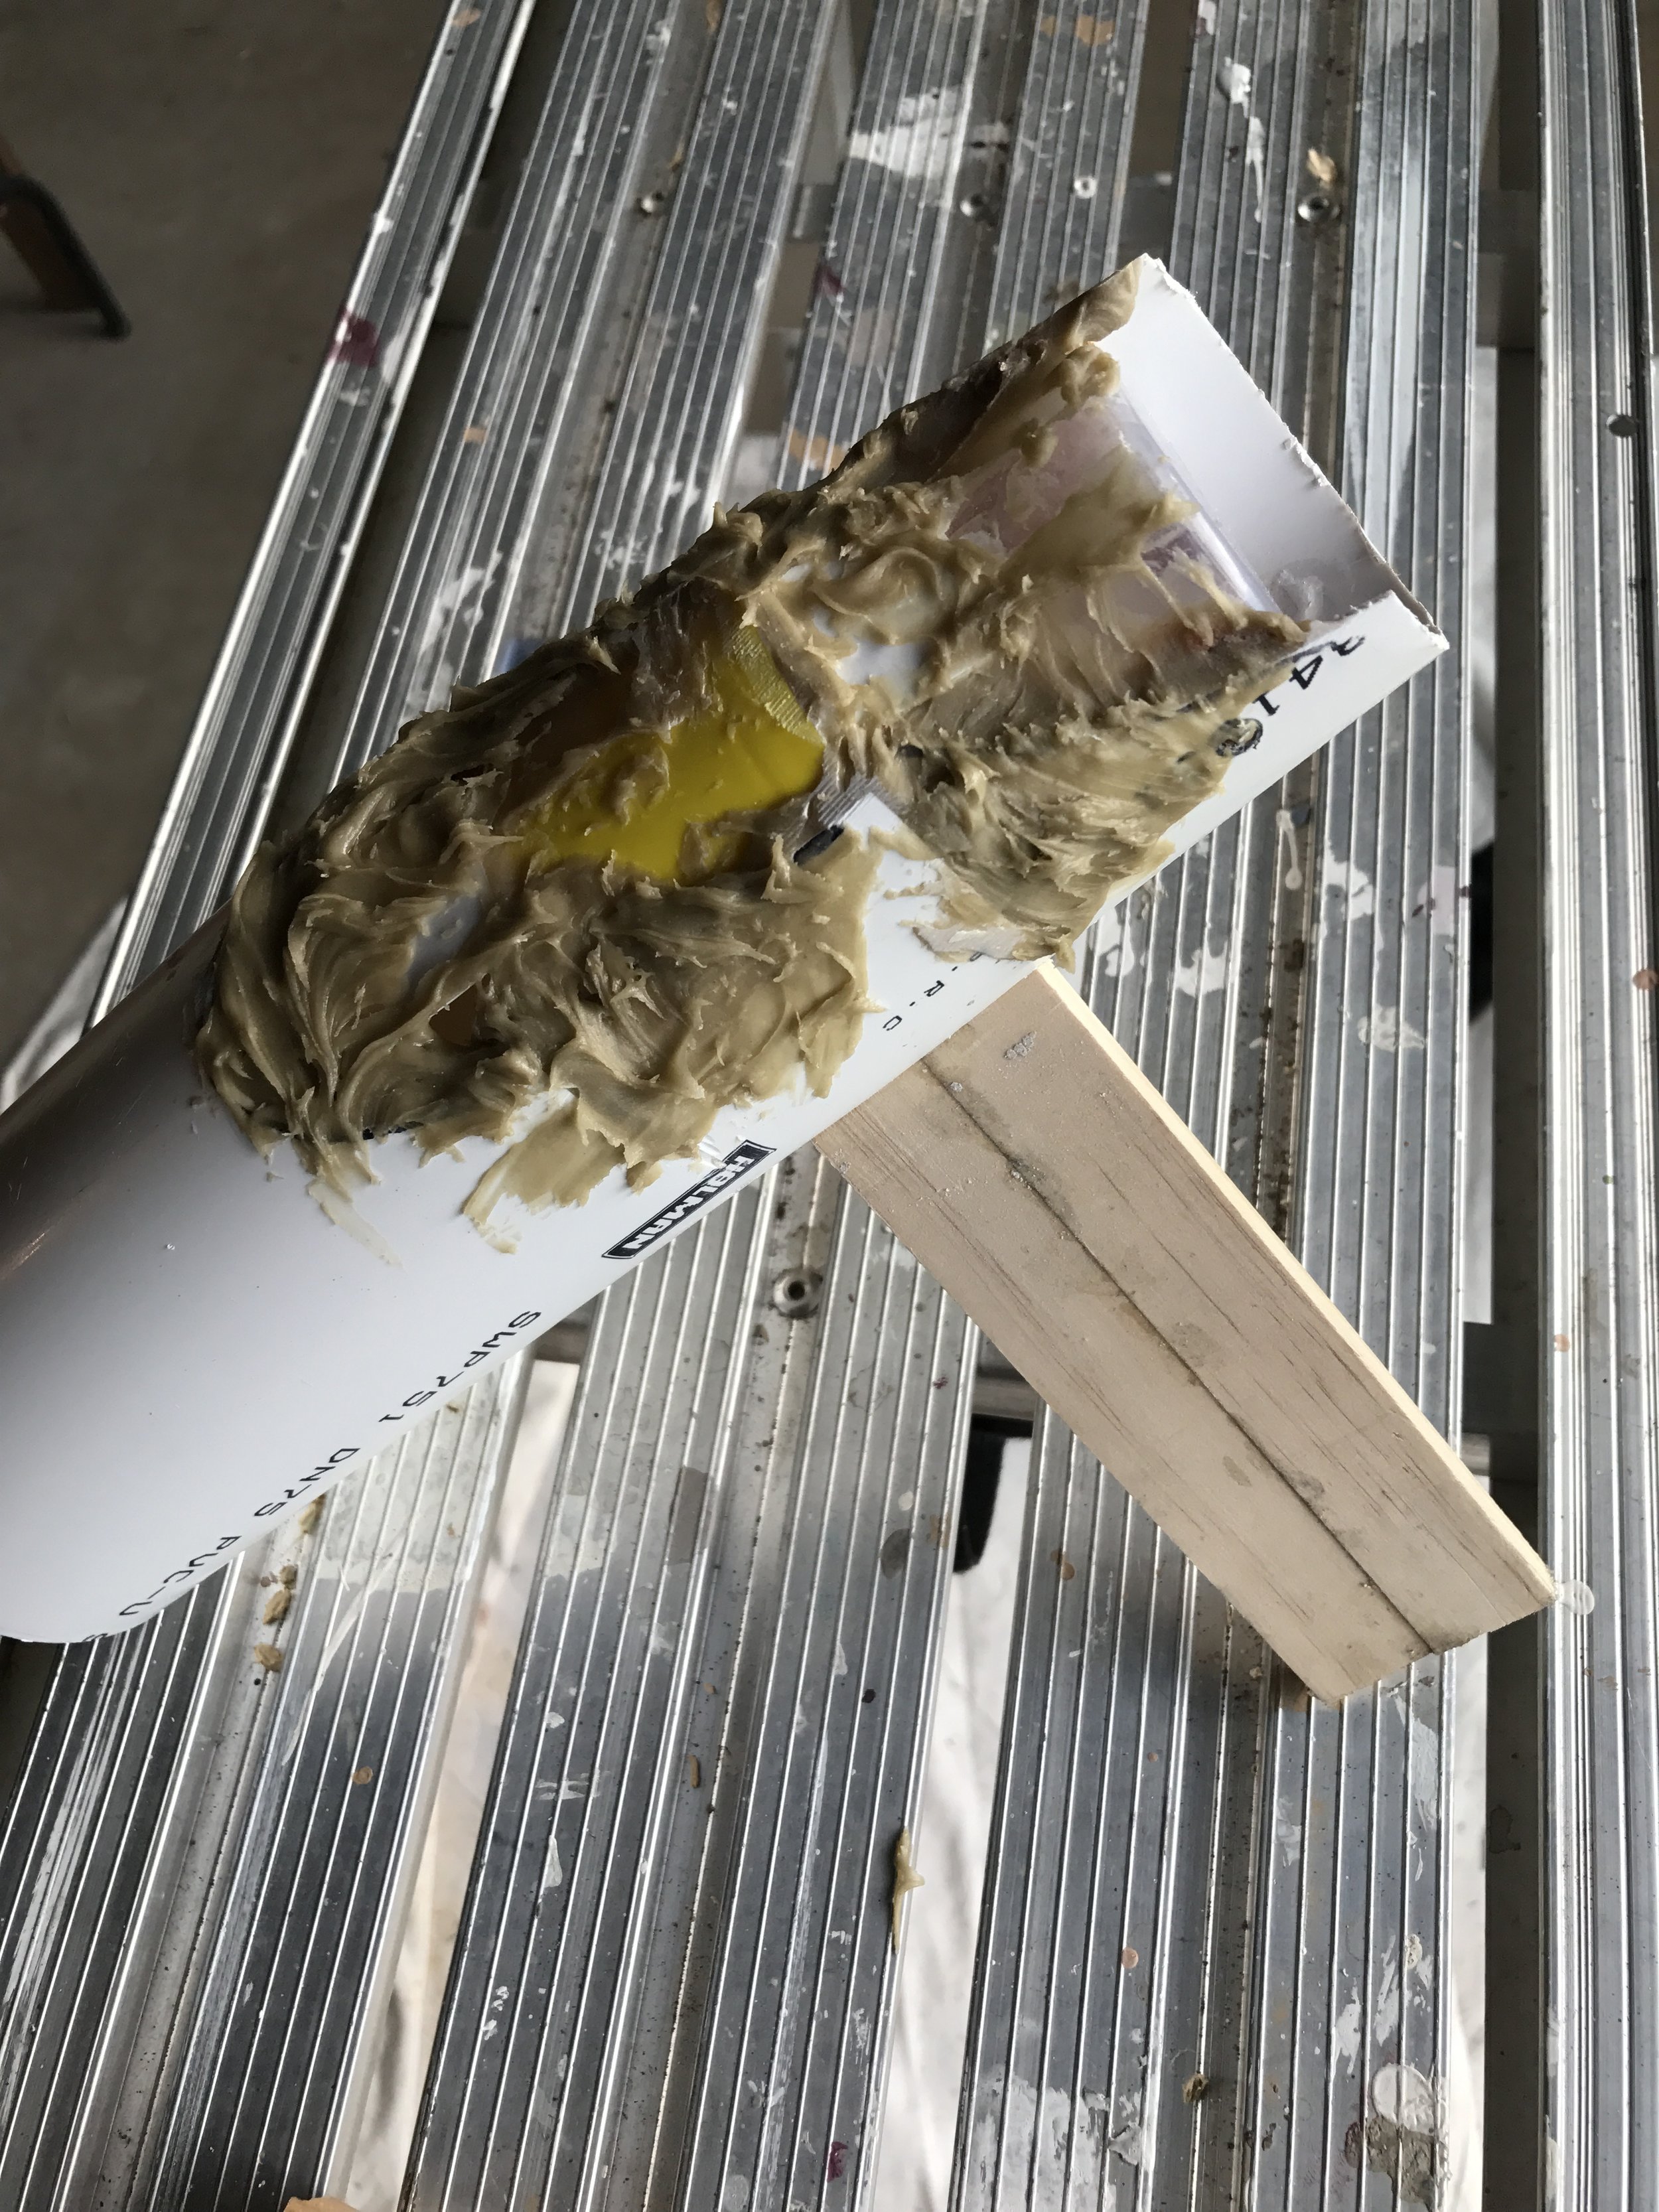
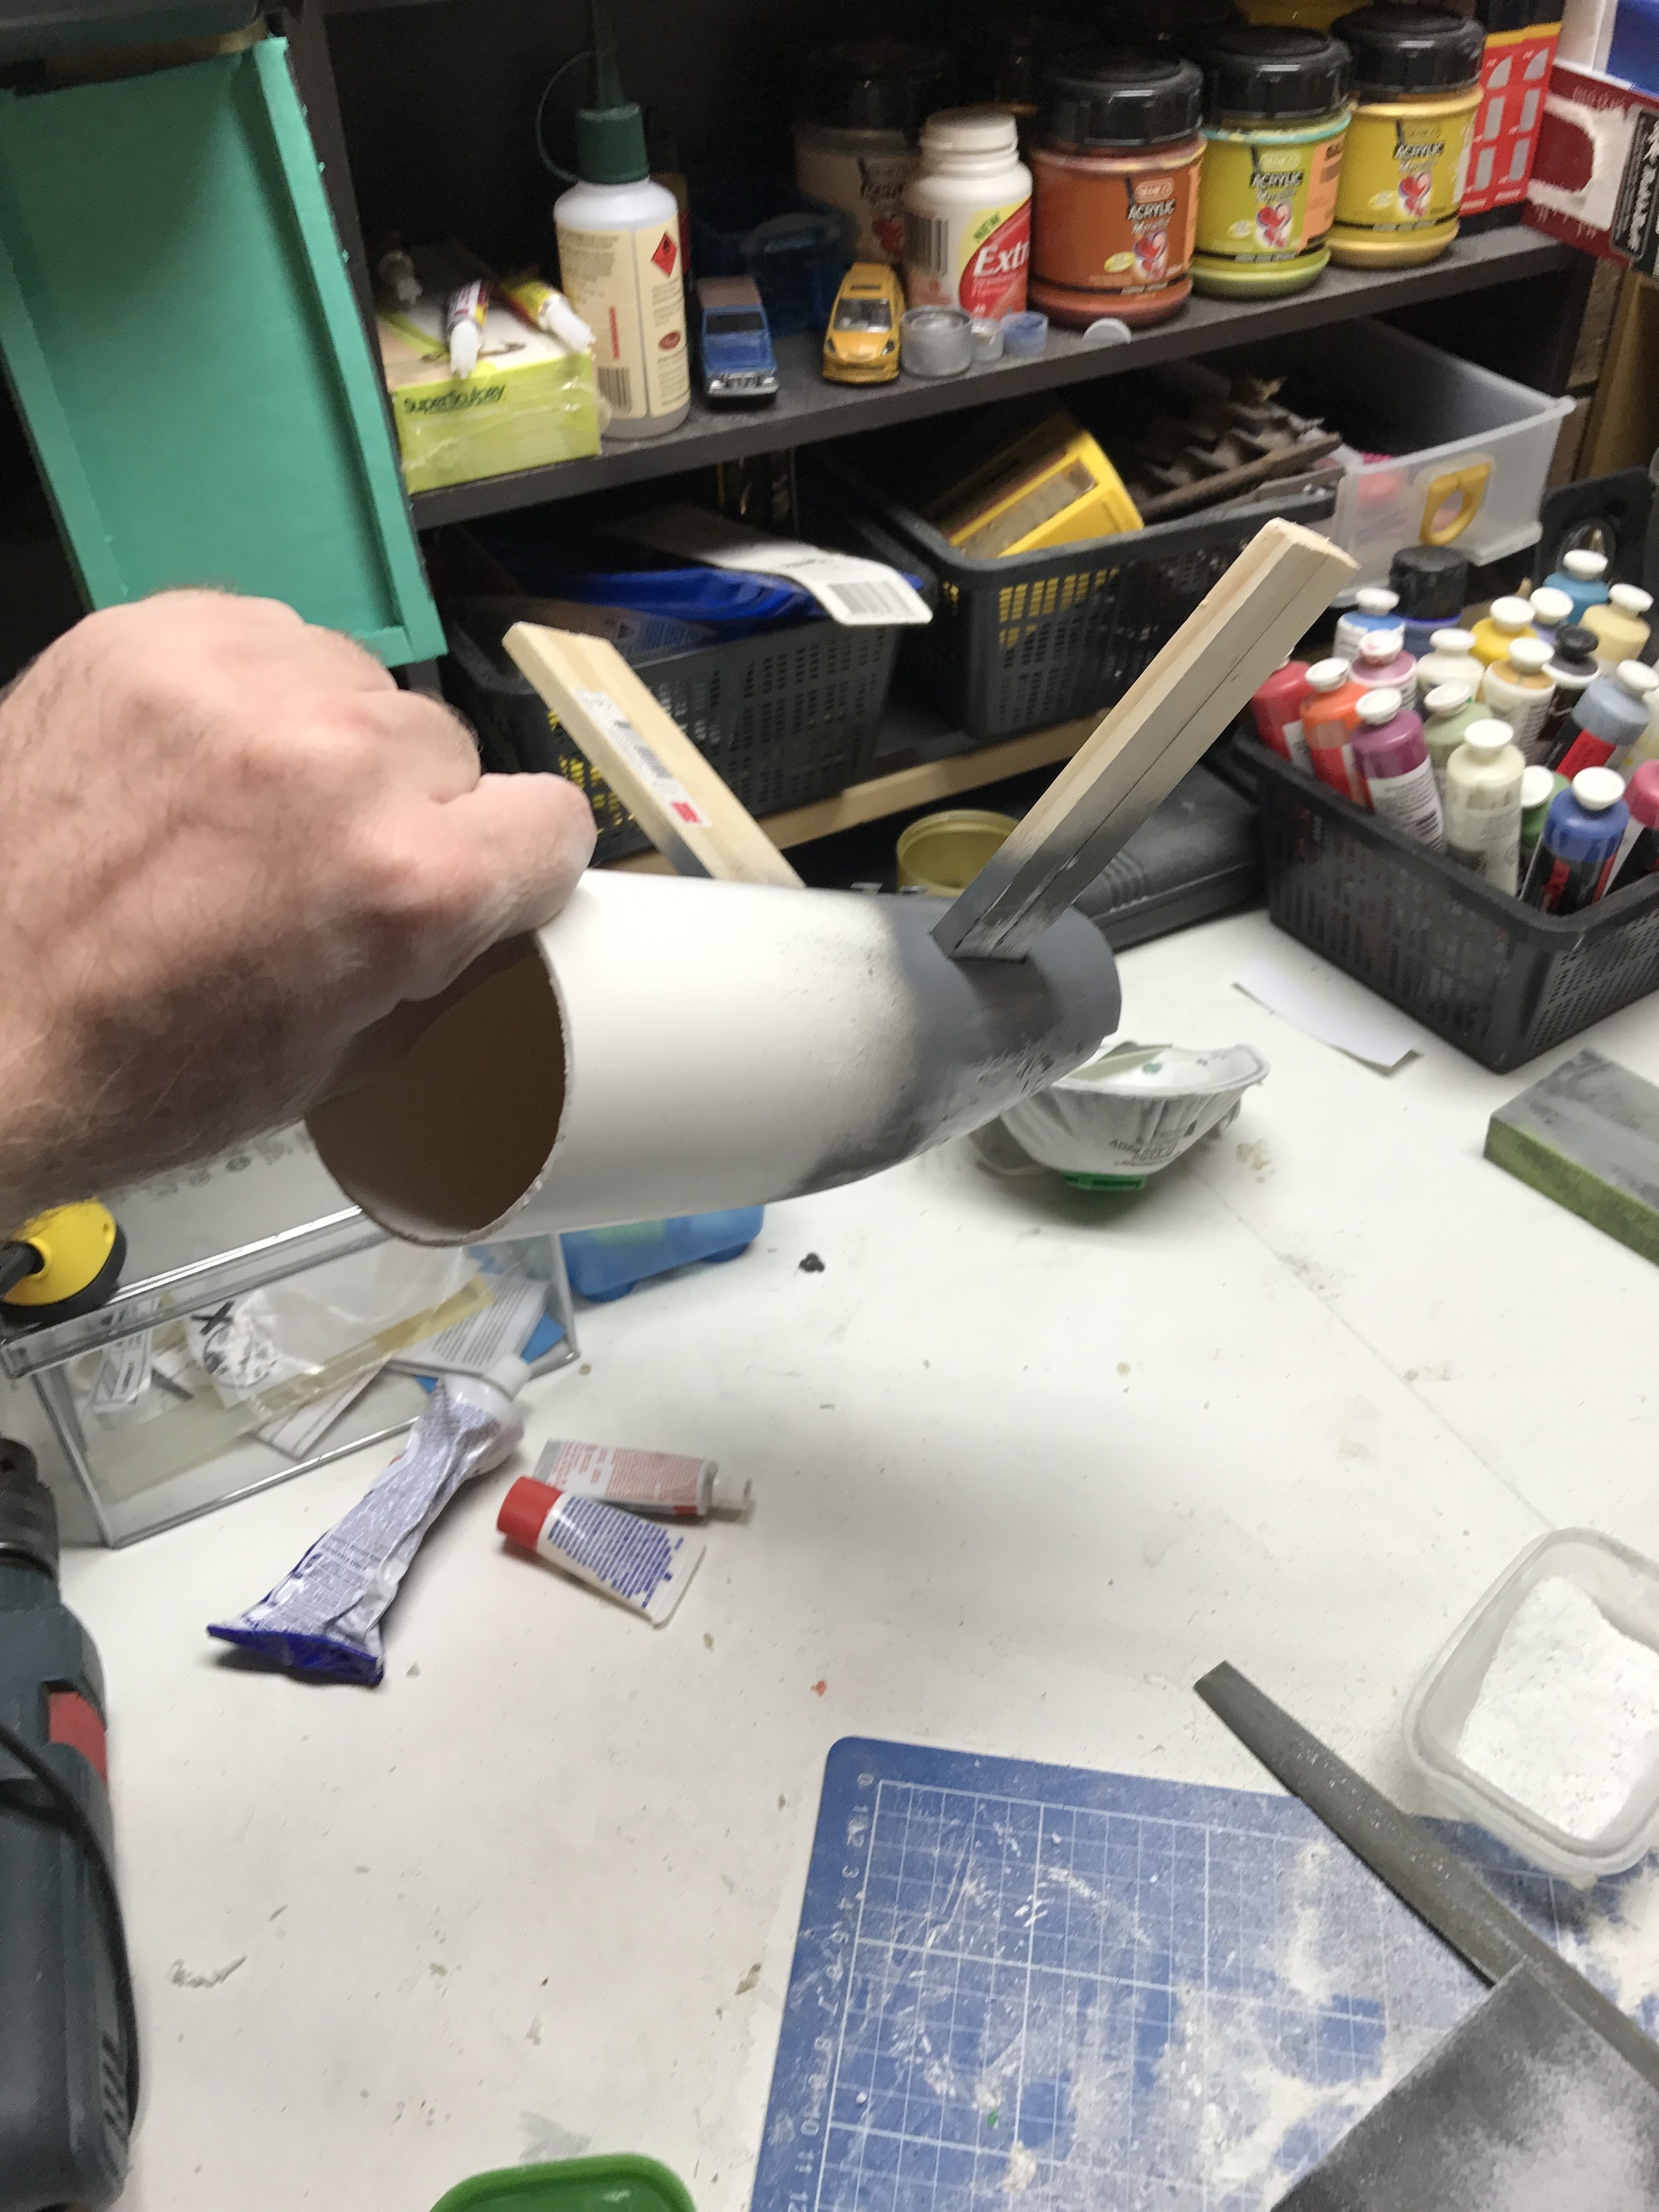
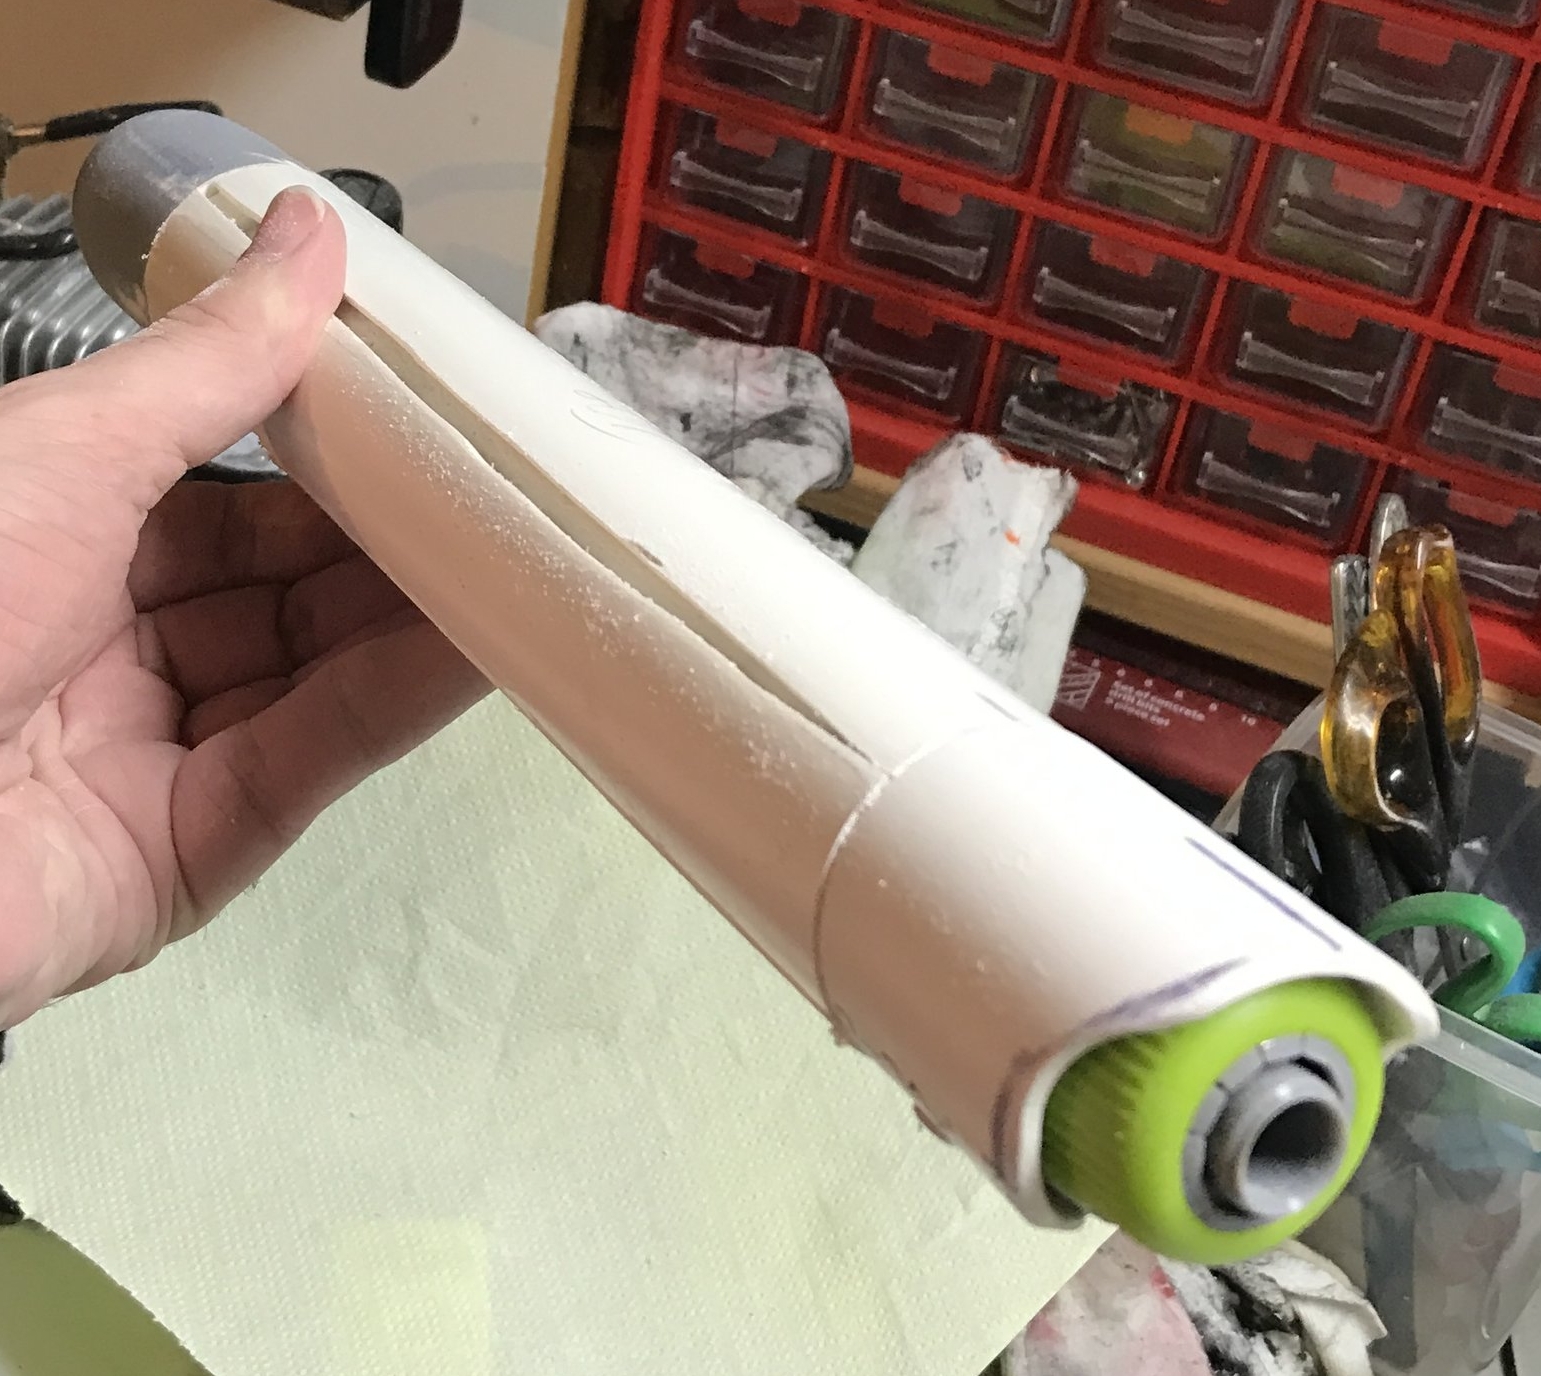
The biggest challenge, believe it or not, was to figure out a way to taper the engineering hull into shape. I had considered just cutting the bottom off the PVC pipe at an angle and being done with it, but I also cut a series of slits into the pipe and pressed it in around spraypaint can lids of various sizes (as pictured very ineffectually to the right, also coated in a carcinogenic amount of Bondo). I wasn't working very seriously on the project at this point, so I didn't take too many photos. I was sick of the thing hanging around, so this was a fairly brutal attempt at either solving the engineering-hull-taper-problem, or ruining it so I could throw it the hell away.
Ultimately, it worked.
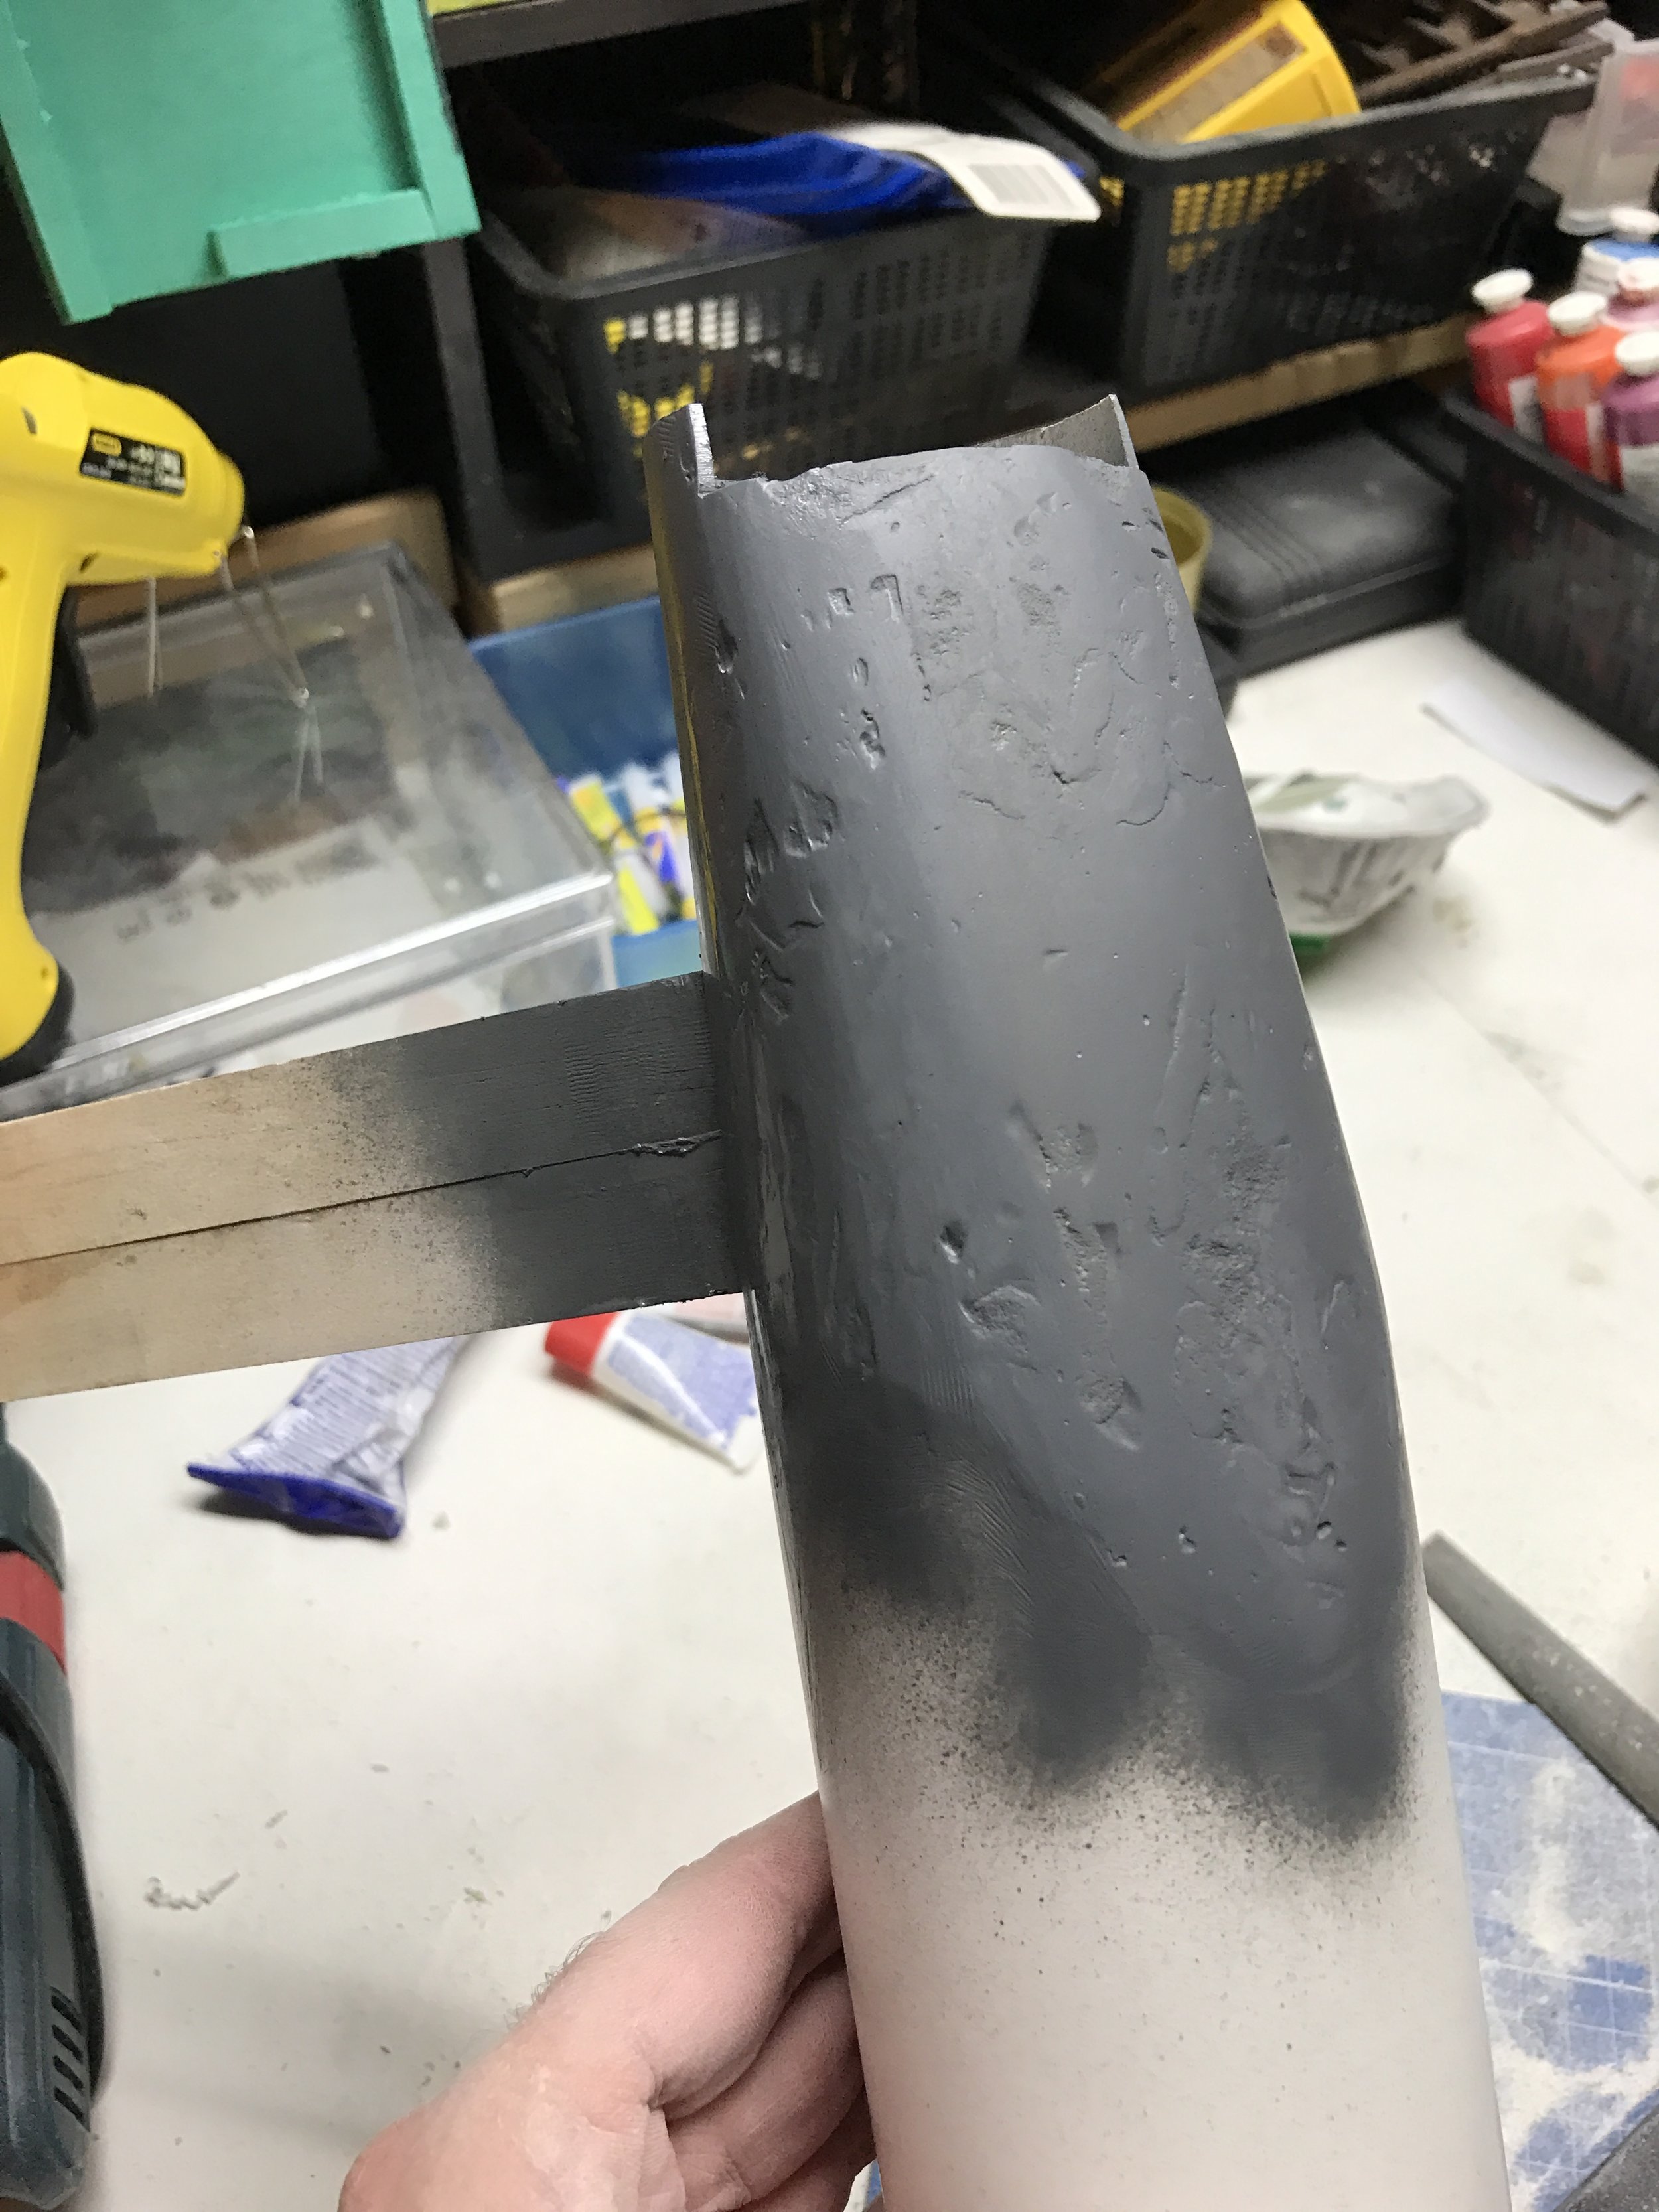
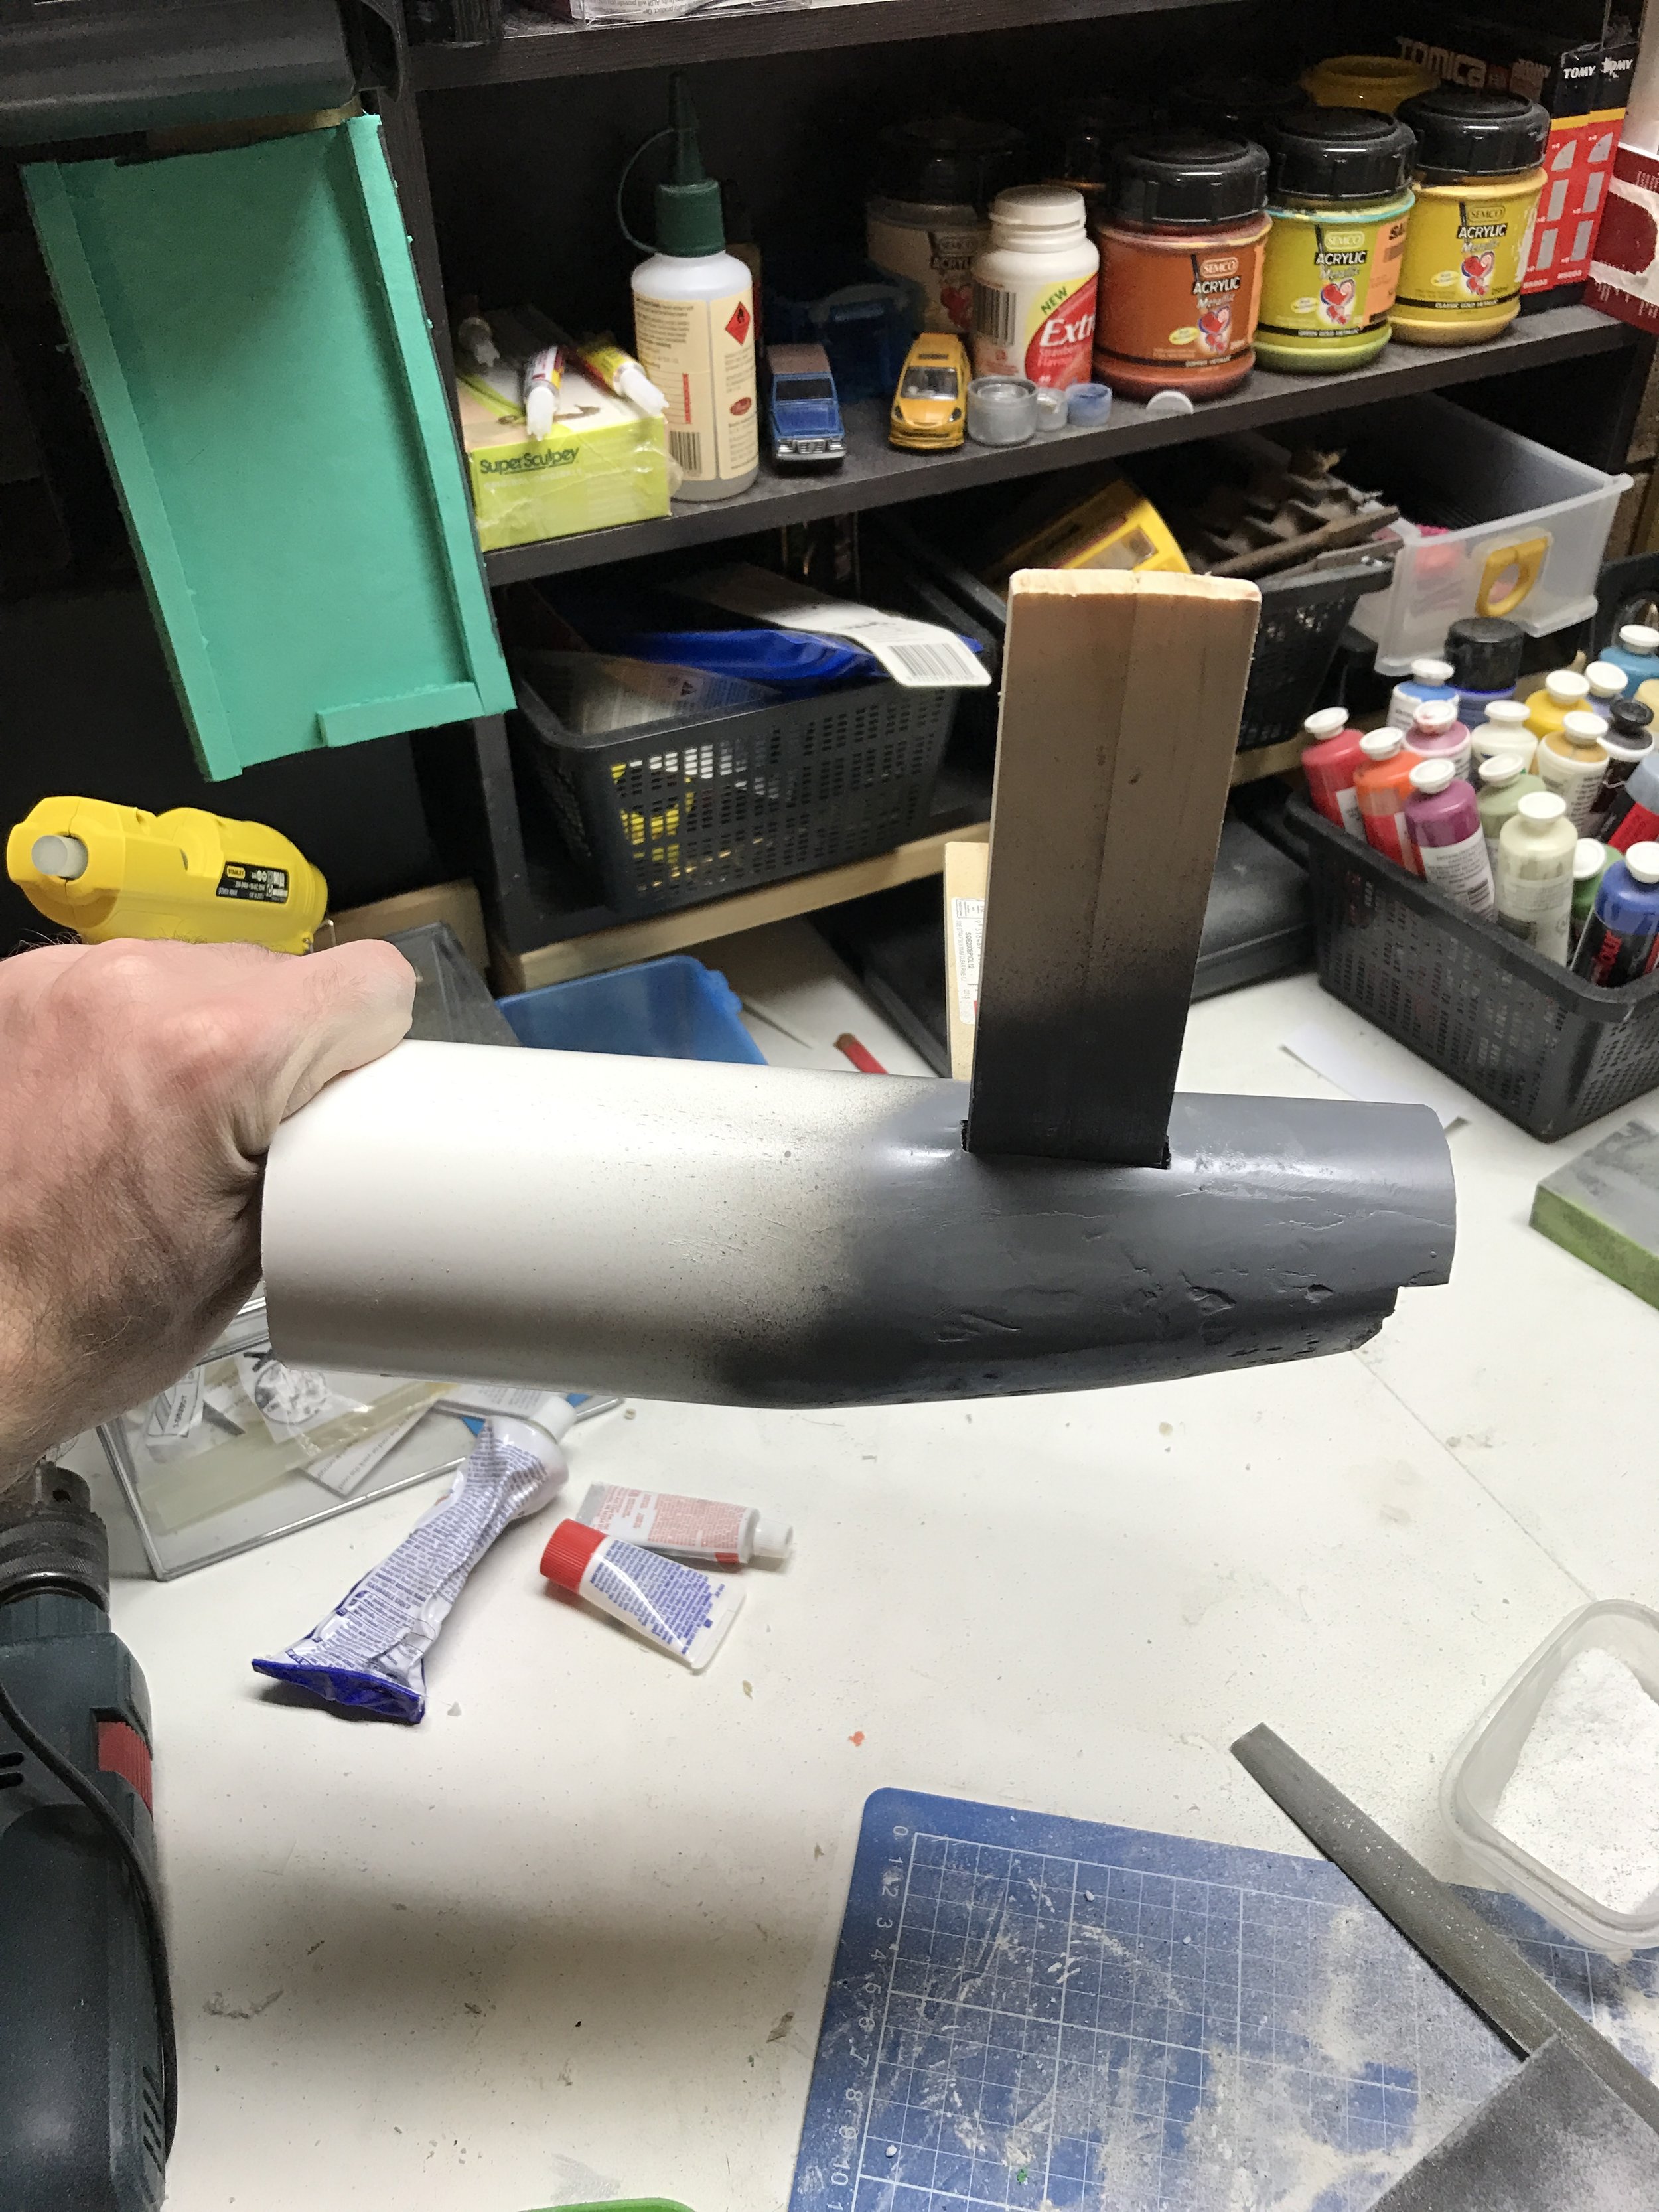
Below are a bunch of photos of the bottom of the engineering hull once it had been roughly hewn into shape using a rasp and files, and squirted with a coat of primer to allow the shape to be better identified. I eventually took a futher "scoop" shape from the very end, beneath the shuttle bay, to give it a more accurate (but not perfect) shape. It's good enough. It's plumbing parts. I'm okay with this.
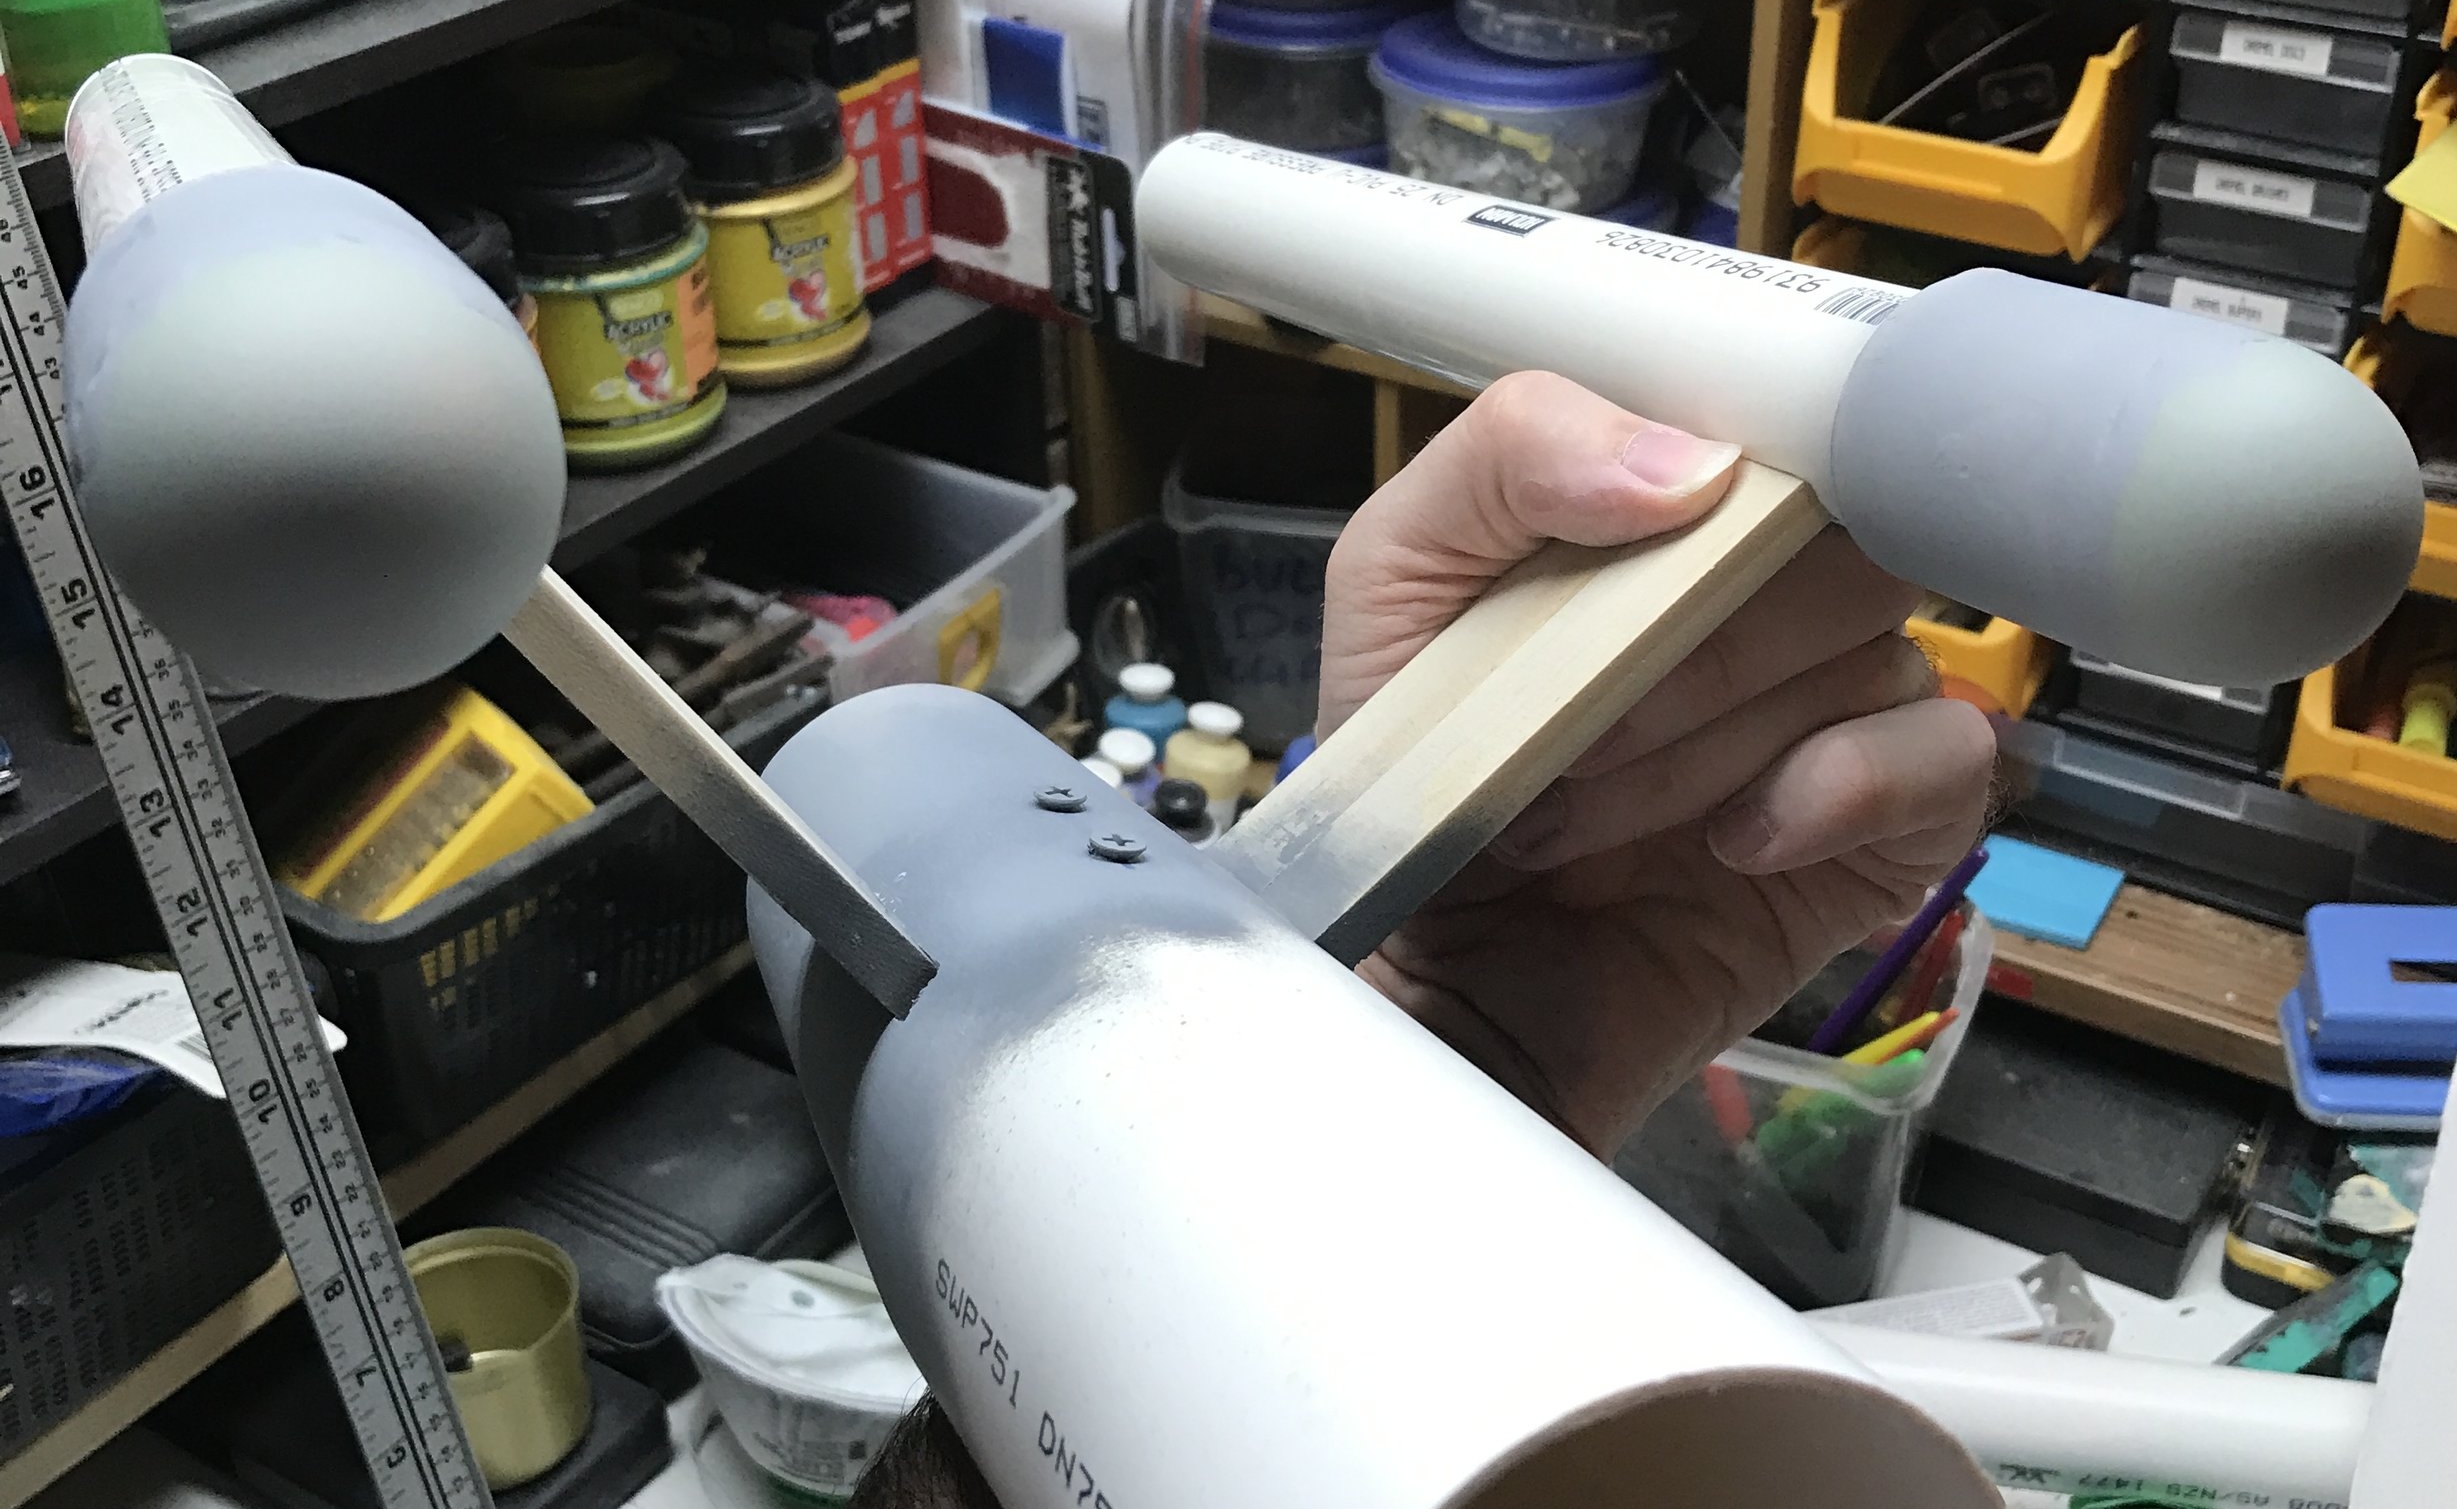
Here's the engineering hull with the nacelles attached:

Next up, I tried to somewhat shape the shuttle bay, and made some rounded caps for the front of the engine nacelles.

Okay. The shuttle bay now has a shape for its little "roof" piece, which was rounded off on the ends using files. I added a couple of extra millimetres of thickness to the "roof" part with some styrene sheet offcuts, to give it a bit more rigidity and the illusion of sturdiness.
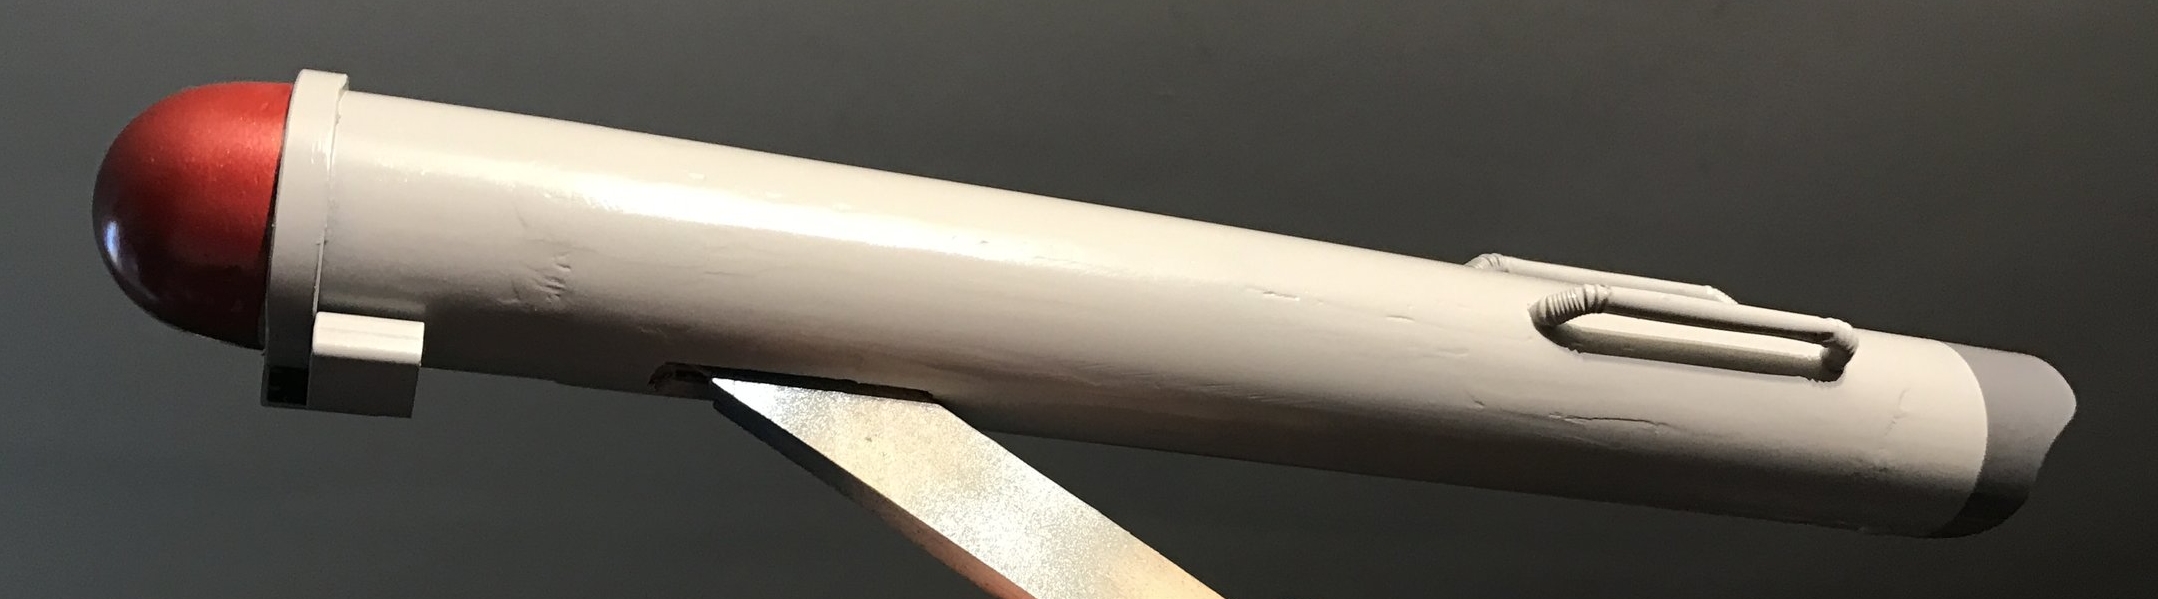
The nacelle end caps (aka "the red bits", or "the domey things") are made relatively simply. The nacelle tubes are 37mm PVC pipe. I cut pieces of 40mm PVC pipe to slide over them (quite loosely, I might add), and glued ping ping pong balls to the ends. As luck would have it, the diameter of a standard ping pong ball is 40mm, so with copious amounts of highly toxic filler shoved in the gap, they blend seamlessly into the tube.
Allow me to address something obvious: They look ridiculous. The reason for this is that I had hoped they would not look ridiculous, and my hope failed me. When these kinds of problems arise while I'm building something, I find the best approach is to ignore them, and trust that a solution will pop out of the ether later on. Spoiler: It does.

Enterprise design purists may wish to look the other way for a moment: the ends of the nacelles are going to be made from hose fittings. Wait -- let me clarify that: The ends of the nacelles are going to be hose fittings.
I'm okay with this. This thing is made from hardware store parts, mostly from the plumbing aisle. It seems only fitting that the engines should be garden hose connectors.
Thanks to The Reject Shop, I managed to find two garden hose connectors and a set of LED string lights disguised as miniature light bulbs (centre of above photograph), one of which was sliced and diced to form the spherical door of the shuttlebay, which needed a little styrene platform under it and a generous coat of primer. (This part fell off many times between now and the final product, but I'll spare you the anguish.)
Now, as you can probably see, it's starting to look a bit more like a starship. We still have ugly nacelle caps, but I have gone to the trouble of making some nice little PVC covers for the rear of the engines, which I'm very happy with. I had to use some scale-inaccurate pop rivets to hold the covers on, but I'm okay with that. These things happen.
The saucer is now...present. I had many ideas on how to approach the saucer, from dinner plates to acrylic plastic, to making ribs and skinning them with something. Ultimately, I settled on two discs of thin MDF propped apart with a ring of EVA foam. Here, you can see I've used two sheets of EVA foam floor mat, but I eventually reduce it to one, as two is clearly far too thick.
No work so far on the deflector dish, it remains a gaping hole.
You can see the mounting nut embedded in the very bottom of the ship, though. It's held in with Liquid Nails and a copious shell of bondo on the inside. Hopefully, this nut will a) hold the weight of the ship, and b) be roughly located at its centre of gravity. Difficult to tell the latter, as I have no idea at this point what the thing will end up being made of, and whether it'll be front or back heavy.
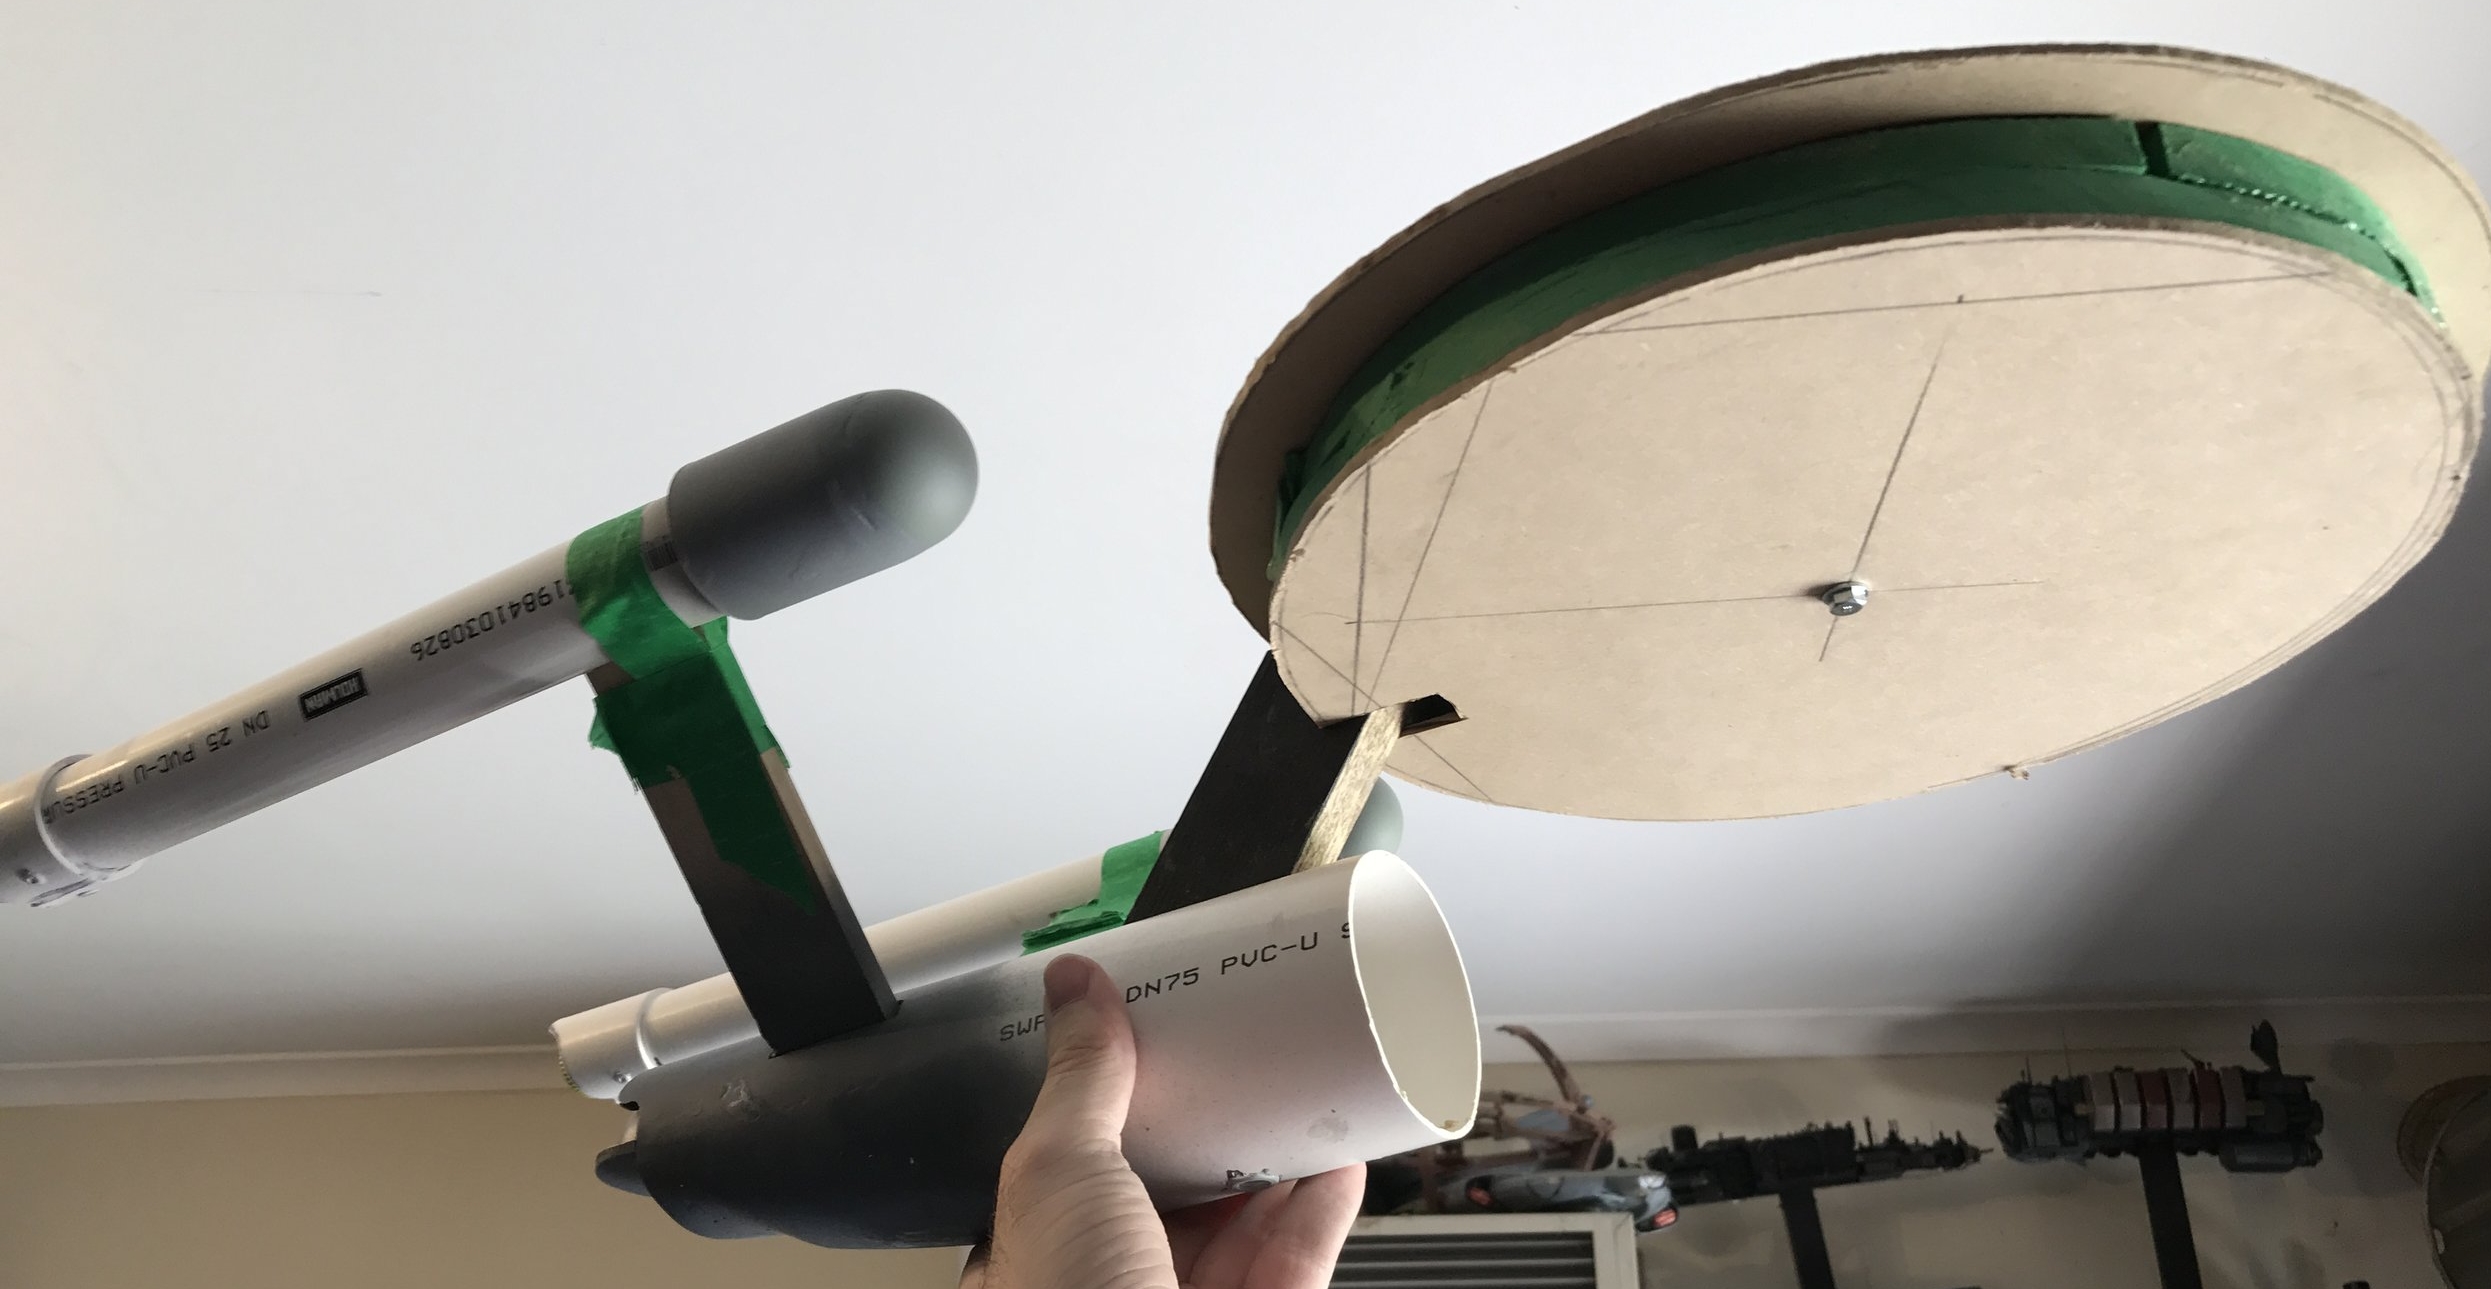
One more thing to address, here: the neck. It's a bit of wood. It's supposed to be at a 45-degree angle, but I had to make it 35-degrees to accommodate the asteroid-sized hunk of bondo inside the engineering tube that holds the engine struts and mounting nut in place. All things considered, it still looks appropriately angled. If you approach my Enterprise with a protractor, you'll be severely disappointed.
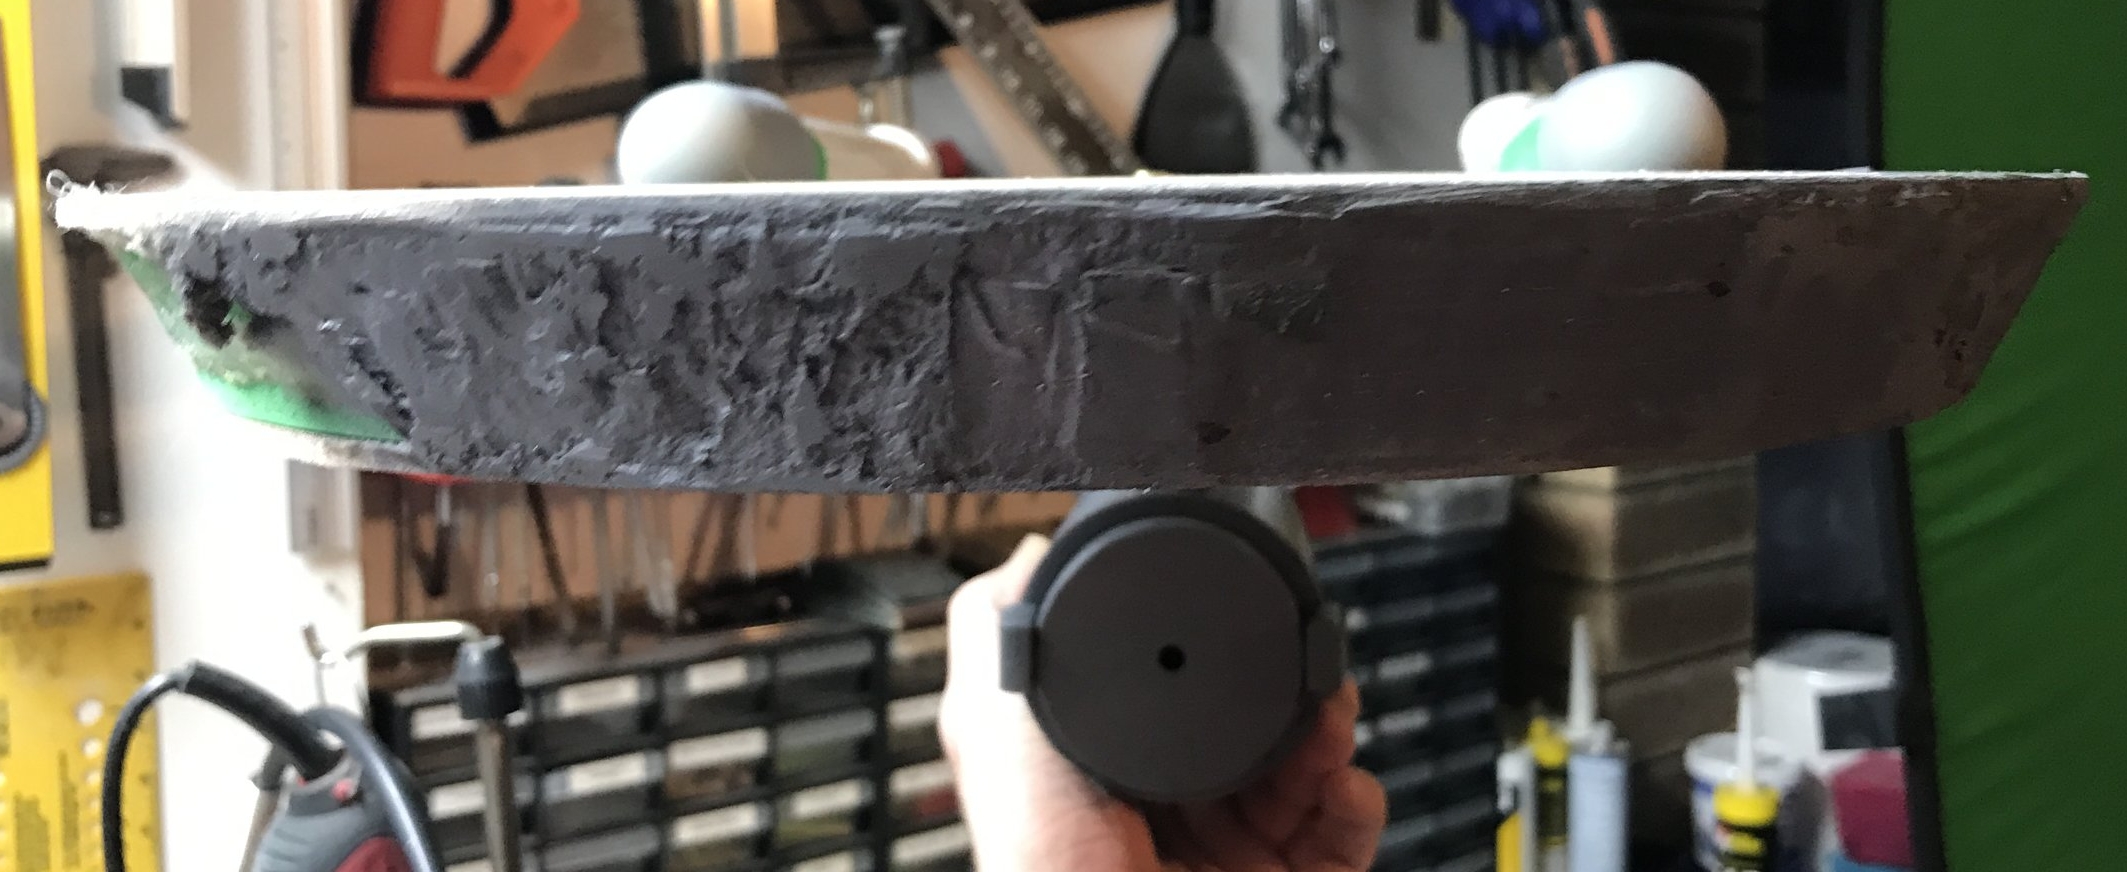
Here's a lovely front view, showing how stupidly and ridiculously thick the saucer is. It's already loaded with bondo, and is starting to take shape. To fix the thickness issue, I ran around the equator of the saucer with a rotary tool, tore the EVA foam spacer in half, and glued the bottom back on. Some times you just have to be brutal with these kinds of projects, and fix the fine details later. I've learned this is a really important rule to follow -- just fix it, otherwise you'll dwell on it and sweat over it, and it'll never be fixed at all.
Okay, time for a solution to the ugly nacelle problem. I wanted to make the nacelles taper gently from front to back. The idea with this project was to nail all of the big elements of geometry about the Enterprise, and the tiny details -- hopefully -- would fall into place. Tapering the engines was essential. My initial plan was to cake them in Bondo and sand them until appropriately tapered. However, that plan would have involved a billion dollars worth of Bondo (the stuff is not cheap), and would have taken several decades off my life (the stuff is not safe).
Instead, I found a more elegant solution. I took a length of the outer-diameter PVC pipe and sliced it into quarters, then used the four quartered panels to taper the engine from front to back. A bit of Bondo in the gaps, and we have an engine. Or two.
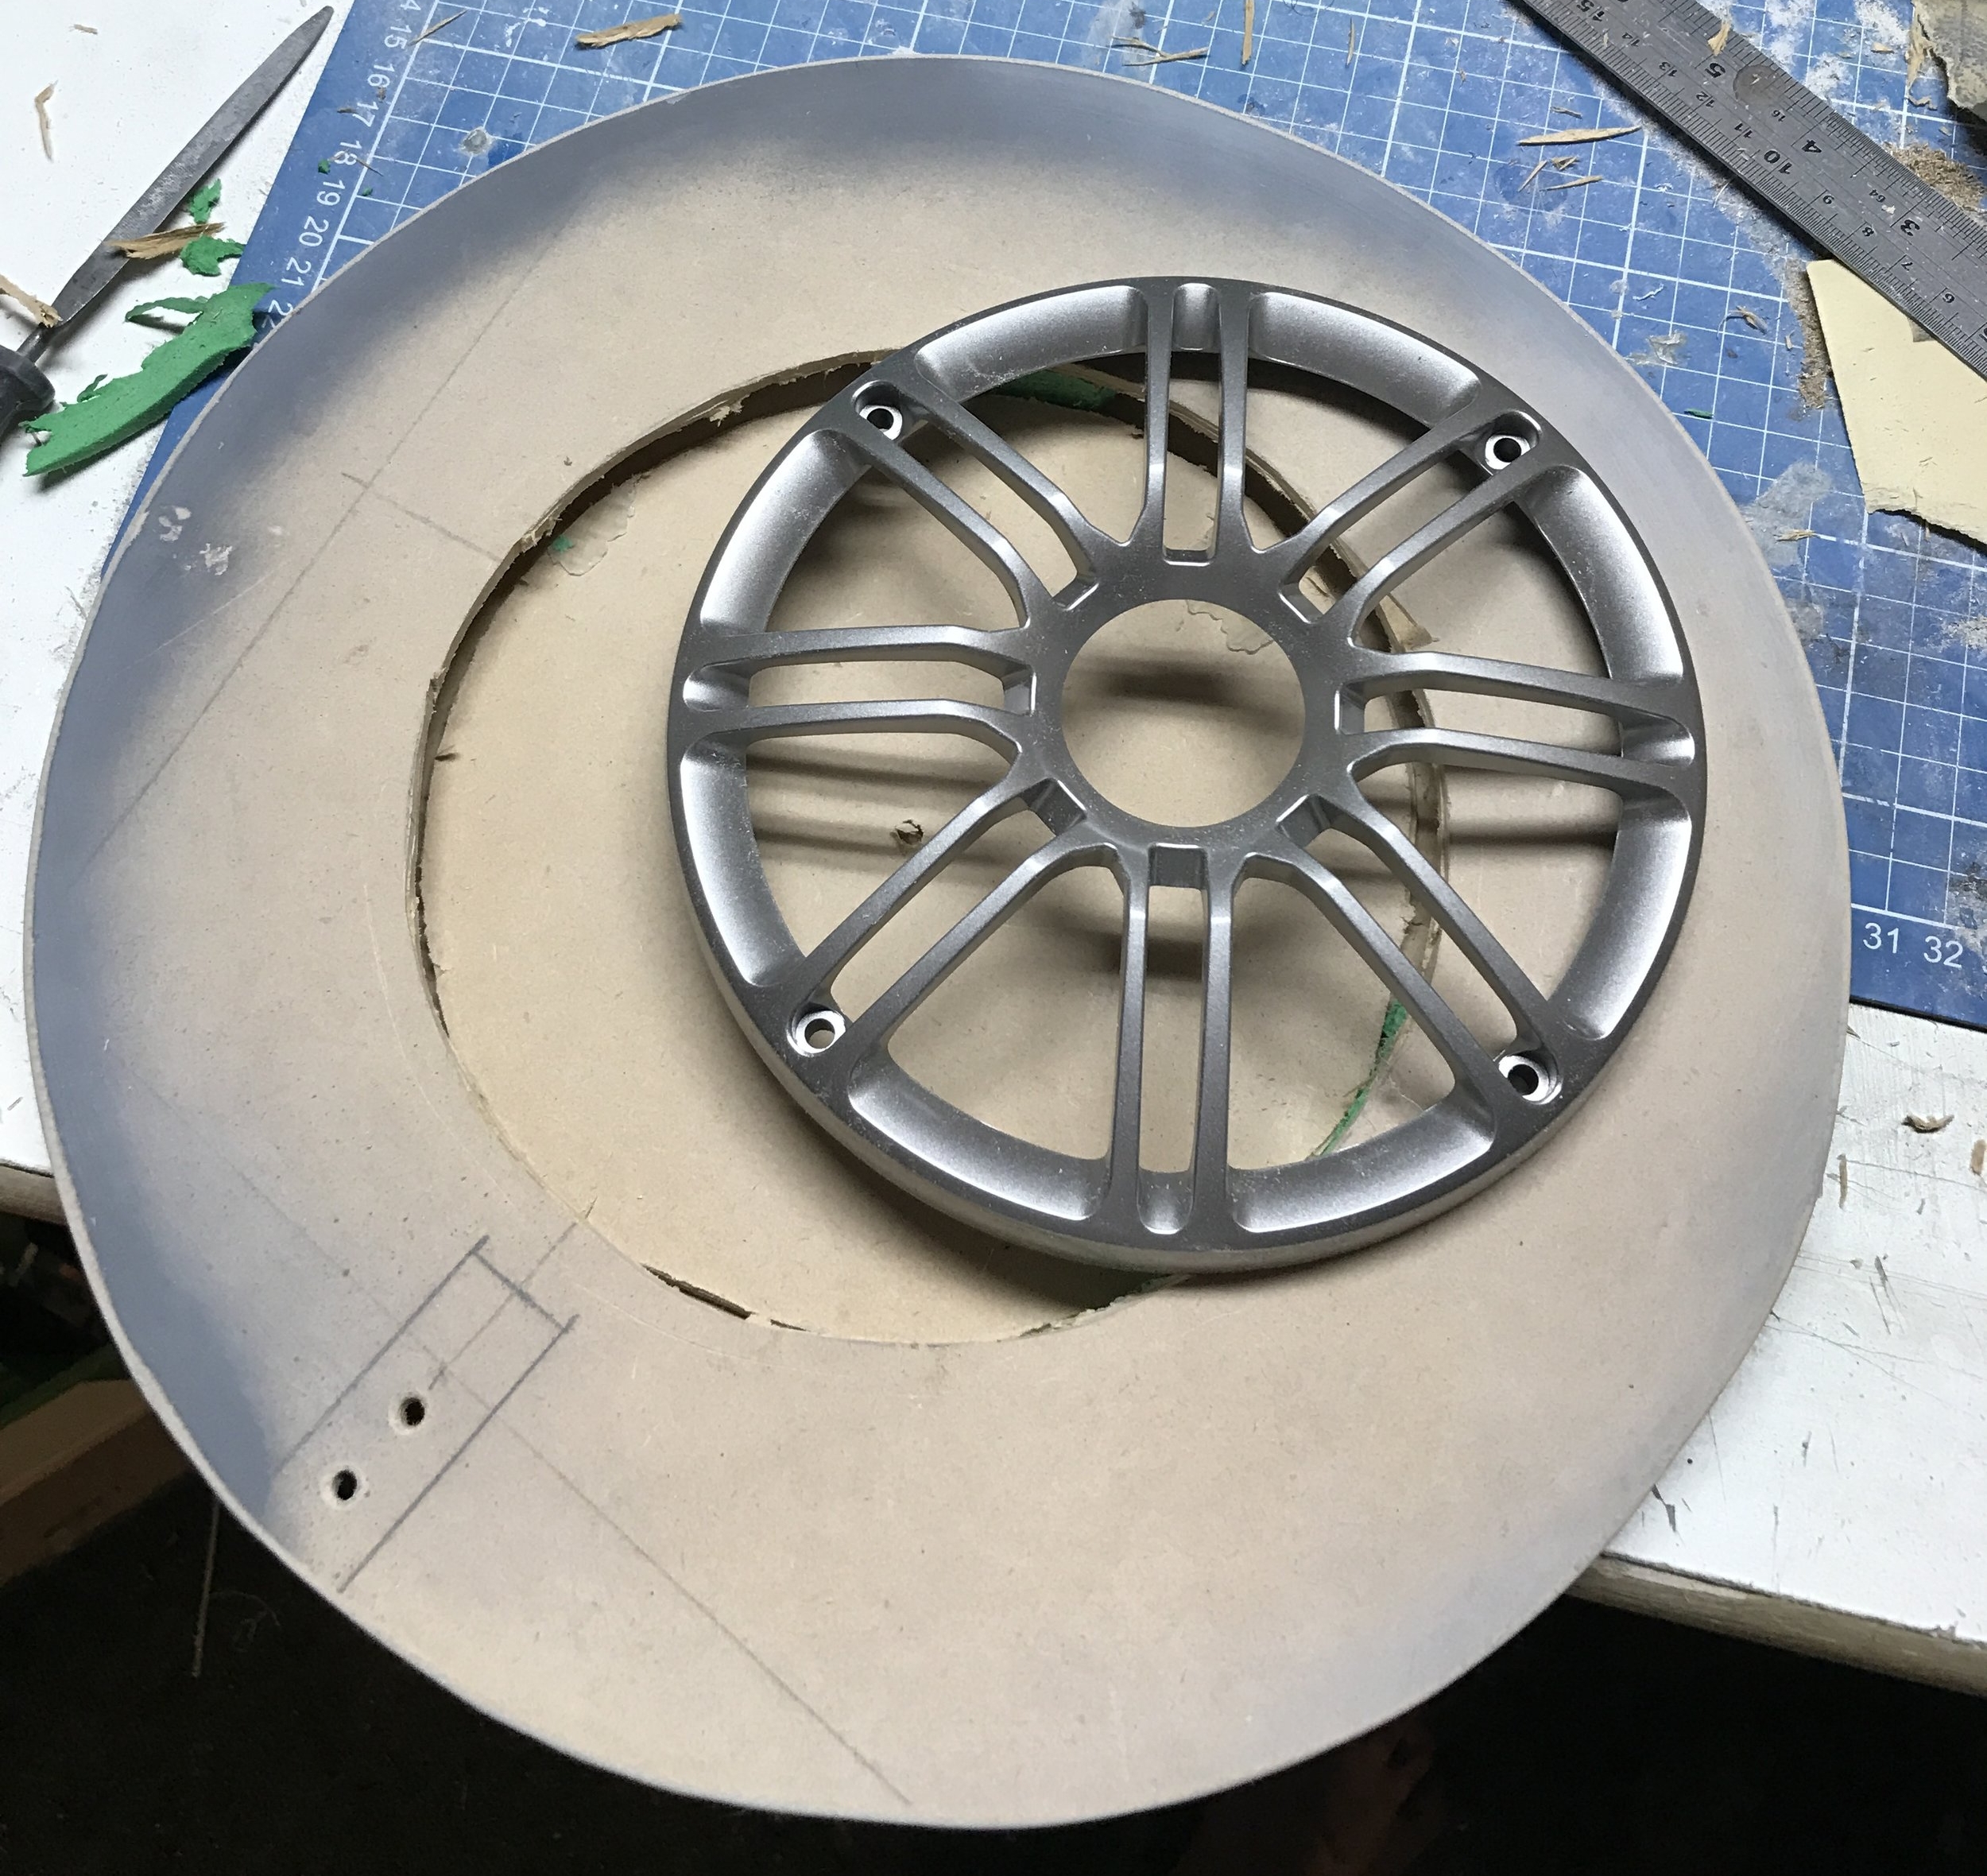
I had no plan for how to create the raised section of the saucer. Instead, I went rummaging around in the various boxes of junk I keep in the hopes of one day solving problems like this. I found a speaker grille from a cheap car stereo, which quite nicely replicates the shape of the saucer hump.
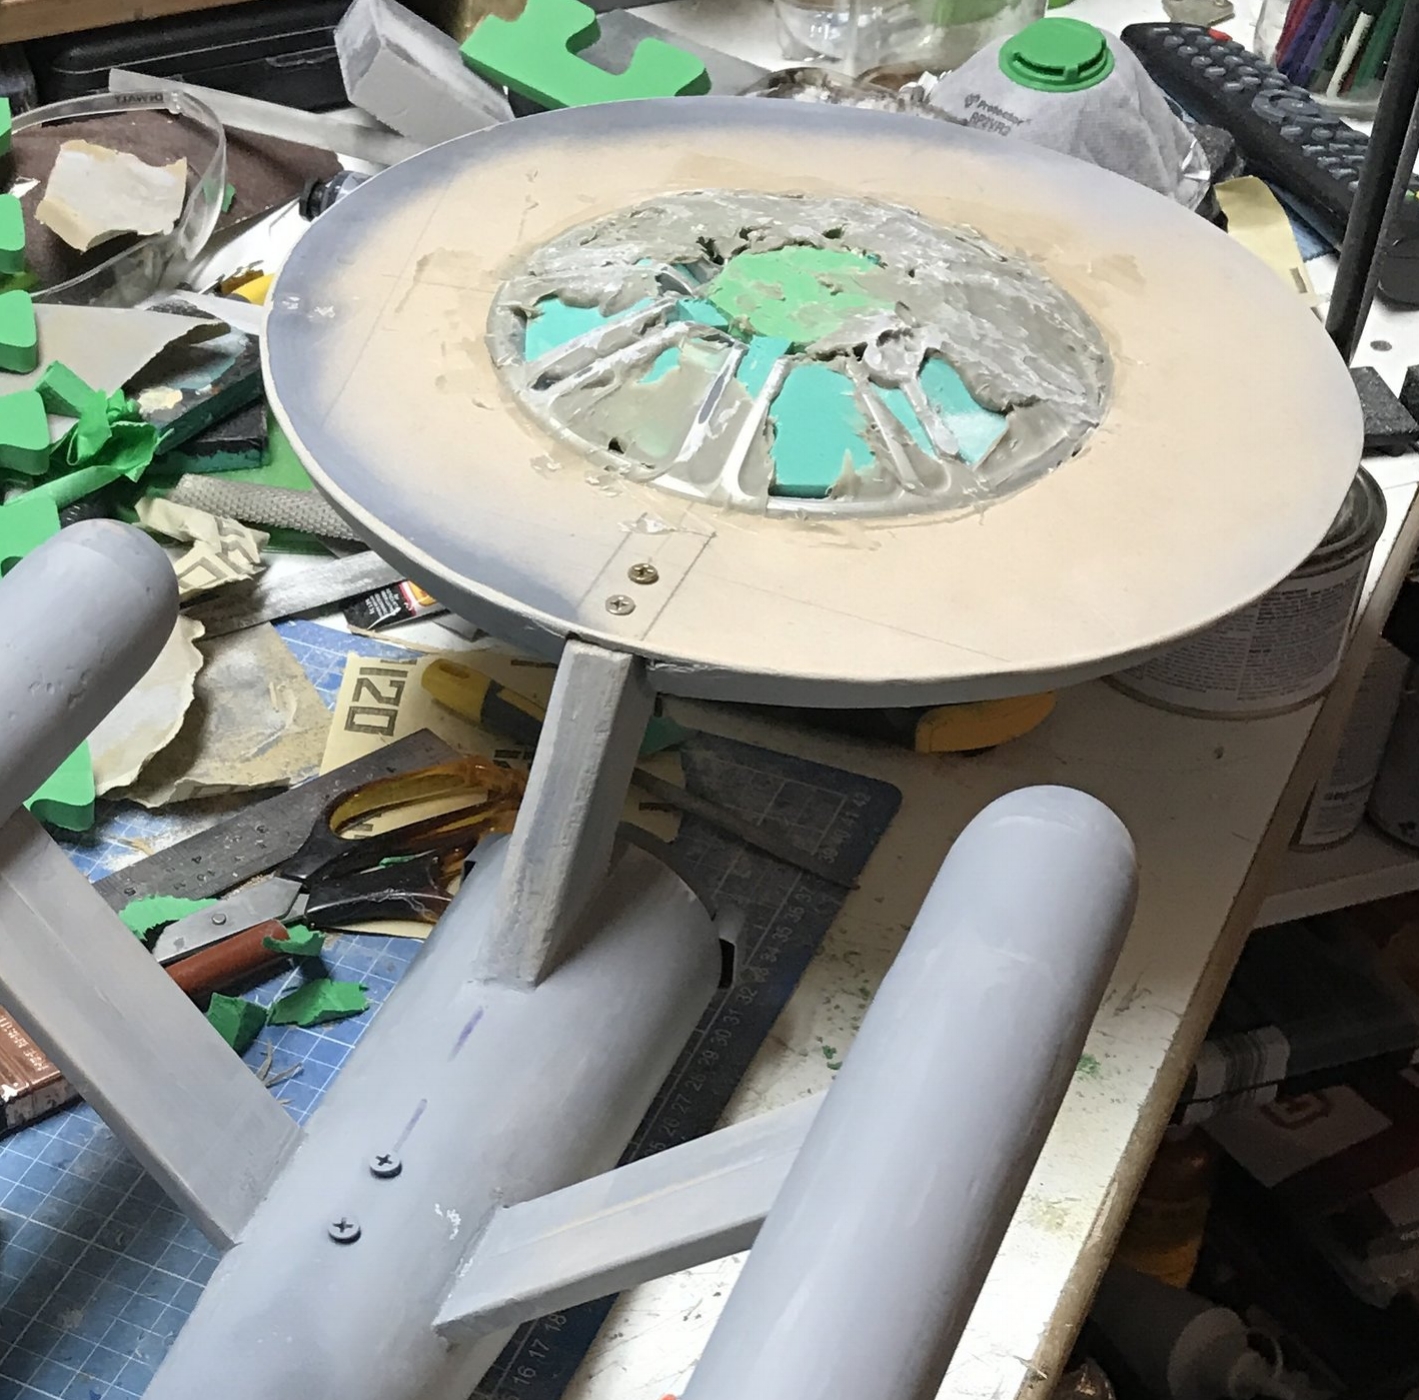
After insetting the speaker grille into the top of the saucer, I packed the holes in it with EVA foam off-cuts to prevent filler wastage, and started filling the surface with Bondo. It took quite a bit. It was not particularly fun. It worked out okay in the end, though.
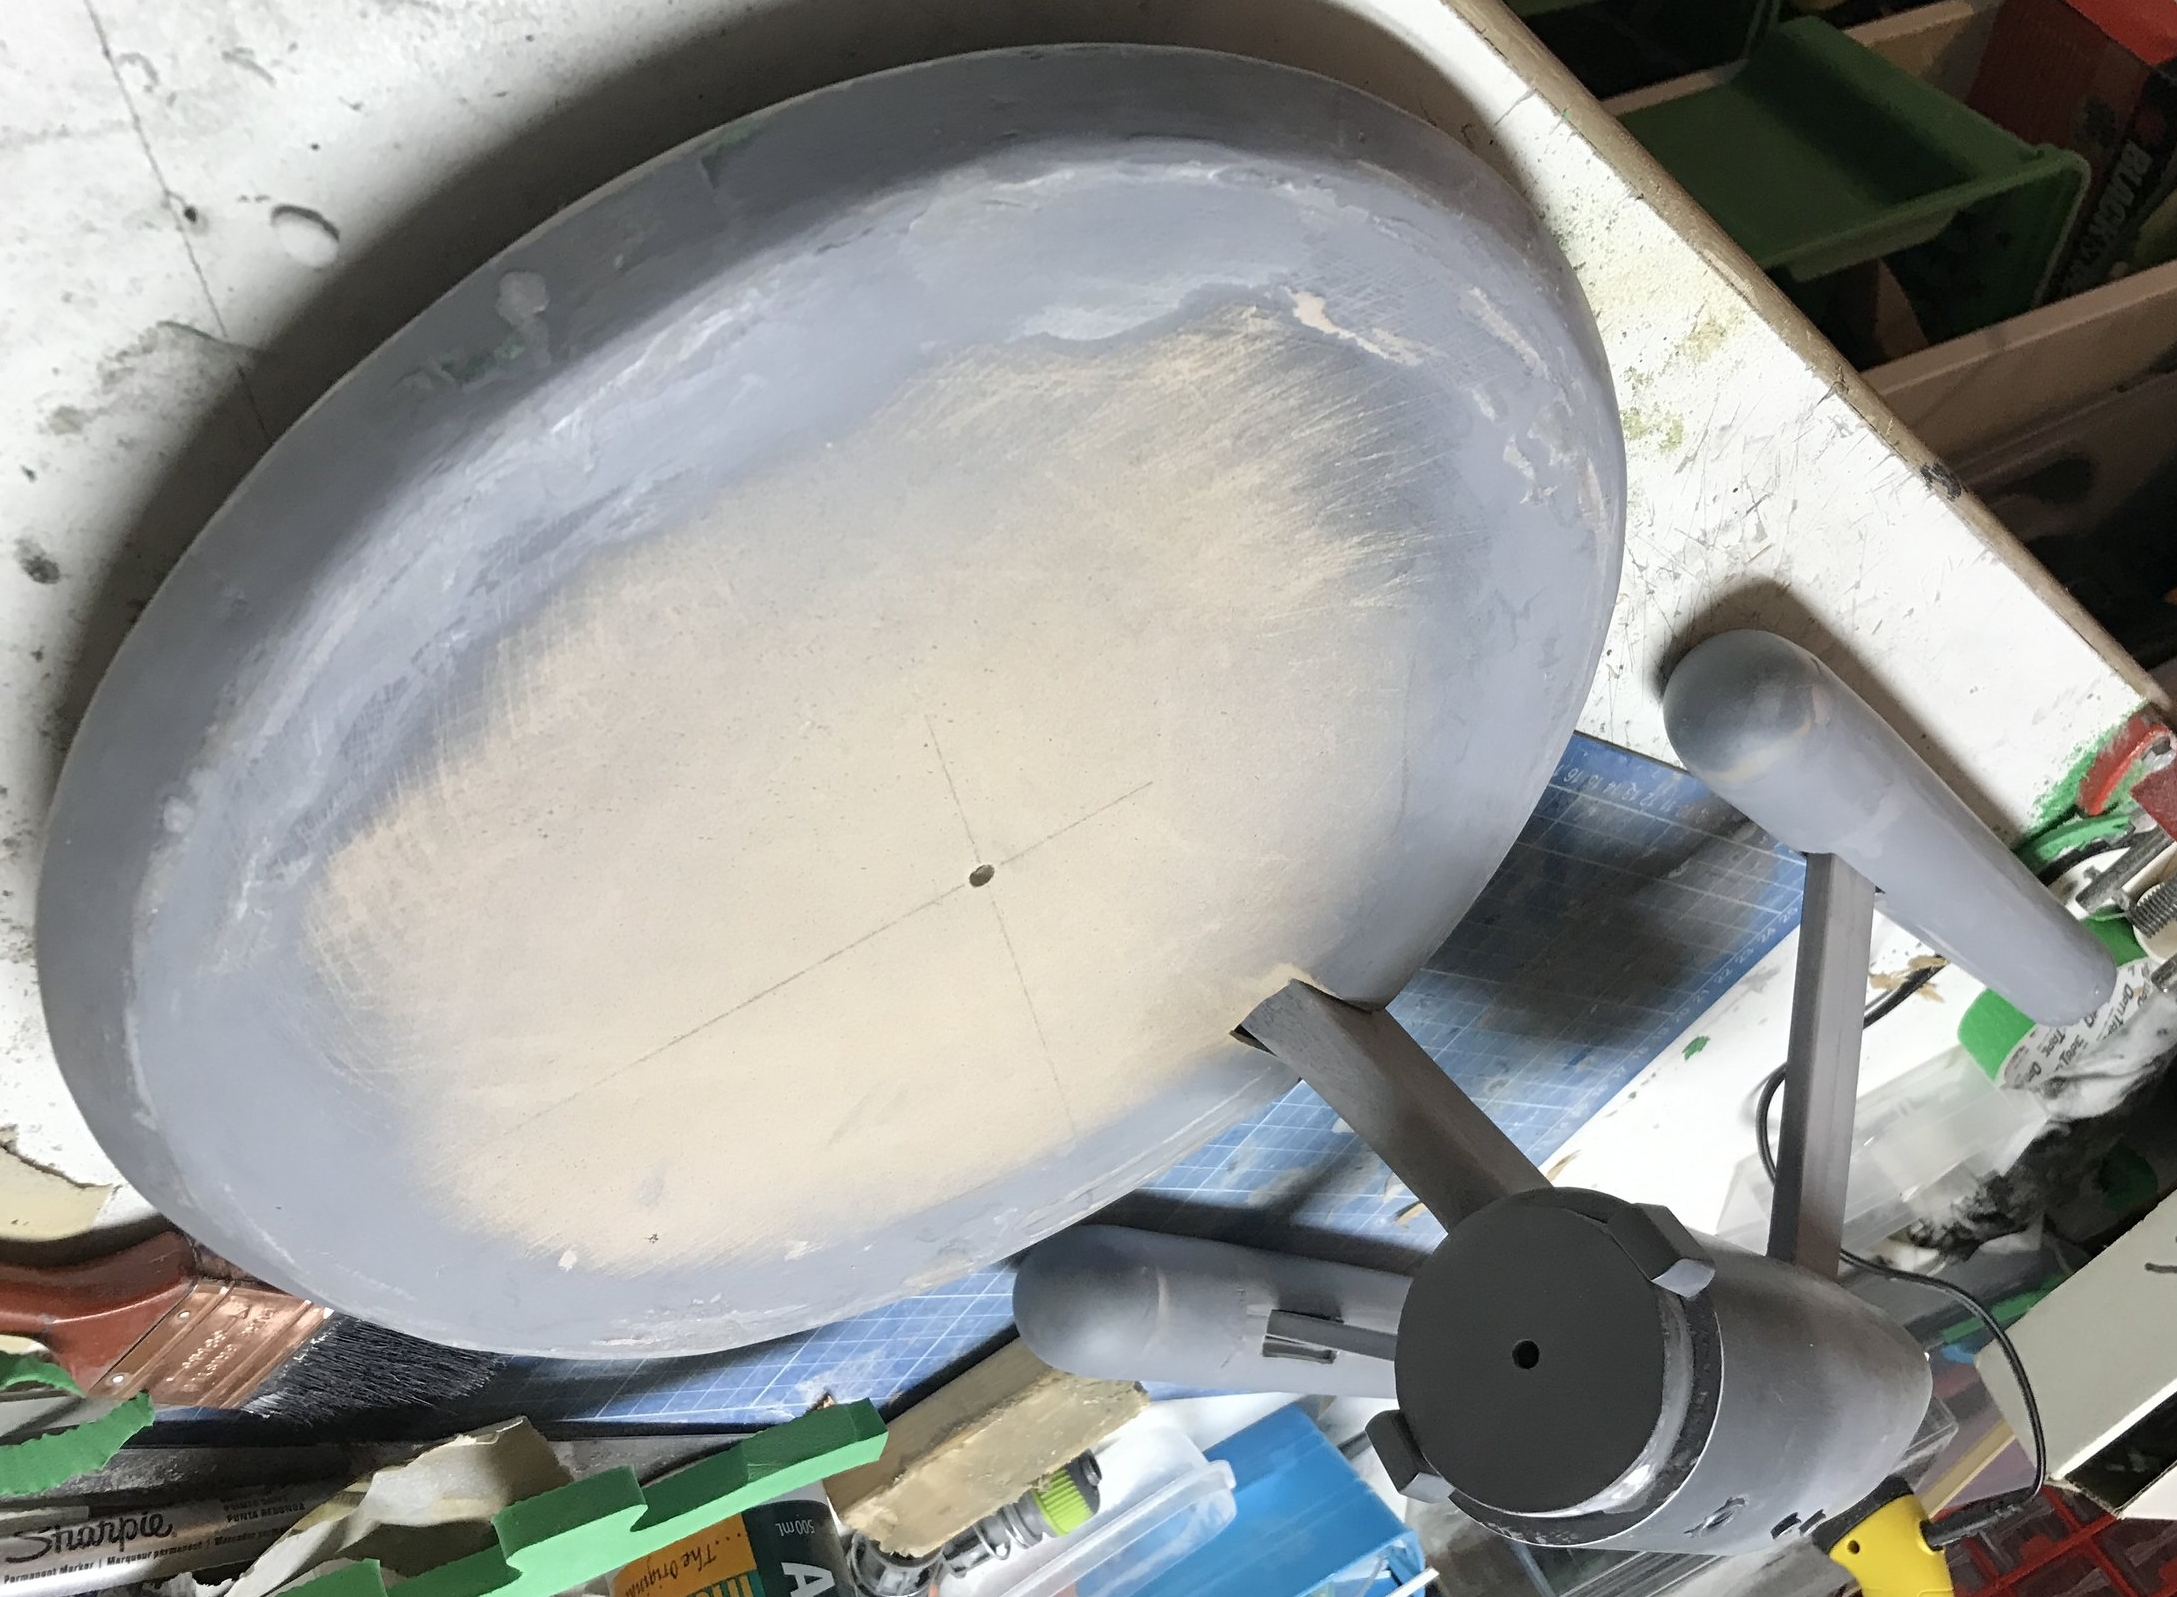
An upside-down photo of the Enterprise on the workbench. The deflector dish location has now been somewhat fixed up -- a piece of PVC pipe, some acrylic sheet, a couple of plastic lids from USB thumb drives. The underside of the saucer remains undetailed, I have not found a solution at this point to create the hump on the bottom.
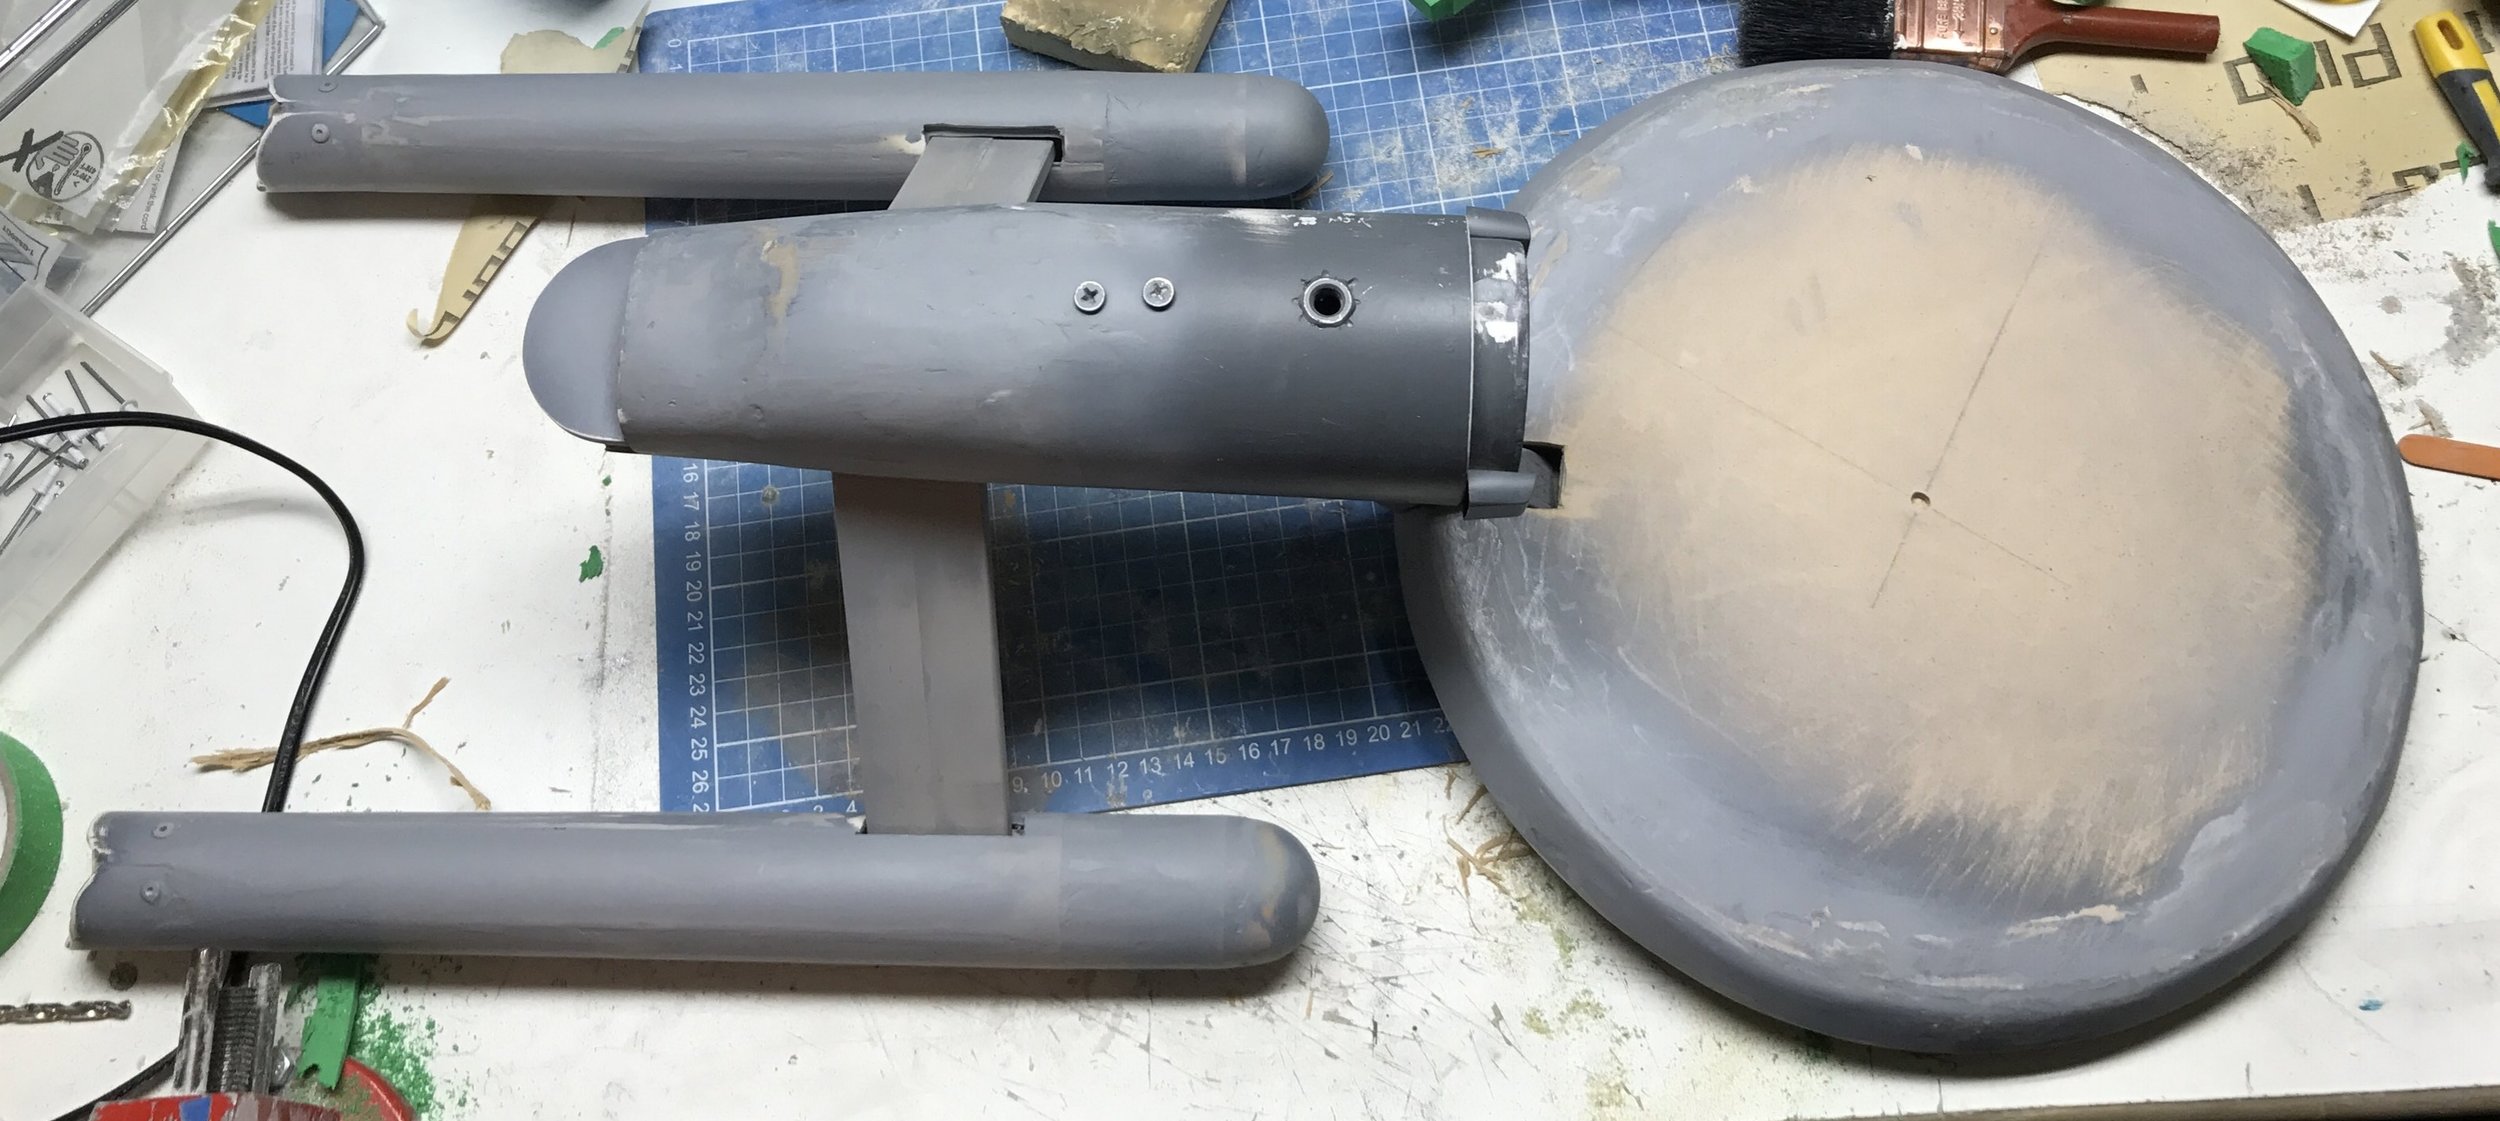
Here's the underside of the ship at this point. Not much to see here, apart from the mounting nut, two screws that I have no intention of trying to hide (they hold the bottom of the neck in place) and some obvious issues with the angle of the deflector area and the saucer mounting point.

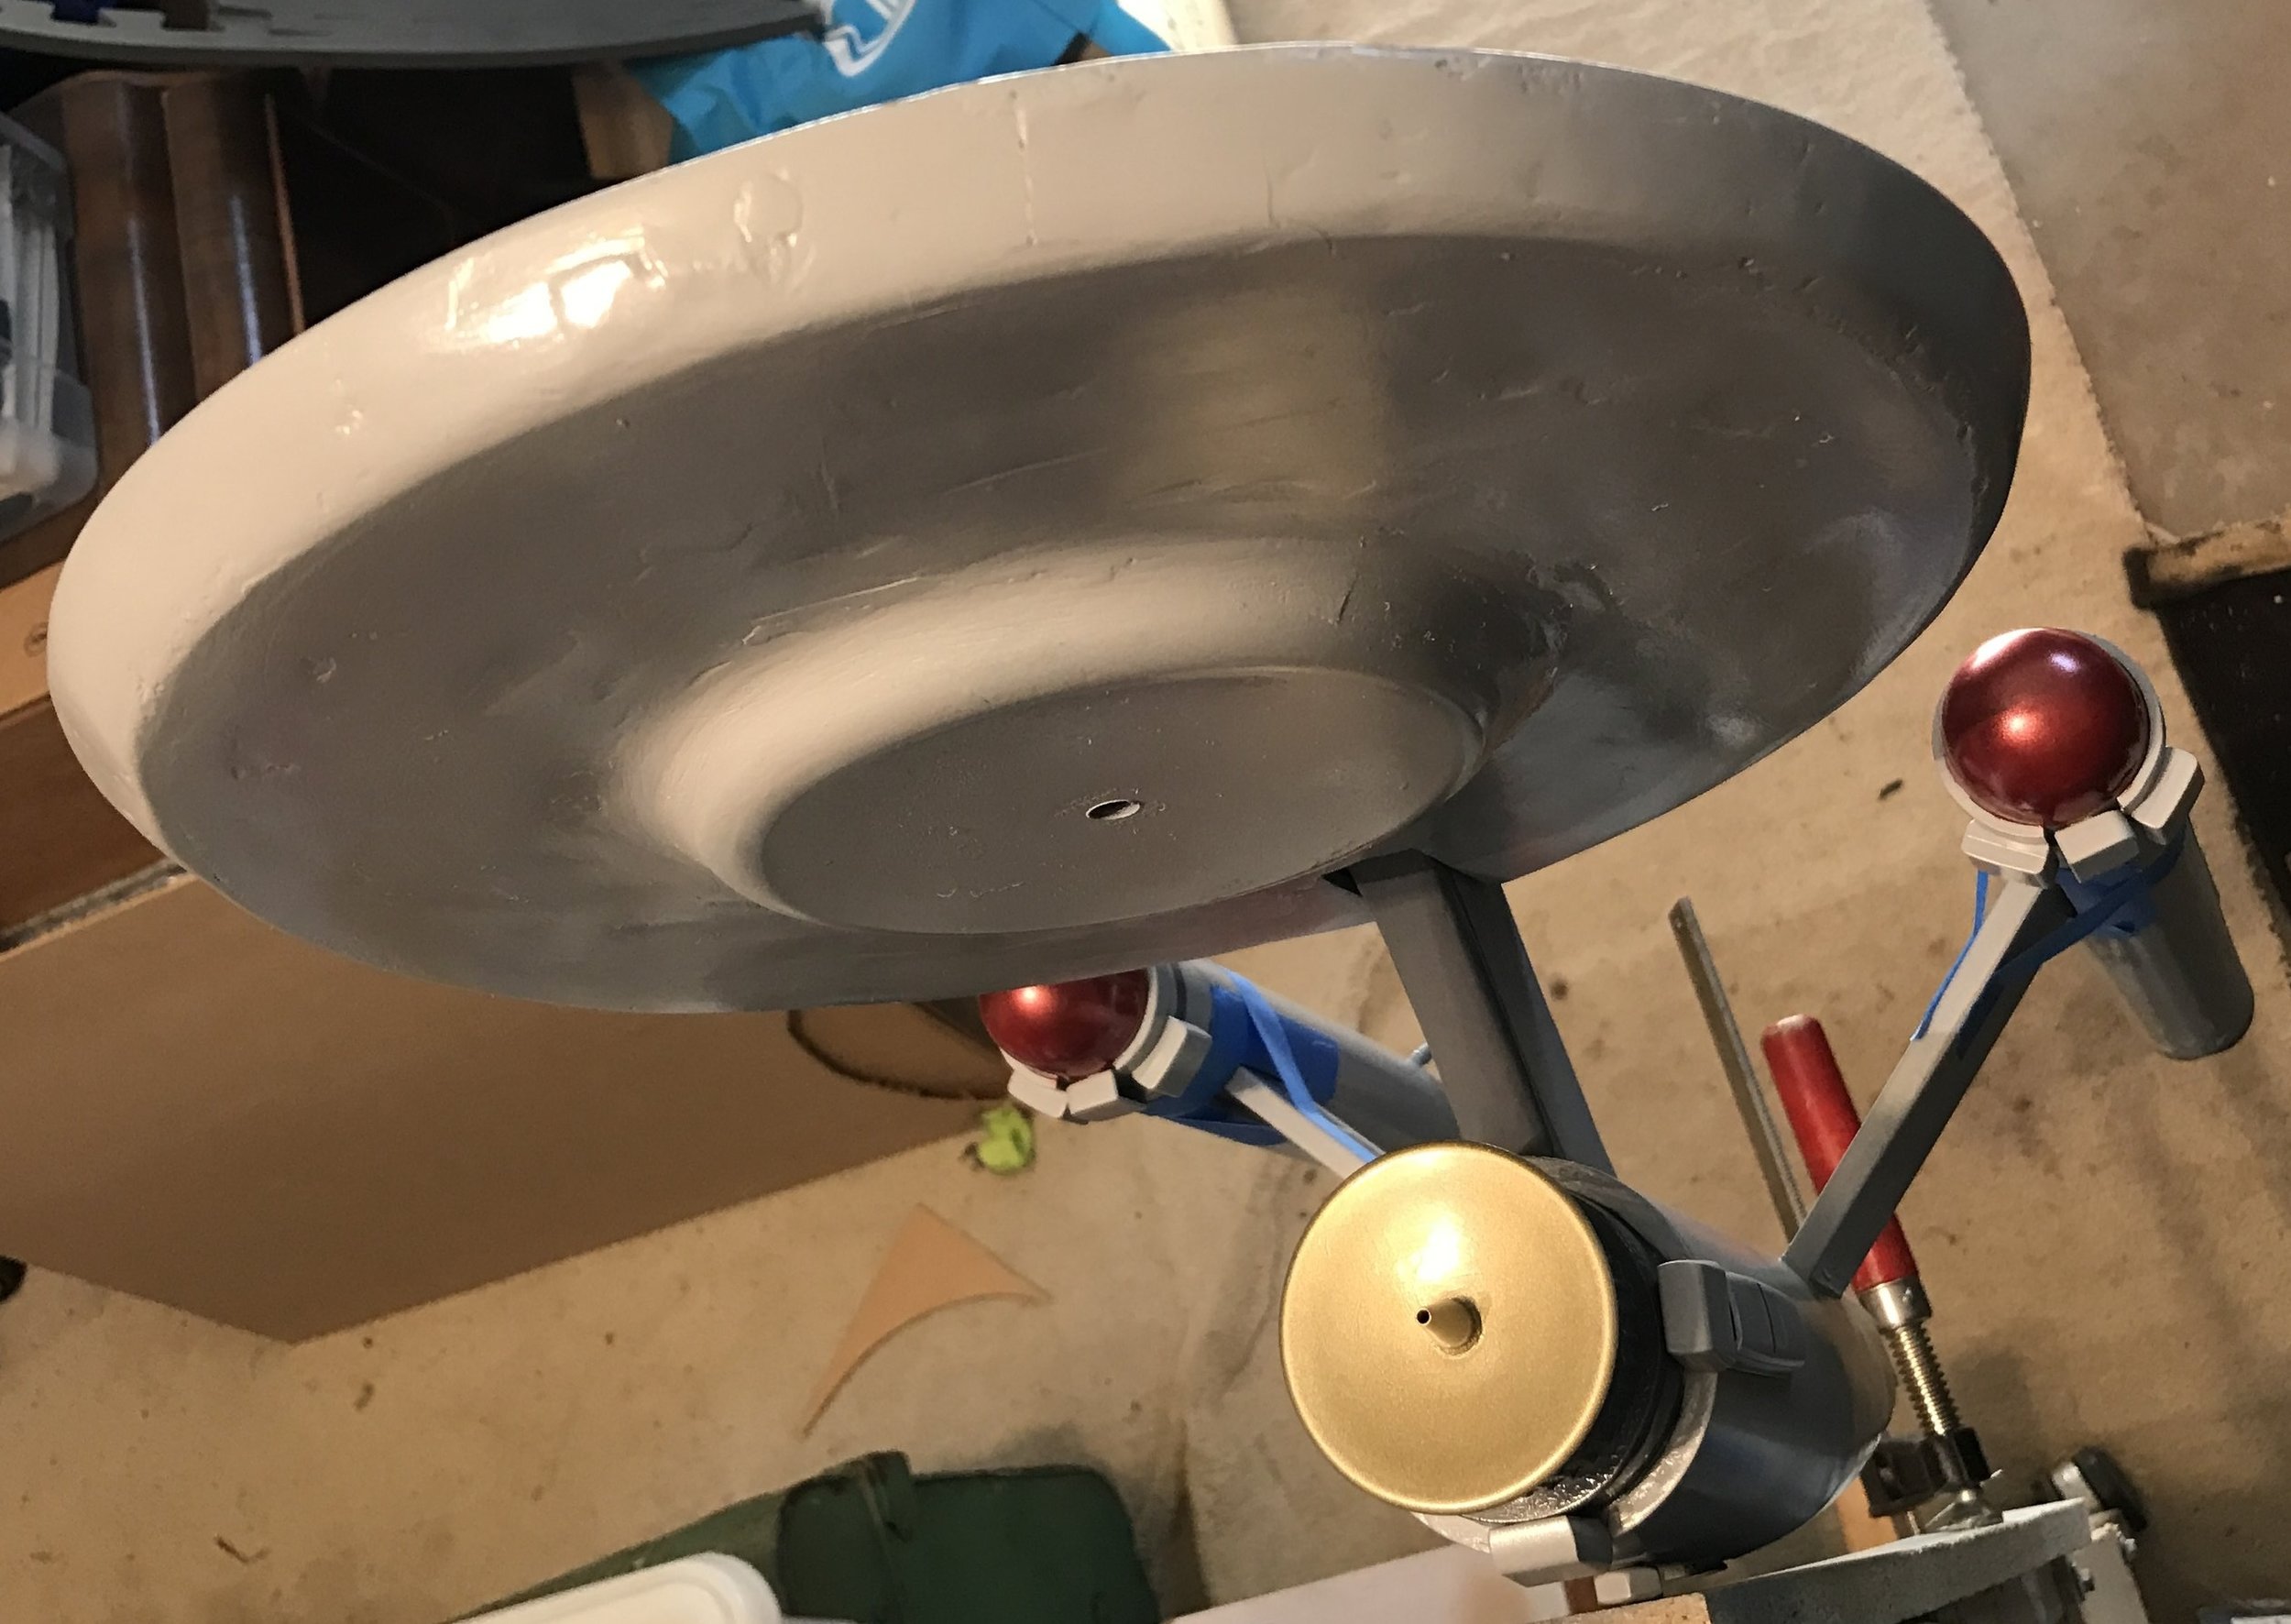
Speaking of the deflector dish...here's my elegant solution for that. That yellow thing is the bottom of a plastic champagne glass. It's a tiny bit big, but this whole project is a tiny bit inaccurate, so I'm not losing any sleep over it. I am slightly concerned about that very obvious angle discrepancy, the front of the engineering hull doesn't exactly appear flat. Oh, well. We'll press on.

While we're in the party supplies section of the department store, we'd better grab some bendy straws. While not the most robust items to make starship parts from, I got this idea from the insanely incredible work of The Nylon Gag on the RPF, who used bendy straws as part of the detail on his scratchbuilt delivery ship, which means they're totally legal building materials. You can find his use of them here, but do go back to the beginning of the build thread, and do dedicate an entire afternoon to it because you won't stop looking at it. The thing is an absolute work of art.
So, the "handles" on the nacelles are bendy straws, tucked into each other, and homed in little holes in the engines. Incidentally, straws are 5mm across. If you were wondering. I was.
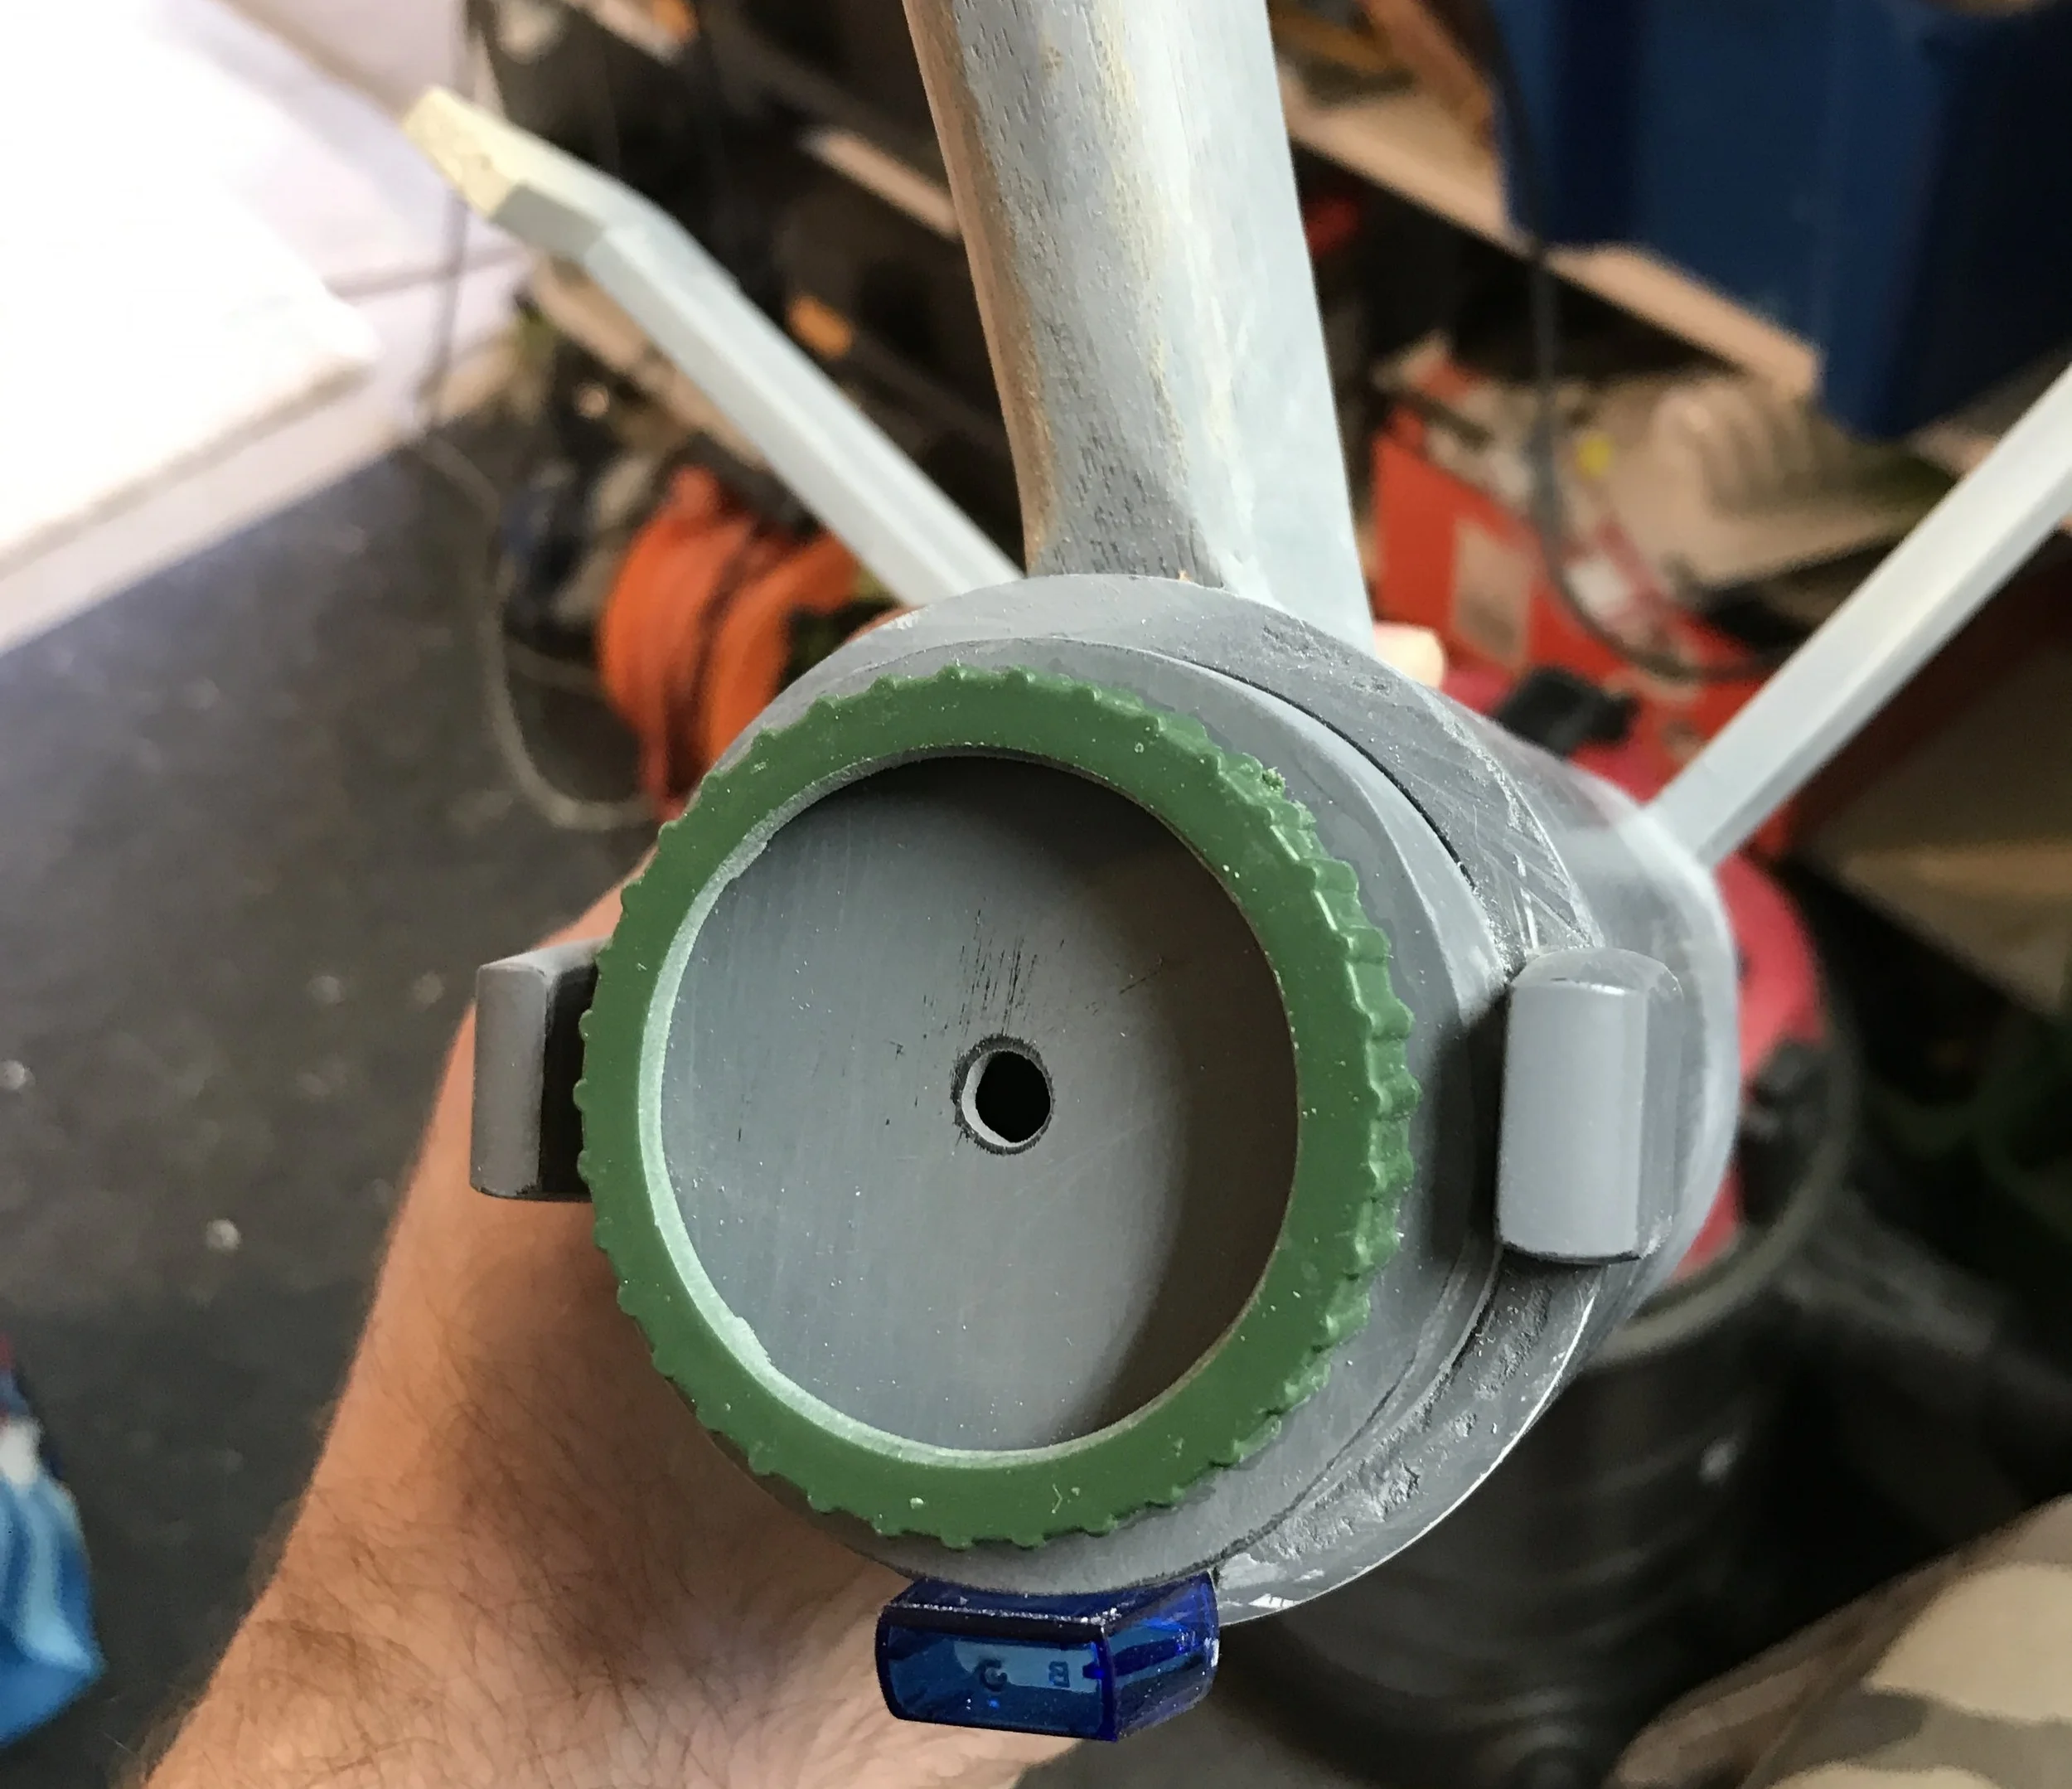
Here's some more detail on the deflector dish mounting area. The green thing is the wheel of a toy cannon from one of those bags of plastic army toys. I stripped the spokes from the wheel, and the textured outer edge seemed appropriate for the deflector region. You can also see another USB thumb drive lid at the bottom, which has not been primered yet,
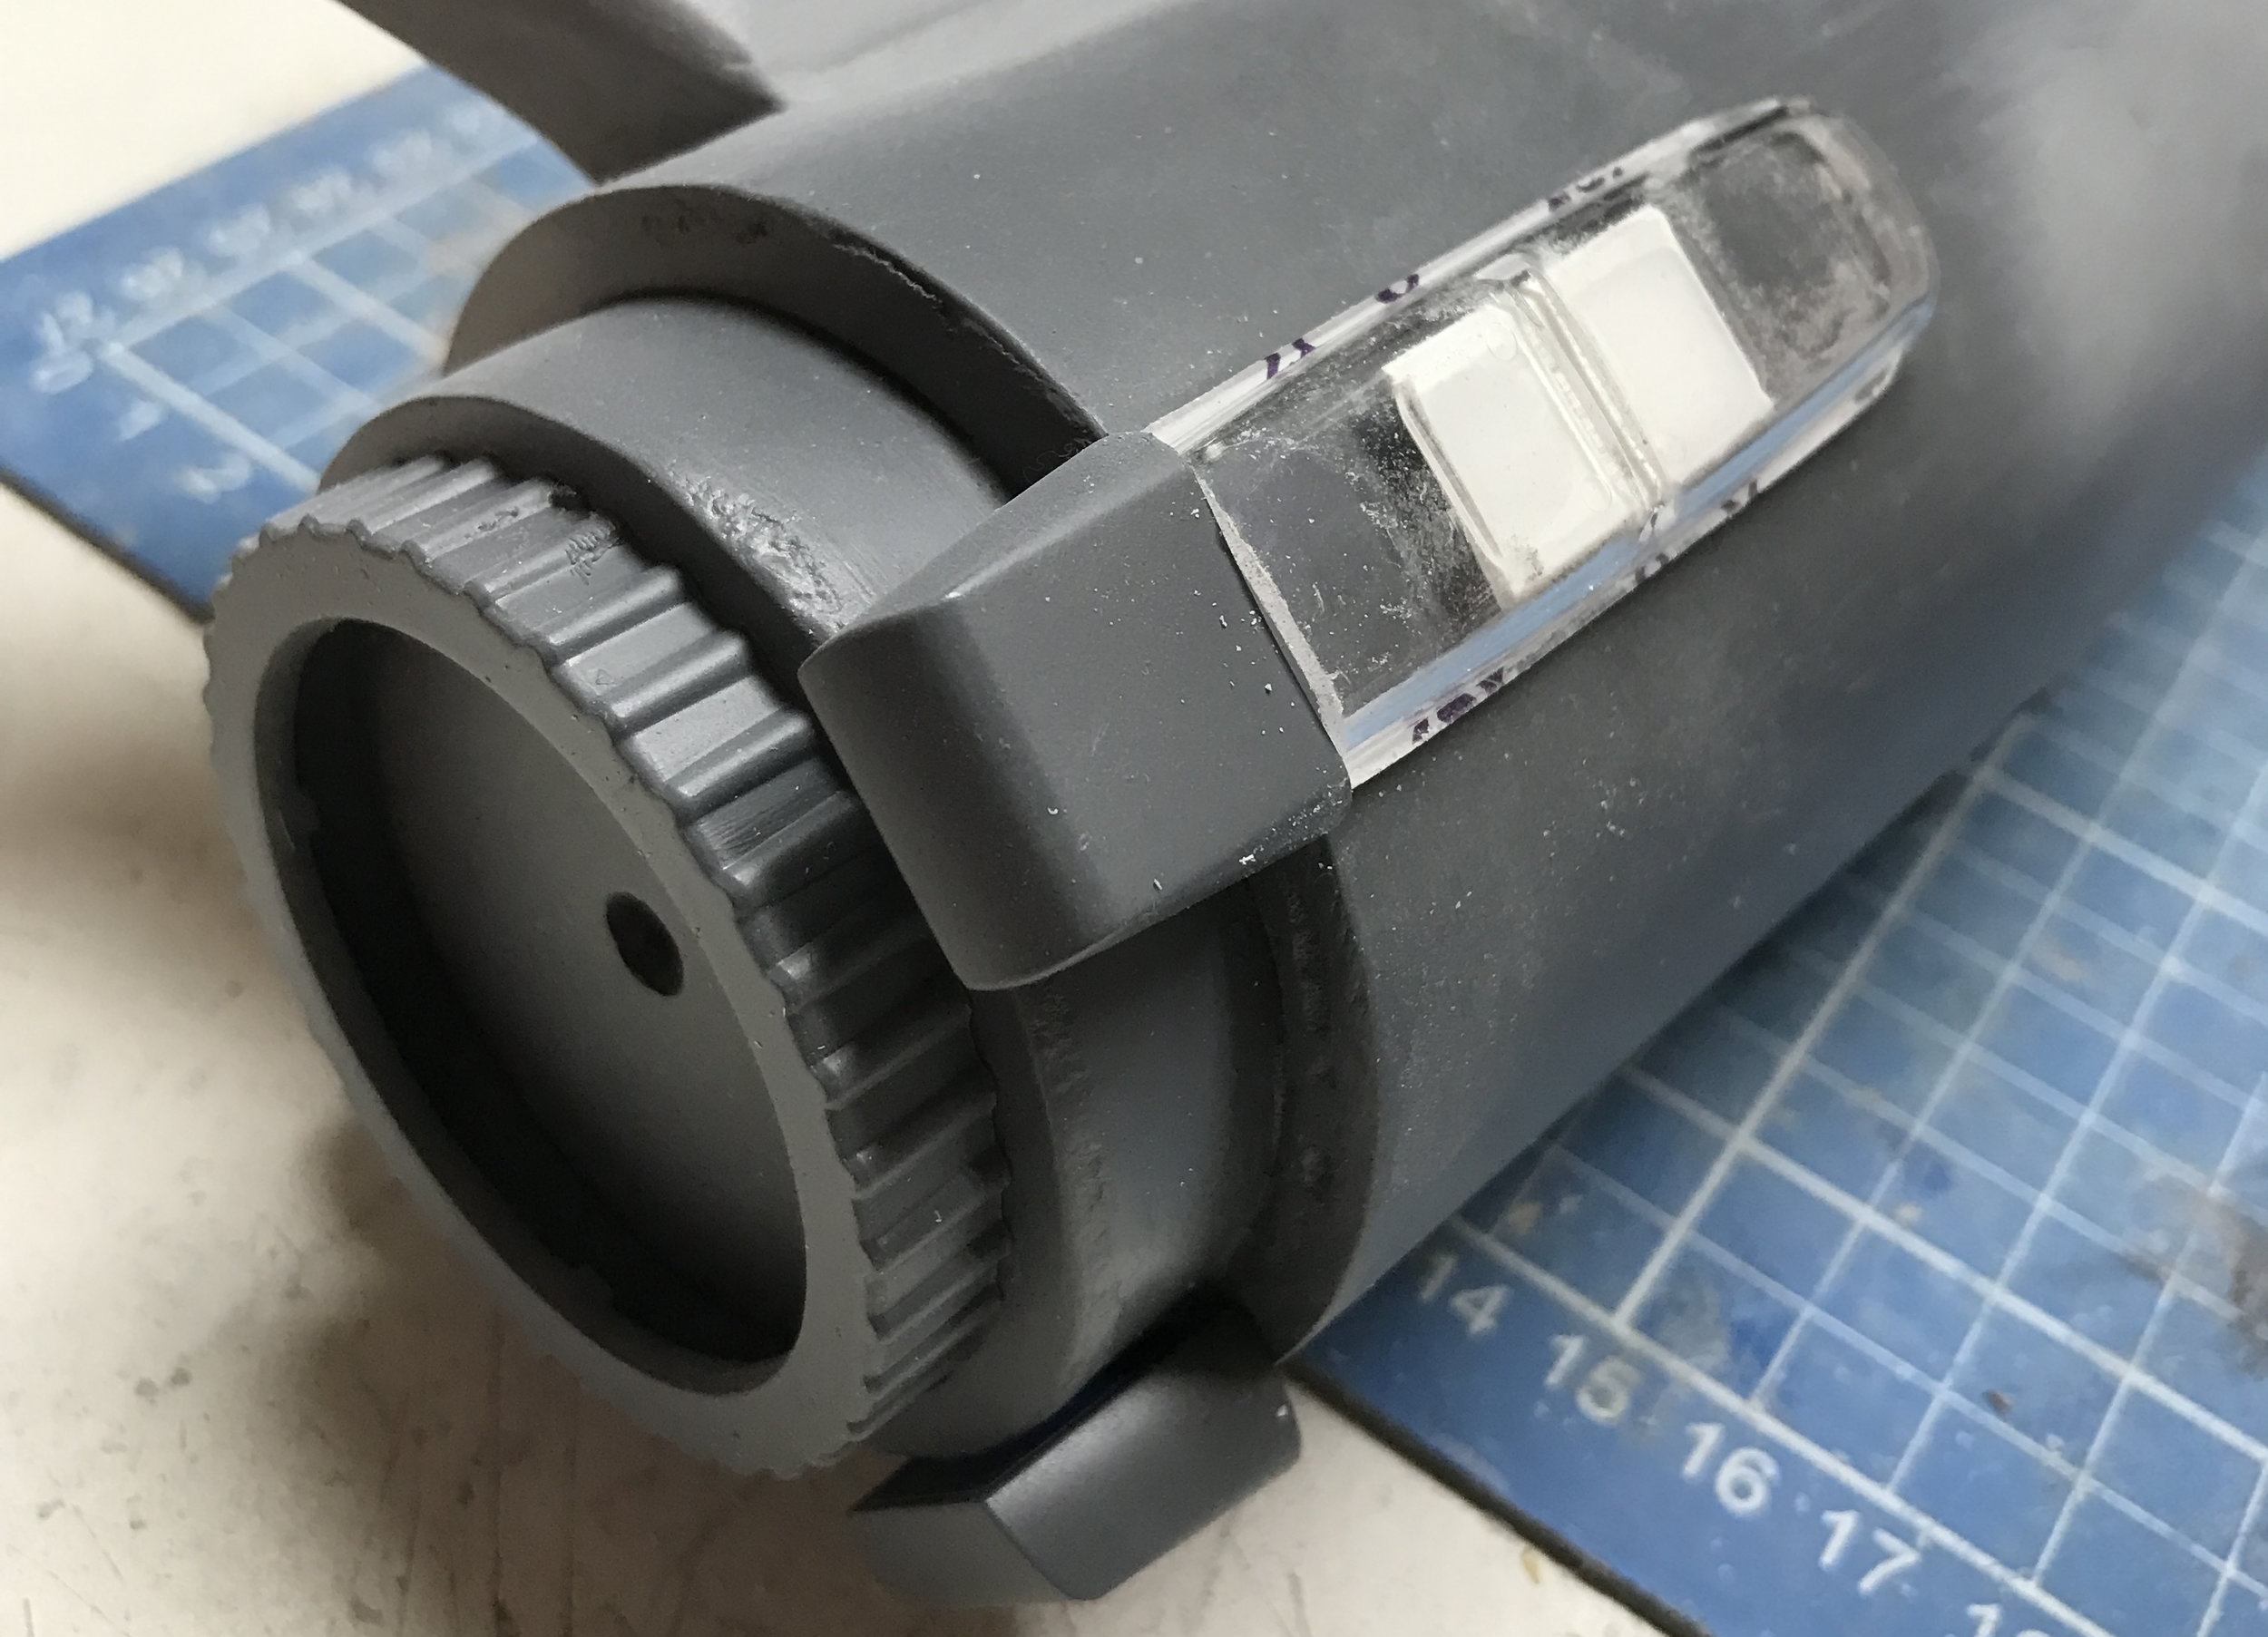
More deflector area detail, now with primer and a post-it note flag dispenser attached. This thing is wildly inaccurate. Don't judge me.
PAINT. We have paint. The body, engines, saucer, etc, will all be a light grey, some details (like the back end of the engine above) will be a dark grey, and there will be scatterings of silver, gold, and obviously -- metallic red. Dulux make some splendid spray paints, in their Duramax range, which dry within about 15 minutes, and can be handled, masked and recoated within an hour. Very cool.
You can't quite tell in the above photo, but the nacelle tips are metallic red. It's very effective.

Engineering hull, now with pale grey paint. I've had to attach the little reversed bracket pieces to the tops of the nacelle stuts, as I'd made the struts a tiny bit too short for the engines to "see" over the saucer, and I needed the little right angle to offer some security to the tubes once they're mounted on the struts. Those little pieces of wood successfully killed both of those birds with one stone. Made of wood. Not stone. That was a terrible metaphor. Also, there were two of them.
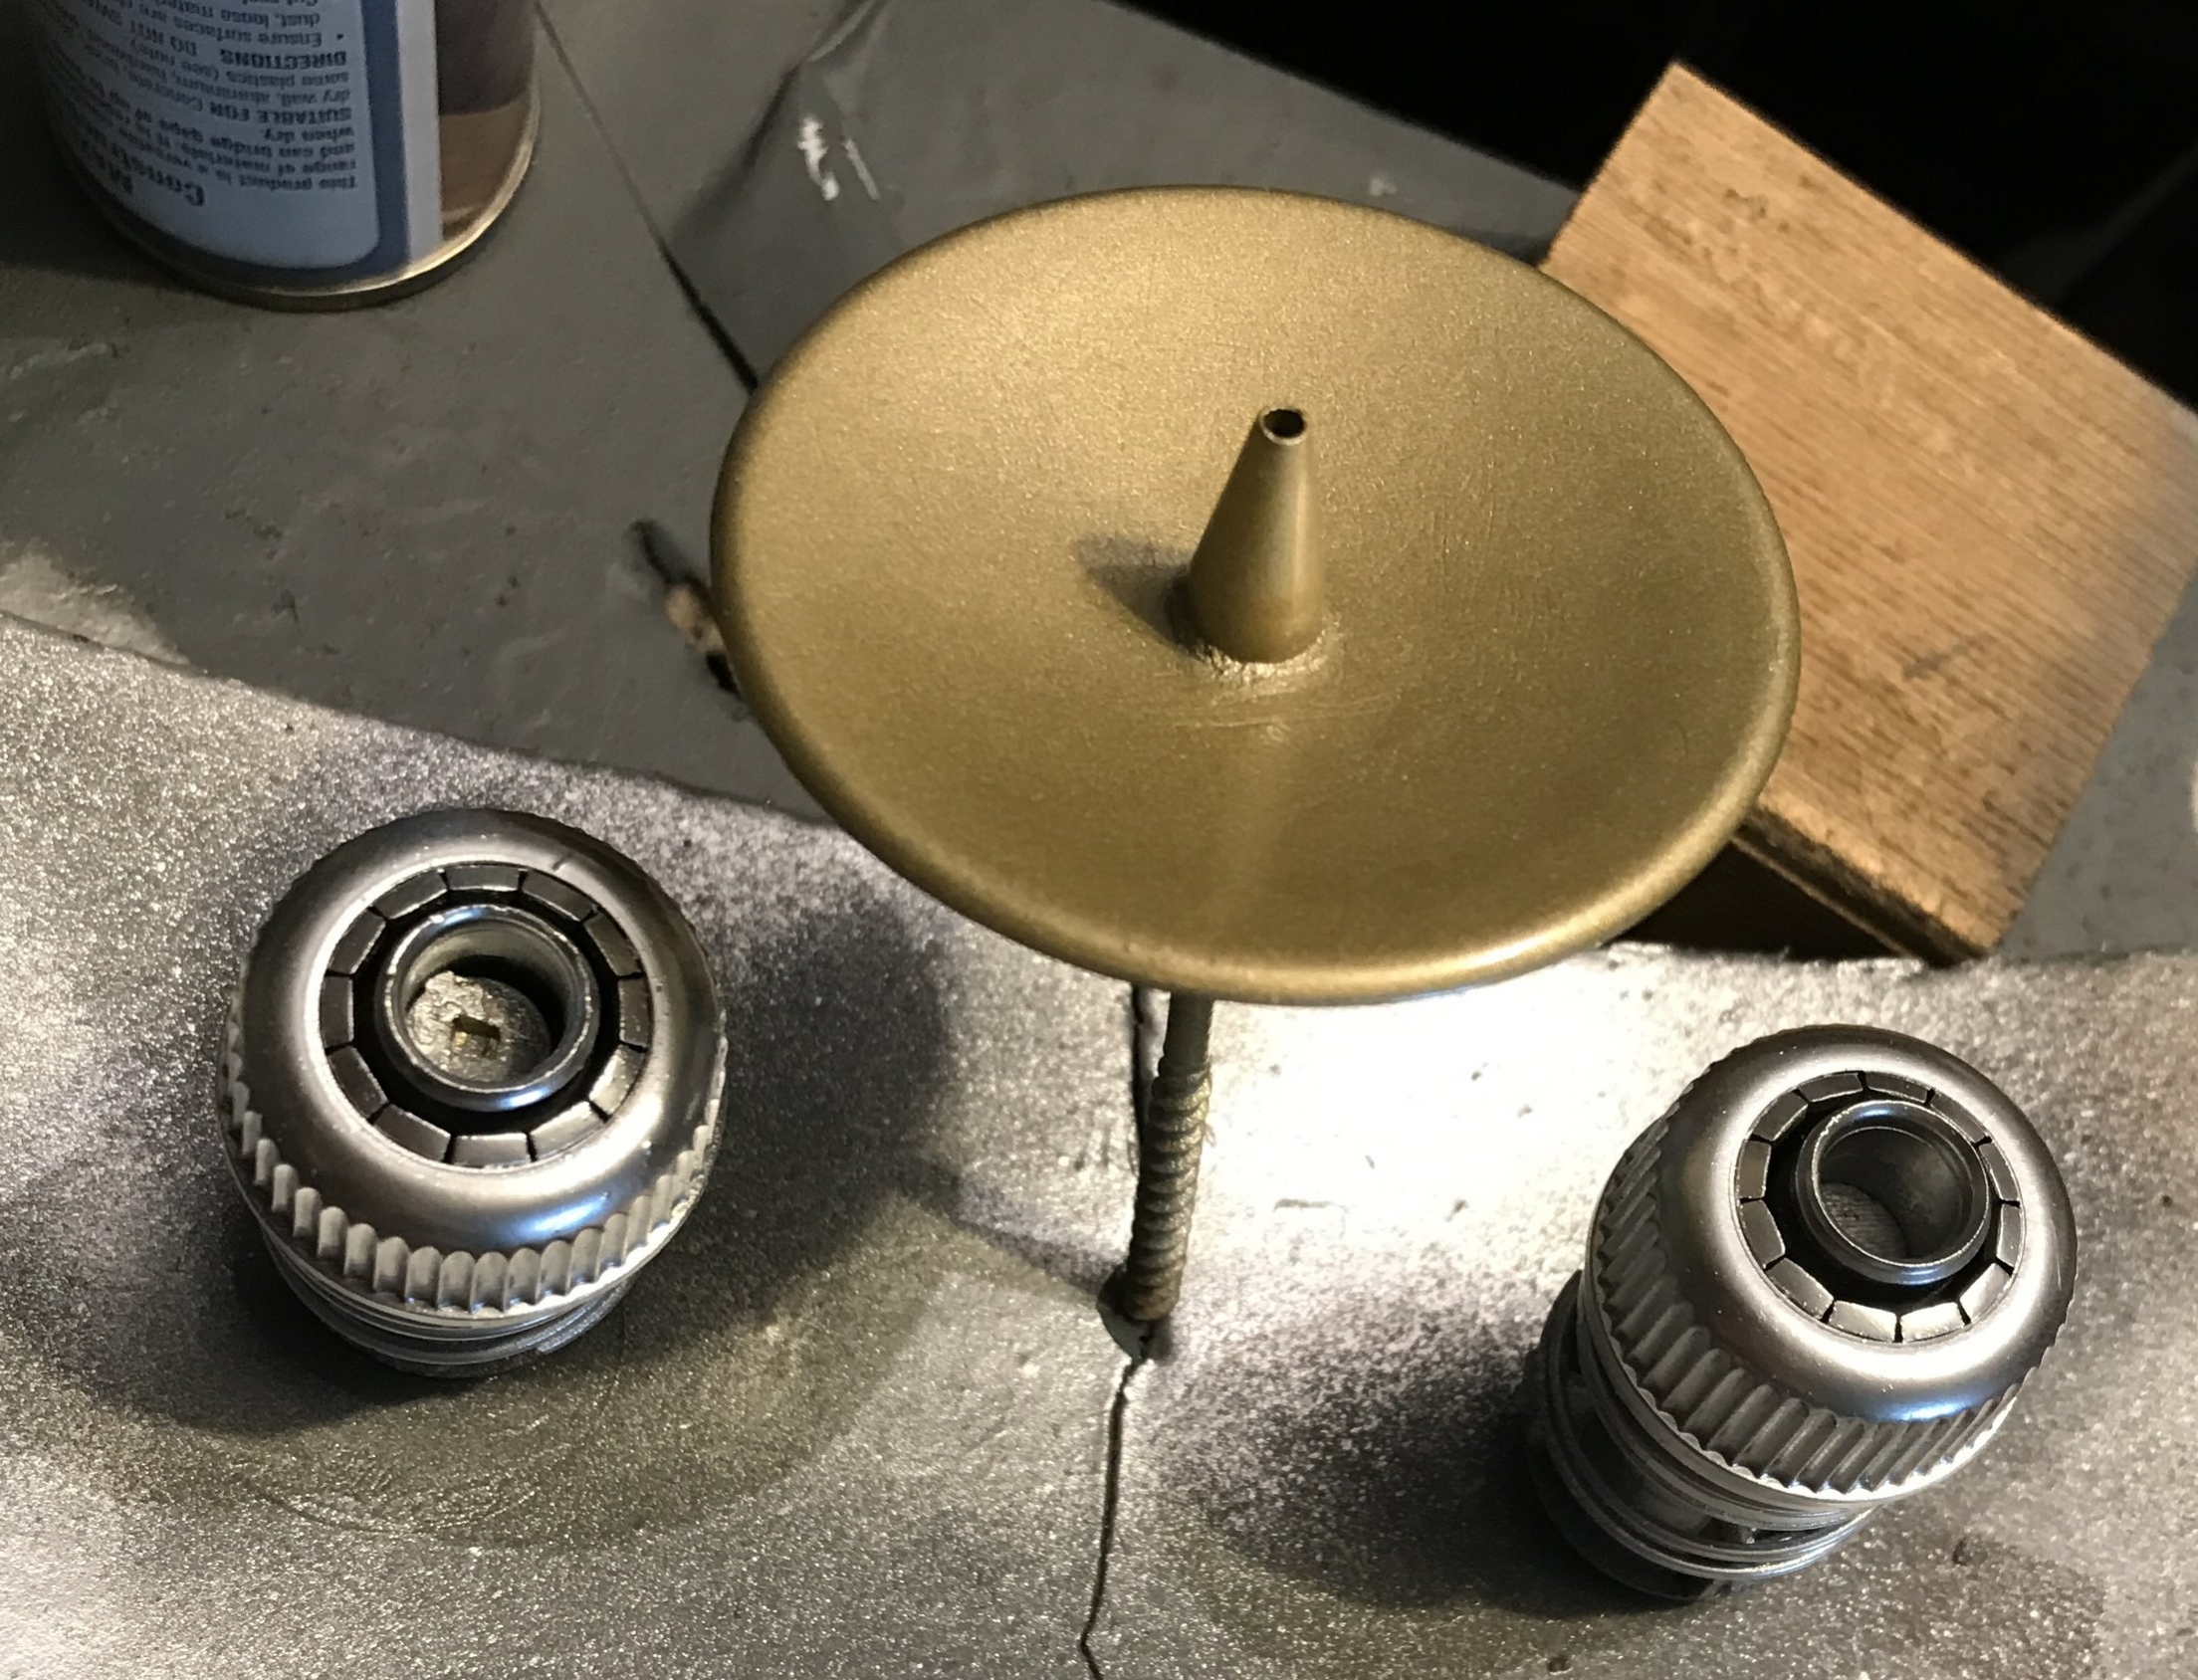
Here we have the nacelle thruster nozzles (or hose connectors, if you're so inclined), and the deflector dish. The nozzles are Krylon classic chrome, and the dish is Rustoleum gold. Just gold. Not metallic gold. Not quality gold. Crappy gold. It should really be copper or bronze, but the only can of copper paint I have is a) hammered finish, and b) clogged like a clogged thing. Hammered finish I could deal with, but unfortunately it's one of the Rustoleum cans with the trigger nozzle thing on top, which is not removable and can't be unclogged. So, long story short, the dish is gold. And I'm okay with that.

Masking, masking, masking. Always buy the blue tape. Spend the money. Buy the good stuff. I like to use the blue tape for any places where the tape comes in contact with existing paint, then I buy a whole bunch of cheap crappy white masking tape to use to hold all of the paper sheets and whatnot over the rest of the job. Don't use the blue stuff if you don't have to, but ALWAYS use it on paintwork.
The point of the above exercise is to create the dark square pattern inside the engine struts, and darken the front of the neck piece and the mounting area for the deflector dish.

Now THAT's a saucer. It's still looking pretty ugly, but it's a saucer. The surface has now been somewhat adequately filled with Bondo and various other filling methods. The bridge dome has been constructed. The dome is one of those LED string lights shaped like a light bulb (refer above, somewhere around the shuttle bay area), which is set inside the frame of an LED tap light (the round thing), with the pointy end of the "teardrop" shape made from one corner of the plastic box Apple distributes its headphones in. (Or used to, they appear to be packaged in more environmentally friendly cardboard, these days.)

The saucer is starting to look very much like a 1950s alien invasion, and should possibly have its own theme music, played exclusively on a theremin. I cheaped out on the bottom of the saucer, and scrounged thrift stores for an approximately accurate plastic dish, shaved the edge off it, mounted it and filled the gap with a generous scraping of Bondo.
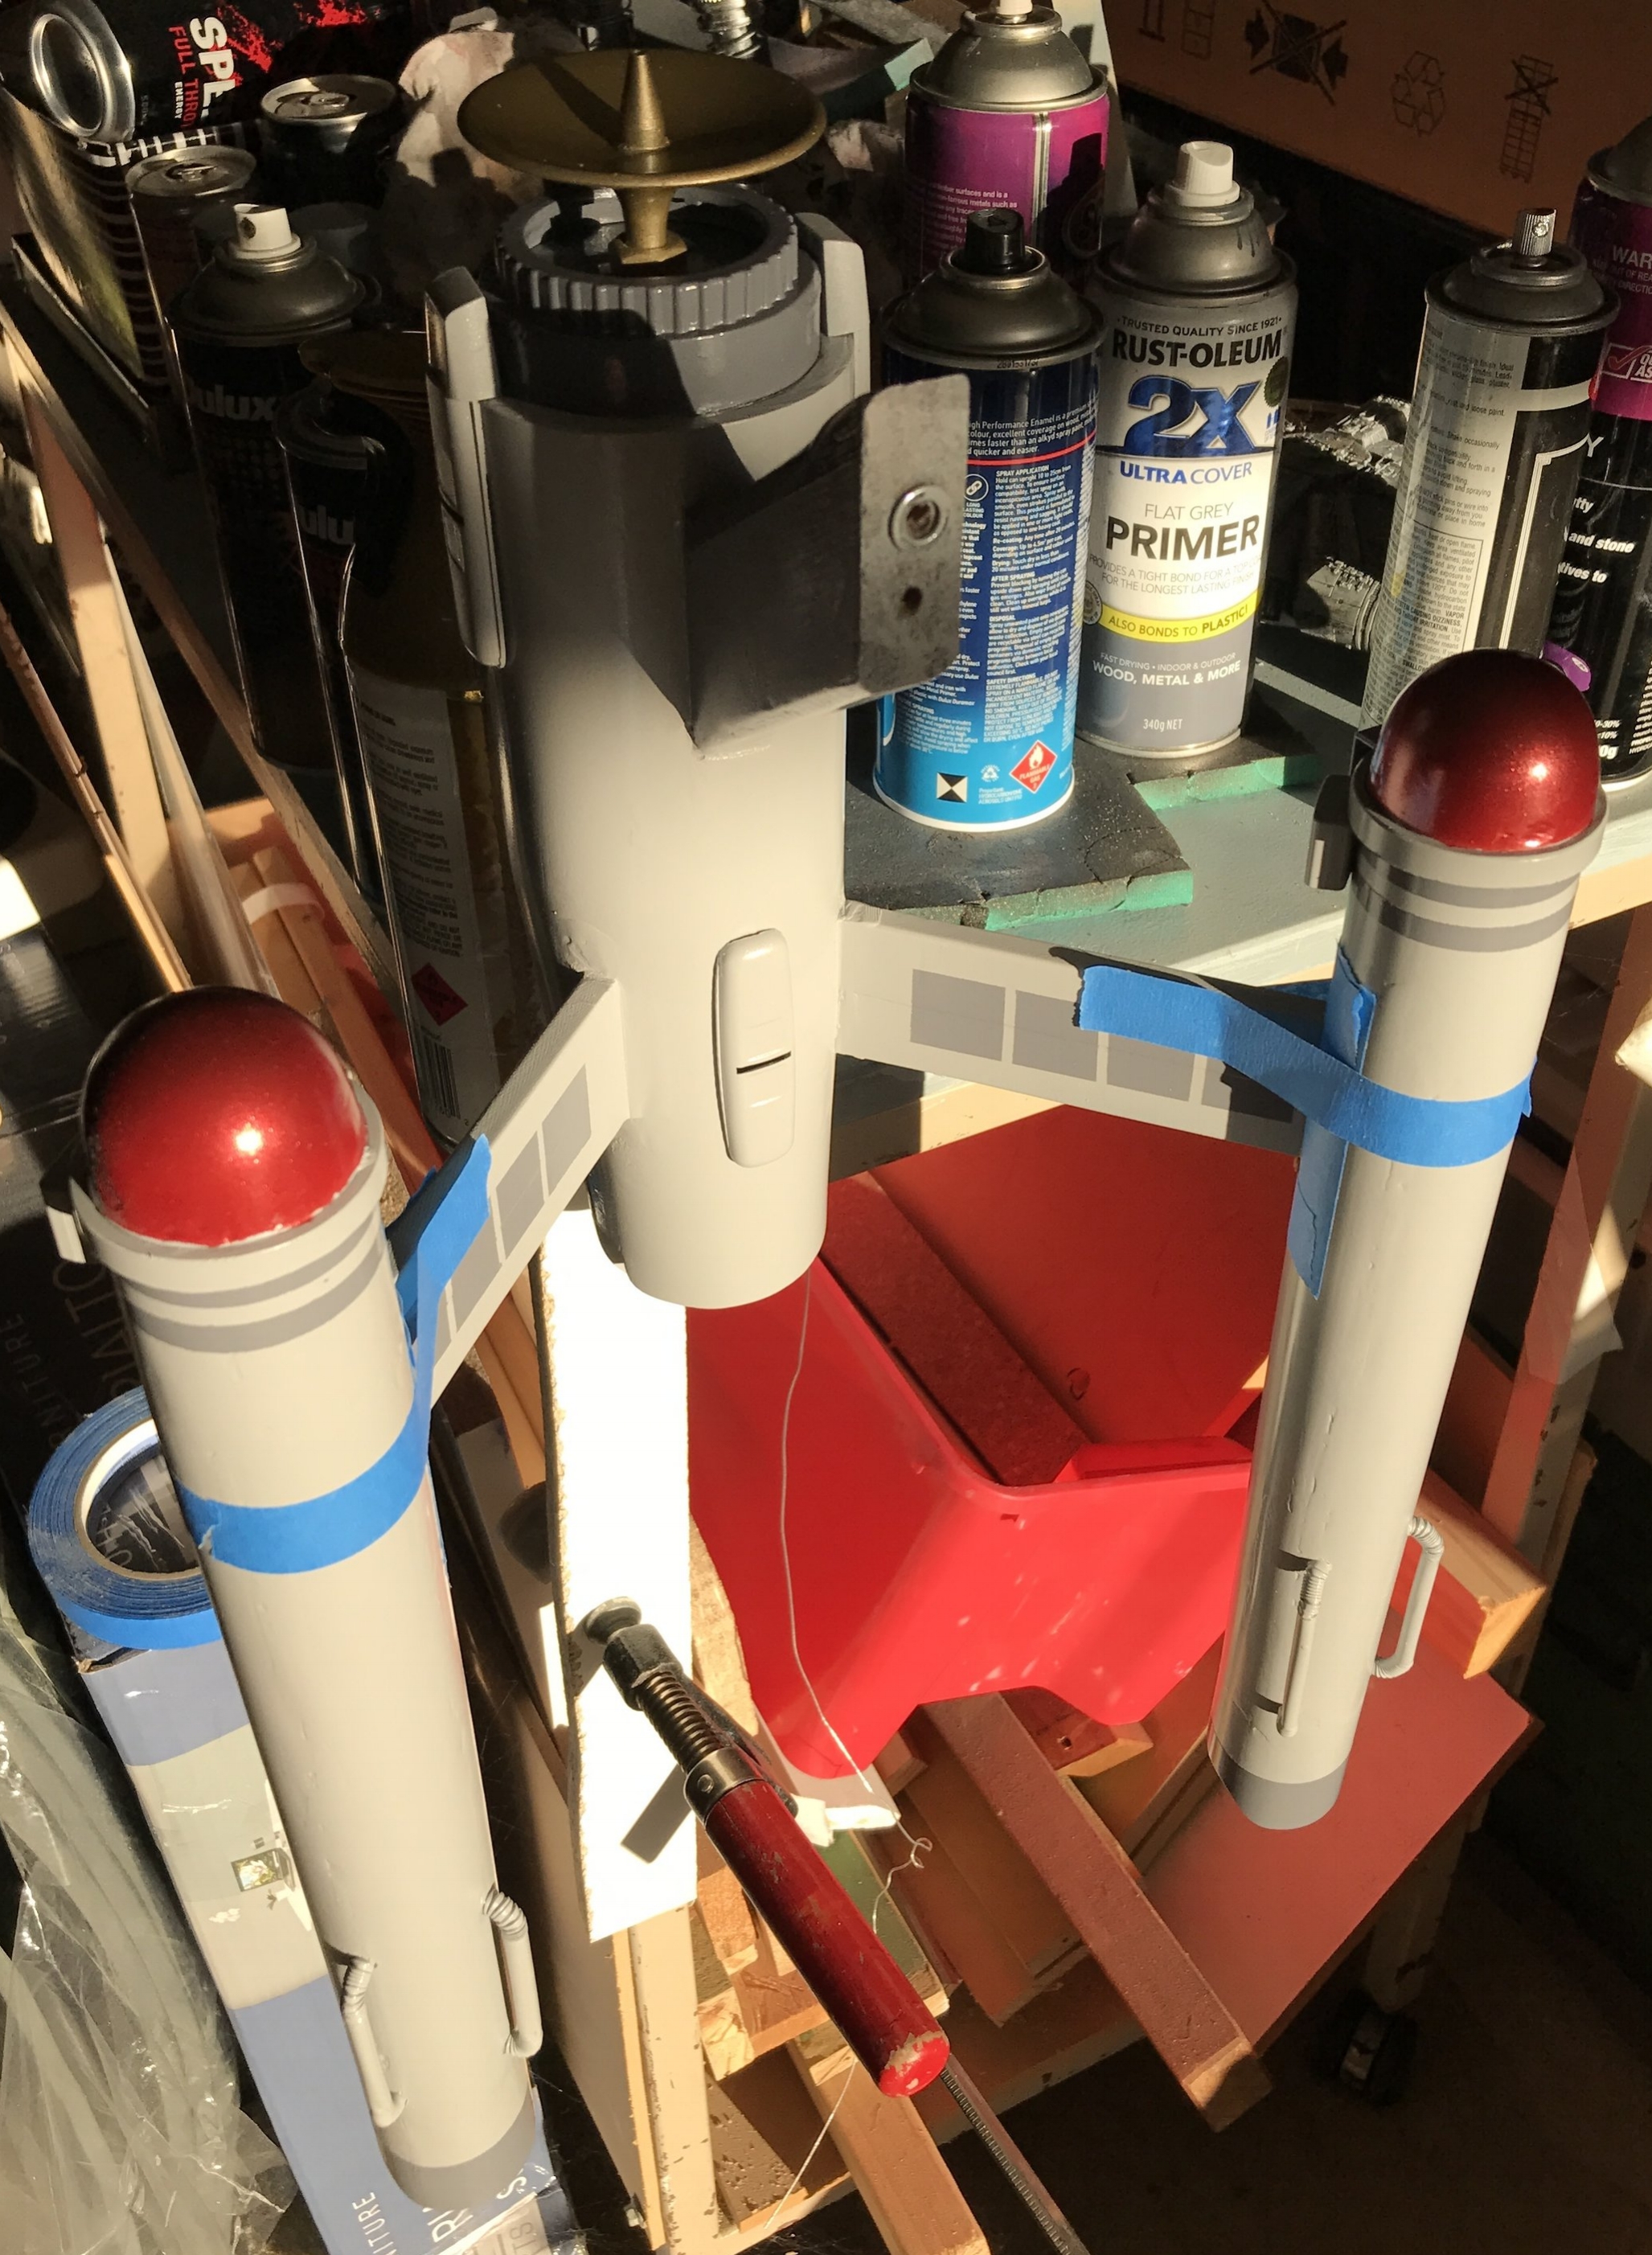
Here, we have a terrible photo of the Enterprise, and an excellent photo of the mess I work in. Don't judge me. I've mounted the ship vertically (using the mounting nut, which appears to be a success), so I can "hang" the nacelles in a fashion that puts minimal stress on the right-angle joint while the glue in the joint sets. I've loaded the little L-shaped mounting pieces on the ends of the nacelle struts with a copious amount of Liquid Nails, masked around the hole on the engines, then mounted them in place and taped them down as hard as possible. Looking at the ship from a distance seems to prove that the engines are level to each other. My biggest fear in this entire project is having all of the parts relatively level to each other, considering the Enterprise, as a design, is basically three things sticking out of another thing.
You can also see that I've added two dark grey stripes to the front end of the nacelles. Because I felt like they needed two dark grey stripes.
This might be the first relatively complete photo of the ship in it's "normal" orientation, even though it's still hanging vertically.
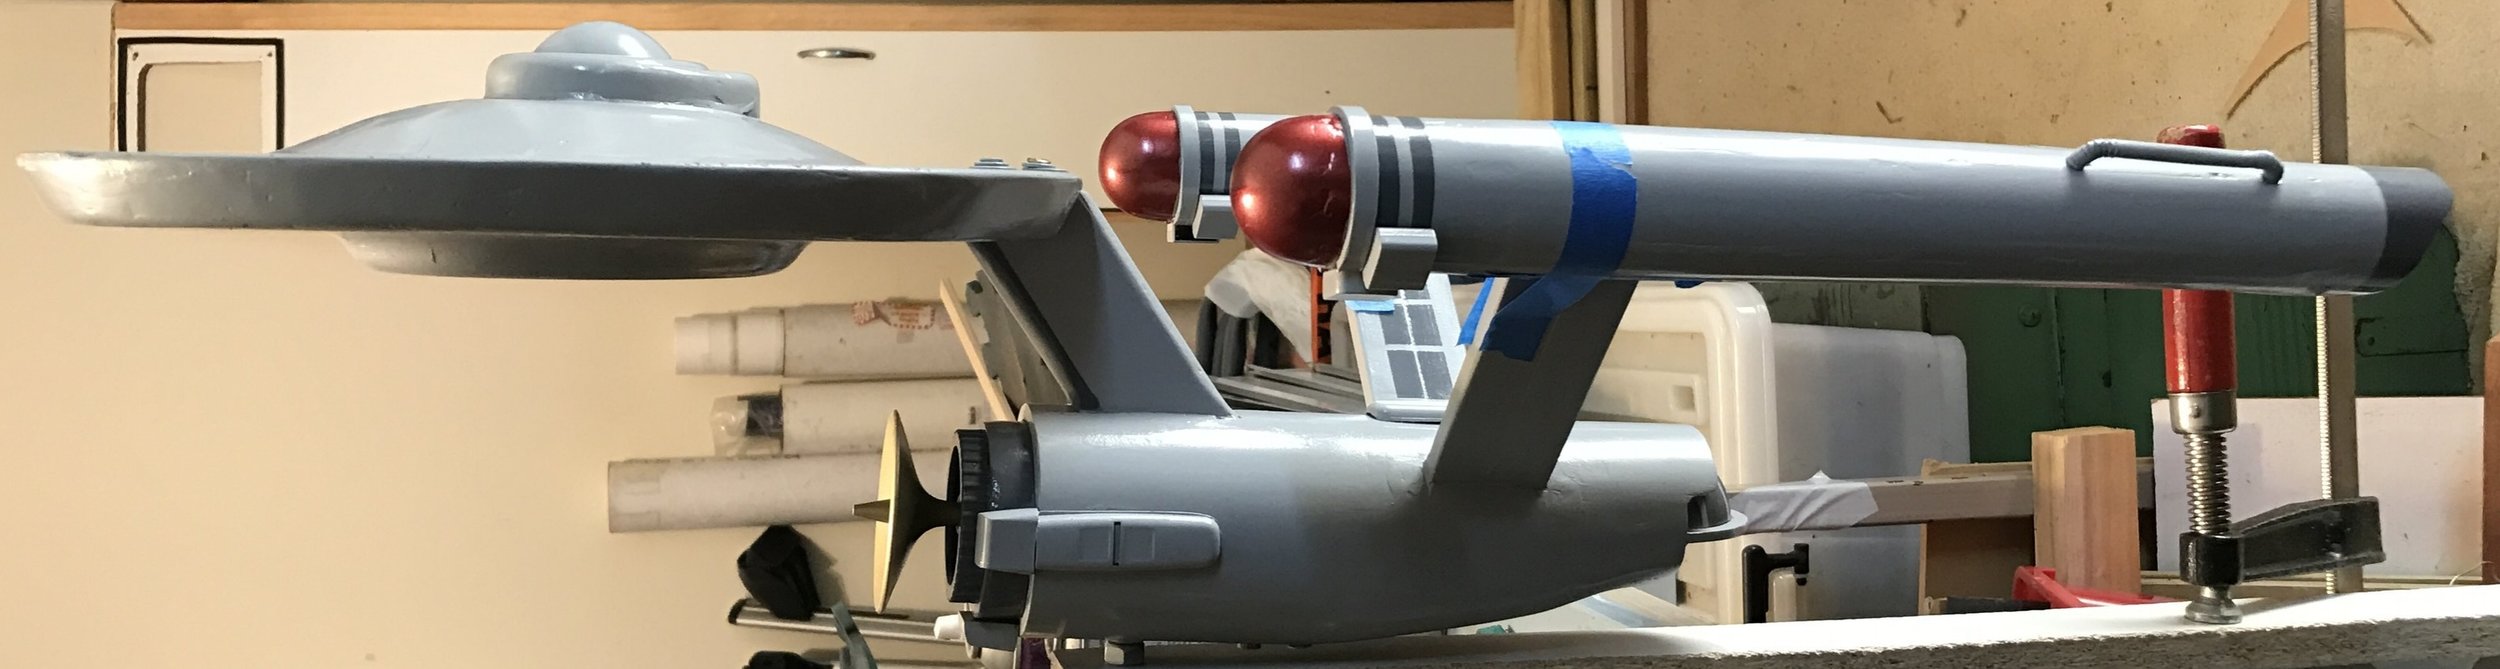
And side-on, demonstrating that -- against all odds -- everything seems to be relatively level. Awesome.

Human for scale. The ship is 70cm long. It's not small.
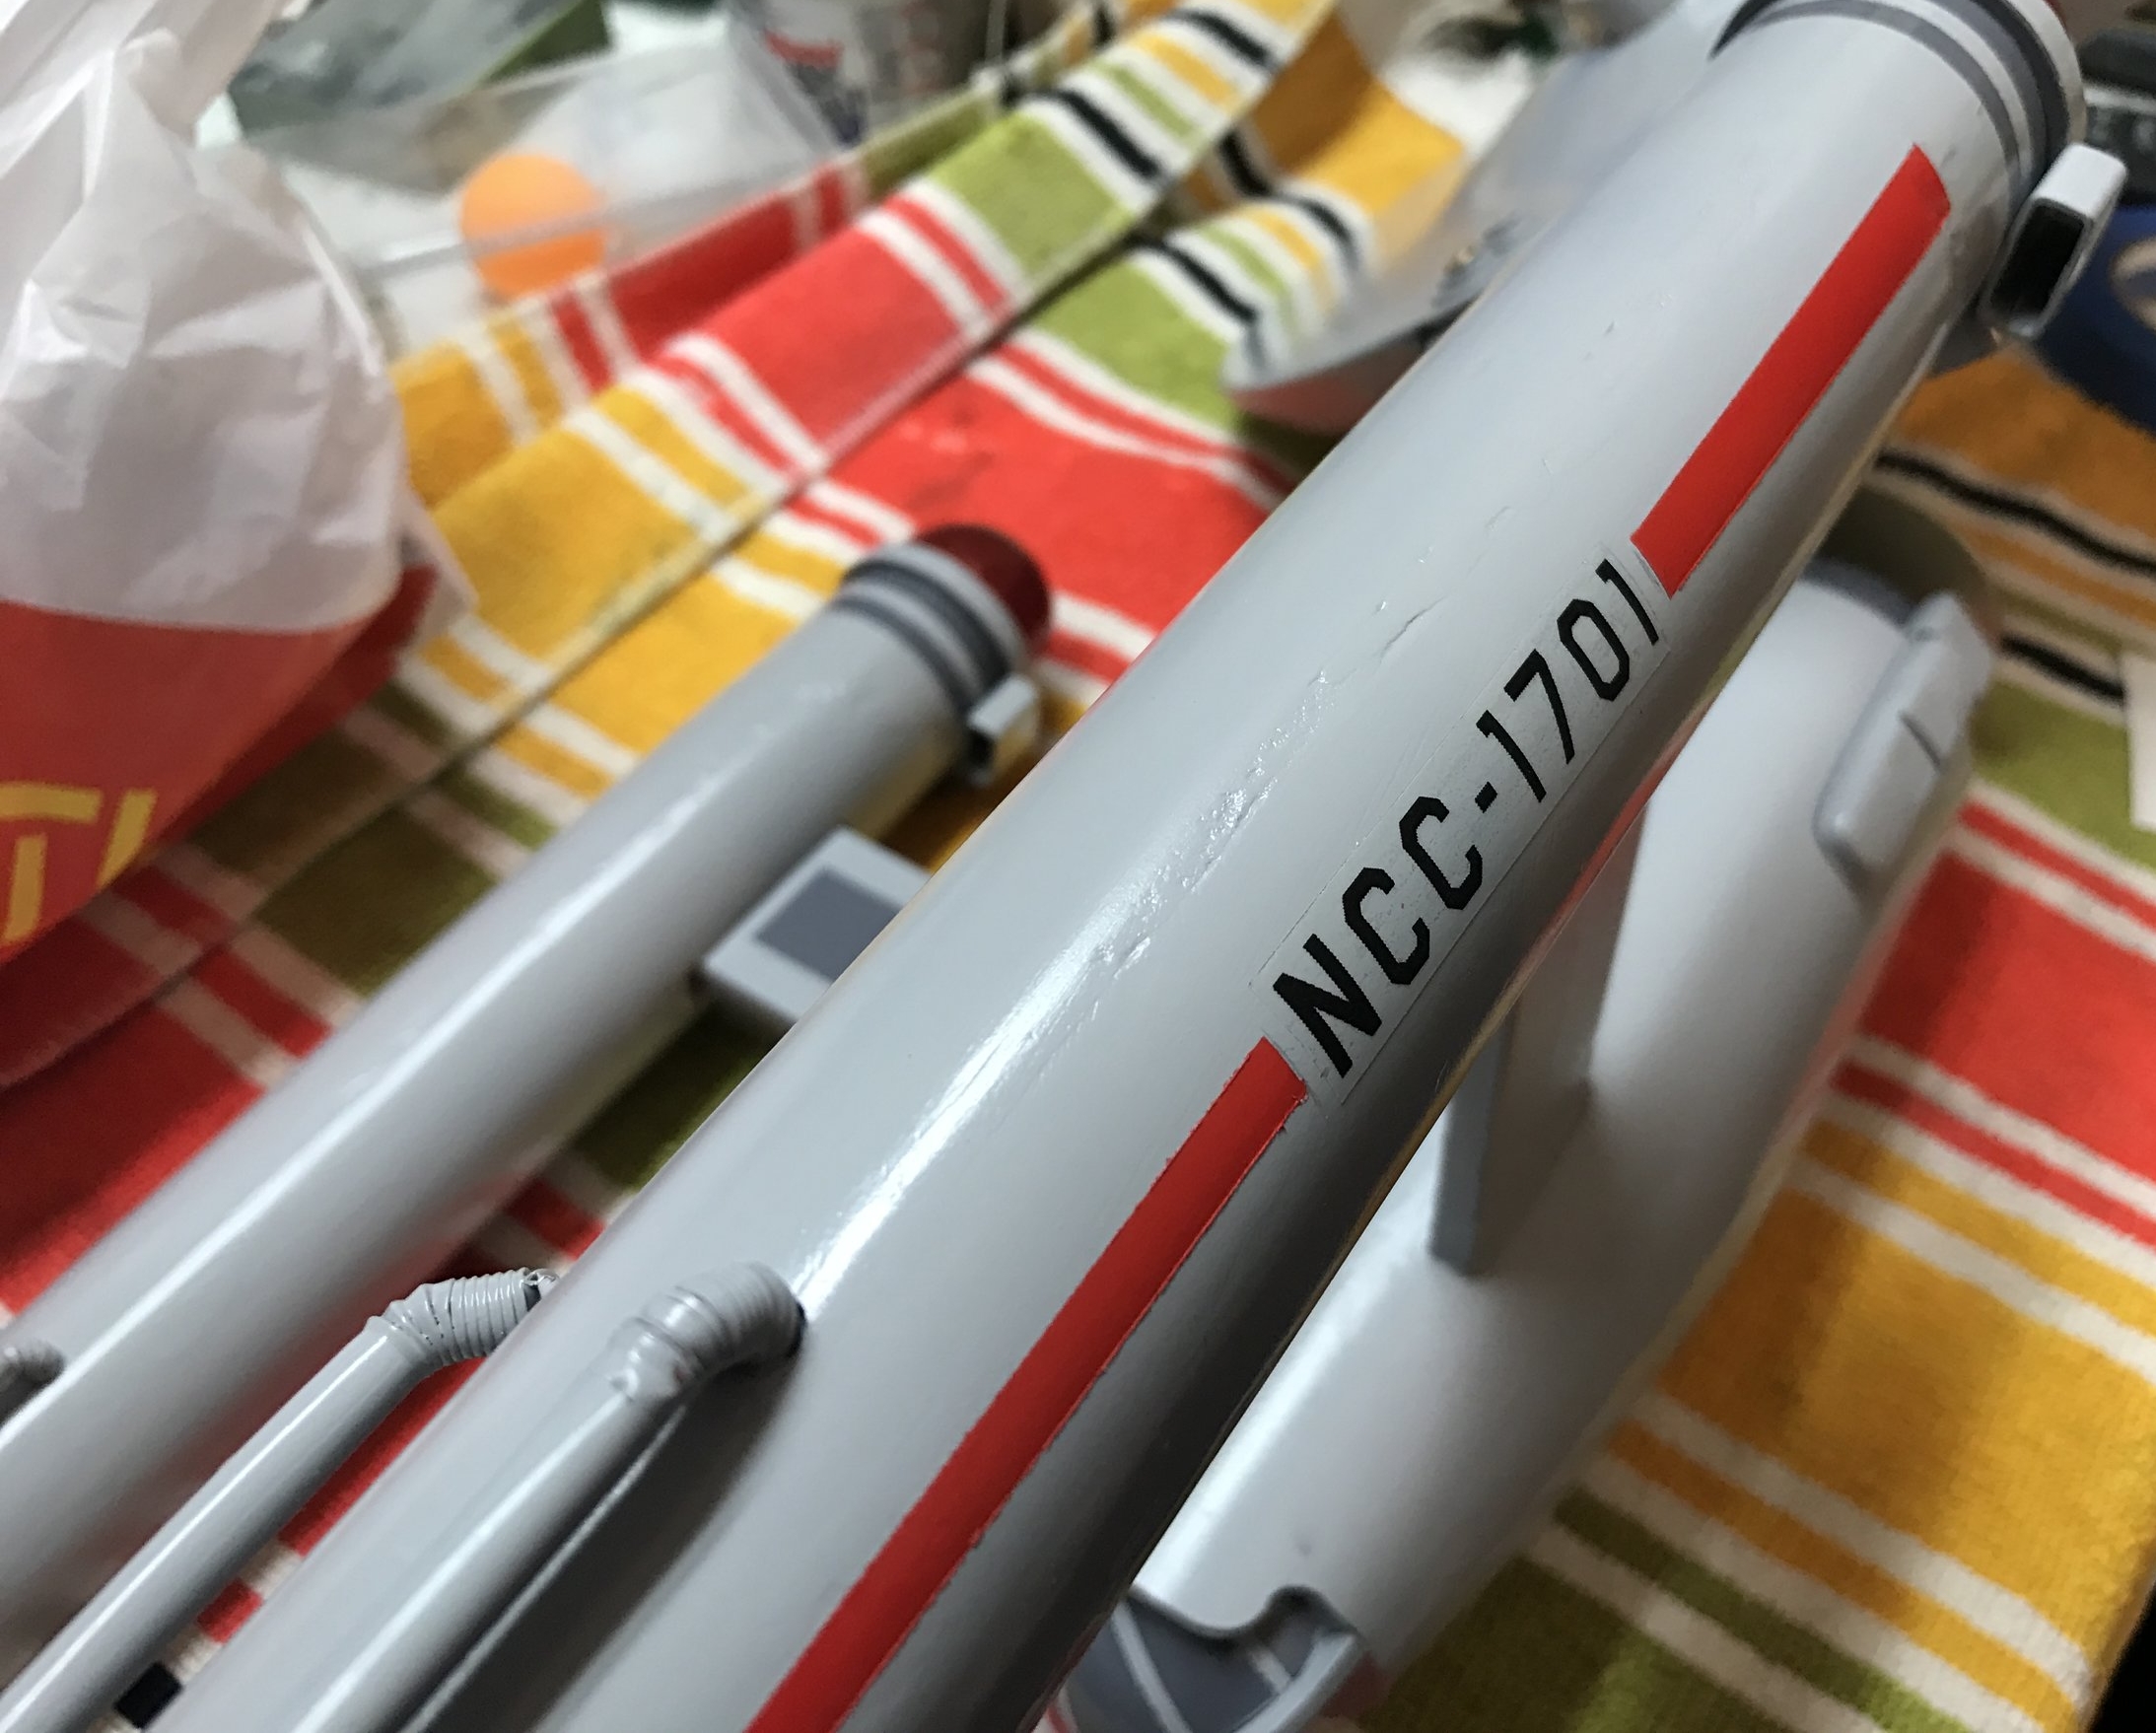
The red markings were masked out (using blue tape, of course), then sprayed with Dulux Duramax "hot lips red" paint. The registry numbers are laser-printed onto clear Avery printer labels, which -- at this point in time -- appears to have been an effective solution. I have a feeling the labels will yellow over time, but we'll see what happens. It's no big deal if I have to re-finish this thing at some point in the future.
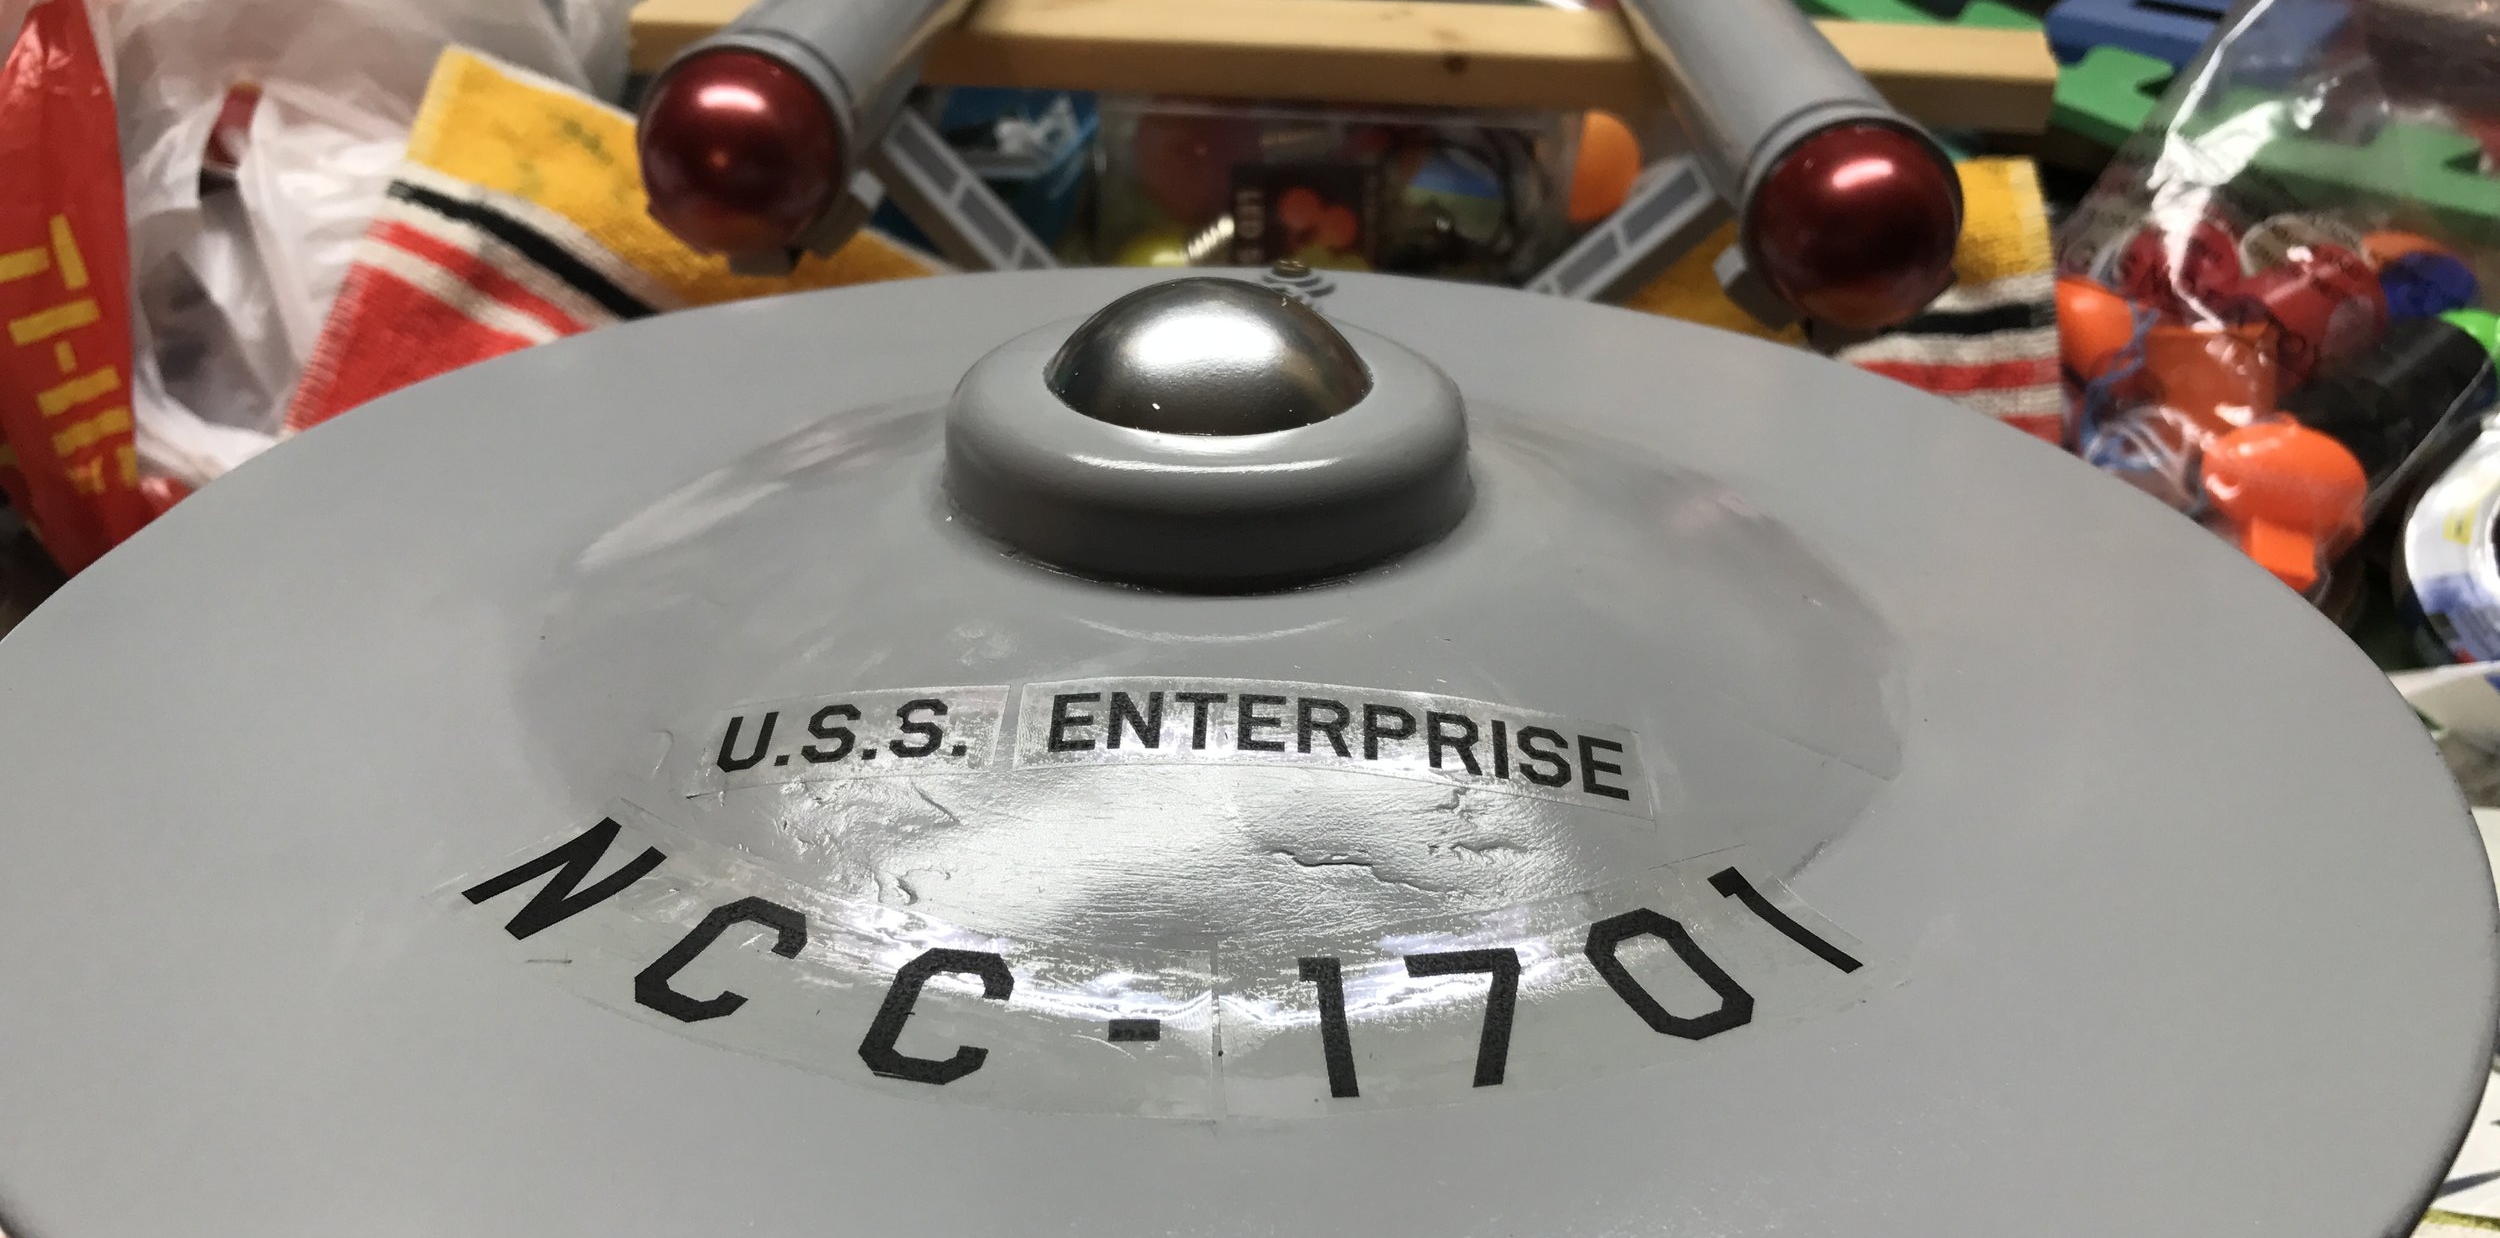
The bridge dome is now chrome silver, and we have hull markings. The stickers seem reasonably resilient to curved surfaces, but again, that's something that will be discovered over time.

And THAT is a finished starship. Final touches include an impulse engine (wildly inaccurate, but it's designed to cover screws, so...it'll do just fine, thank you), painted details on the saucer and running lights (pearlescent pin heads).

And one final photo, sausage dog for scale. The gold squares on the saucer should actually be white, but I had no white paint handy, and I didn't want to use chrome again. I'm happy with the gold. Gold is nice.
So there it is. It's huge, it's silly, it's the Enterprise. Is it accurate? Hell no. Do I care? Hell no. Will anyone look at it and think it's anything other than the U.S.S. Enterprise? I think not!
Take care, folks.
One to beam up.